Verifying the quality of the zero procedure, Verifying the quality of the zero procedure 95 – MTS SWIFT 30 Sensor User Manual
Page 95
Test Track Vehicle
SWIFT 30 Sensors
Installing the Transducer
95
Verifying the Quality of the Zero Procedure
Perform the following consistency checks for each SWIFT sensor while the
vehicle (or corner) is elevated.
1. Does Fz measure the approximate weight of the tire/rim assembly?
2. Is Fx small (less than 0.1% of the rated load)?
3. What is the variance in Fz (modulation) when the tire is slowly rotated?
4. When the vehicle is on the ground, is the Fz reading approximately equal to
the corner weight of the vehicle? (See
, “Effect of Zero Reference on SWIFT
5. Perform a Shunt calibration on each transducer.
A. Elevate the vehicle on a lift, or jack up each corner.
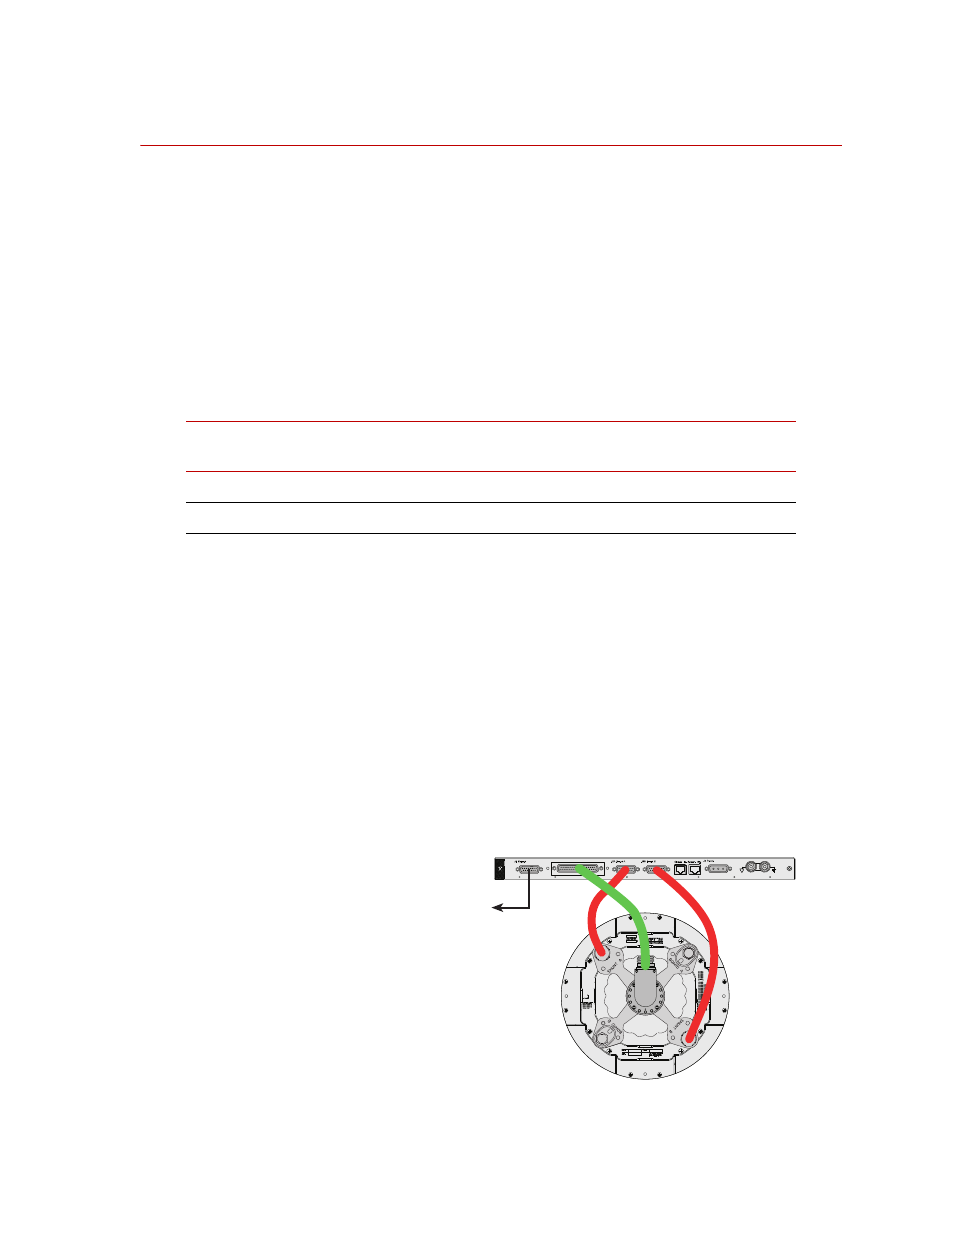
B. Connect the shunt calibration cables from the Shunt A, Shunt B
connectors on the front of the transducer to the Shunt A, Shunt B
connectors on the back of the TI box (see the next figure).
C. Connect the signal cable from the slip ring to the Slip Ring connector
on the back of the TI box.
D. Press the Shunt button on the front of the TI box, or use option 5 in the
TISHUNT program.
The shunt indicator will light continuously for 30–45 seconds. If the
indicator continues to flash after shunt calibration is complete, the
shunt calibration has failed.
Connect the shunt calibration cables
Acceptable Variations for Fx, Fz Readings
T
RANSDUCER
M
ODEL
M
AX
R
ATED
L
OAD
(F
X
, F
Z
)
F
X
R
EADING
WITH
V
EHICLE
L
IFTED
F
Z
M
ODULATION
WITH
V
EHICLE
L
IFTED
SWIFT 30 A (Aluminum)
28 kN
0.1% (±20–30 N)
0.2% (±40–60 N)
SWIFT 30T (Titanium)
50 kN
0.1% (±40–50 N)
0.2% (±60–100 N)
Connect to
Data Acquisition
System
Shunt A
Board A
Board A
Shunt B
S30-24