Mounting, Whistle – ElmoMC SimplIQ Digital Servo Drives-Whistle Installation Guide User Manual
Page 20
Whistle and Tweeter Installation Guide
Installation
MAN-WHTWIG (Ver. 1.604)
20
3.4. Mounting
3.4.1.
Whistle
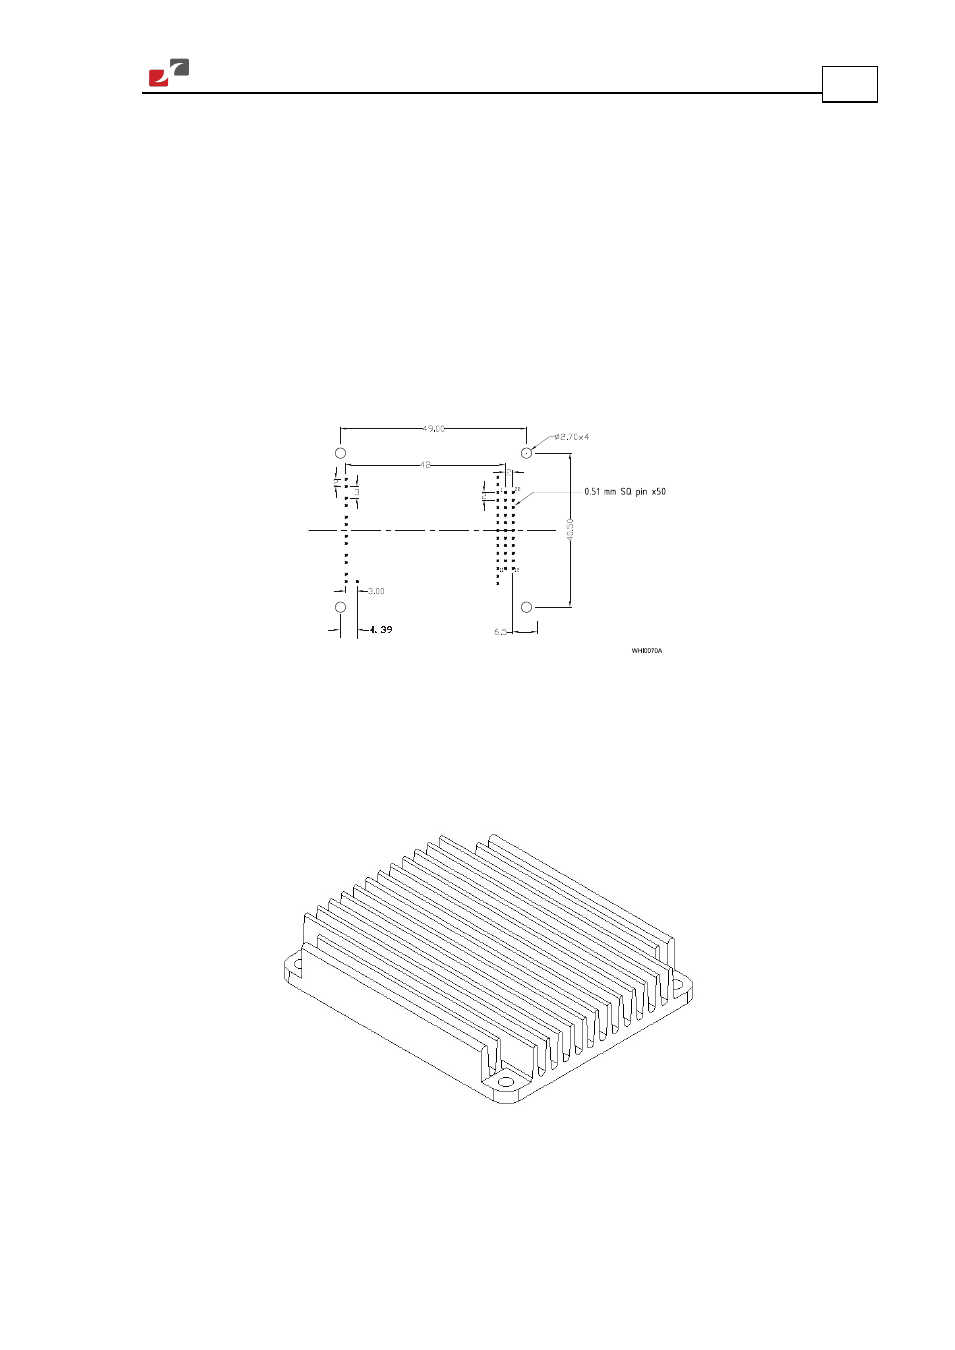
The Whistle was designed for mounting on a printed circuit board (PCB) via 2 mm pitch 0.51
mm square pins. When integrating the Whistle into a device, be sure to leave about 1 cm (0.4")
outward from the heat-sink to enable free air convection around the drive. We recommend
that the Whistle be soldered directly to the board. Alternatively, though this is not
recommended, the Whistle can be attached to socket connectors mounted on the PCB. If the
PCB is enclosed in a metal chassis, we recommend that the Whistle be screw-mounted to it as
well to help with heat dissipation. The Whistle has screw-mount holes on each corner of the
heat-sink for this purpose – see below.
Figure 3: The Whistle Footprint
When the Whistle is not connected to a metal chassis, the application’s thermal profile may
require a solution for heat dissipation due to insufficient air convection. In this case, we
recommend that you connect an external heat-sink. Elmo has an external heat-sink (Catalog
number: WHI-HEATSINK-2) that can be ordered for this purpose – see below.
Figure 4: Whistle External Heat-sink