Dakota Ultrasonics MVX User Manual
Page 74

70
CHAPTER EIGHT
THRU PAINT MEASUREMENT TECHNIQUE
8.1 Introduction to Thru Paint Measurement
The principle behind thru paint measurement is by measuring the time between two
backwall echoes returning from the test material. Since both of these backwall
echoes travel the same path through the paint or coating, the thickness of the coating
is subtracted out of the measurement so that only the actual material thickness can
be measured. This feature saves the user a great deal of time scraping and
removing the coating from tanks and pipes during the inspection process.
The primary purpose of thru paint measurement is to determine actual or overall
material thickness by eliminating the coating thickness. Thru paint mode cannot be
used for flaw or pit detection. Therefore, inspectors will use this echo -echo thru paint
mode in conjunction with a standard pulse-echo flaw detection mode. The
combination of using both modes is ideal for the advanced inspectors needs.
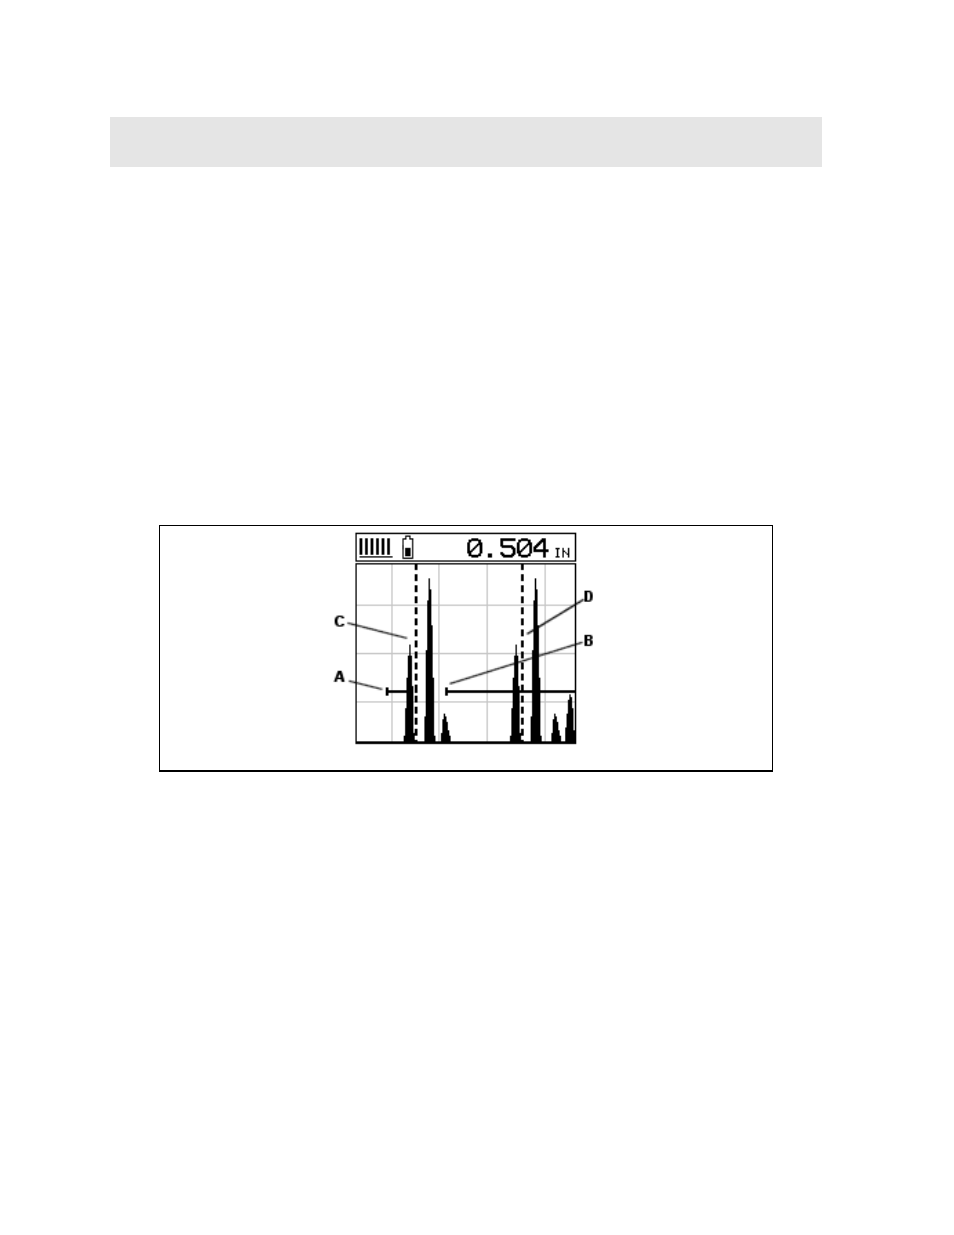
ECHO – ECHO MODE (THRU PAINT ) – TWO GATES
Refer to the diagram above. This is a typical example of an echo-echo mode setup
commonly used for a through paint or coatings application. Once again, the
definition of an echo -echo measurement, is a measurement taken between to return
echoes, rather than from the initial pulse to a single echo. Therefore, the
measurement is taken between the first and second echo reflections. Point (C)
represents the detection on the back wall of the first reflection. Notice that GATE1
has been has been set up so that the MVX can only see the first back wall reflection
(C), and cannot see anything before the first reflection. Remember that the MVX can
only see those signals inside the dimensions of the gate.
GATE2 (hold-off) has been set at point (B), so that the transducer ring down noise
following the first detection (C) can’t interfere with the second back wall reflection (D).
The distance from point (C), which is the end of the first gate (A), to the start of
GATE2 (B), is the hold-off time or delay. This type of setup allows the user to
eliminate the paint or coating, and measure only metal the thickness of the metal.
