Dakota Ultrasonics MVX User Manual
Page 55

MVX High Performance Thickness Gauge
instance, and passes over a pit in the process, the scan bar will quickly deflect
and alarm the user to go back and search for the defect.
J) Contour (blind surface) – A view of the B-Scan displaying the blind side surface
contour of the material.
DIGITS VIEW
DIGITS
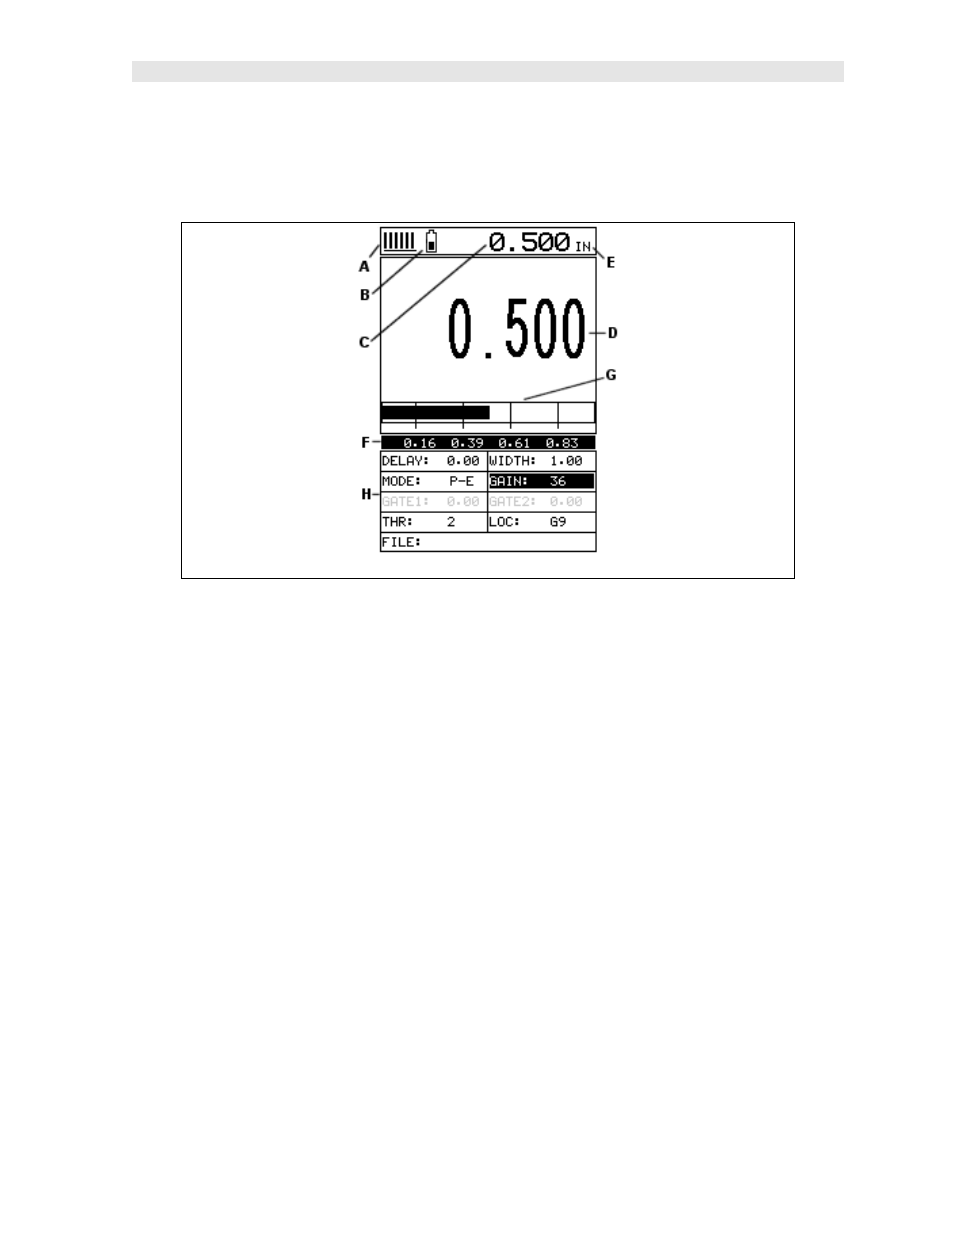
The Digits view is a basic digital thickness gauge look and feel. The larger digits
make it much easier for the operator to monitor the thickness readings. The Scan
Bar has also been added to the Digits view to provide the user with yet another visual
tool for easily monitoring changes in thickness readings due to internal flaws or
defects.
The following is a list of the viewable features on the display:
A) Stability of Reading Indicator – Indicates the stability of the return echo on a
scale of 1 to 6 – the solid bars displayed in the figure above indicate a repeatable
signal. If the MVX is displaying a reading from memory, the repeatability i ndicator
will be replaced by the text “MEM”.
B) Battery life indicator – Fully charged batteries will appear filled in solid. Note:
The diagram shows the batteries at approximately 50%.
C) Thickness reading – Digital readout of thickness (inches or millimeters).
D) Large Digits – Large readout of thickness (inches or millimeters).
E) Units Label – Display’s the current unit of measurement (inches or millimeters).
F) Measurement Labels – The measurement labels are calculated and displayed
based on where the left side of the display has been set (Delay), and the overall
viewable area (Width) of the display. Note: The gray hash marks break the
