2 boot gasket fender assembly installation – CiDRA SONARtrac HD VF-100 User Manual
Page 35
Copyright © 2006 CiDRA Corporation
Page 7-18
20638-02 Rev 01
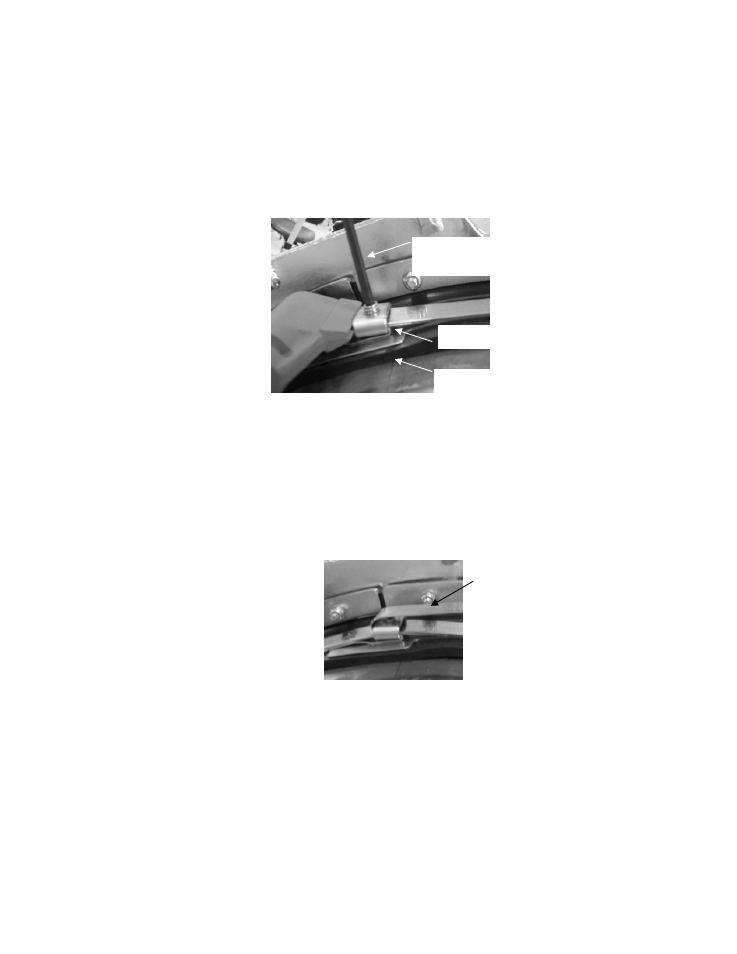
Tension the band until the resistance on the tool handle is constant
(i.e. the band does not slide easily through the buckle). The boot
gasket should be tight against the process pipe under the gasket
protector plate. Verify the band buckle and splice protector plates are
still in place.
Tighten the setscrew to lock the band in place. The setscrew will
dimple the band.
Figure 25
Final Alignment and Securing of Gasket Band
Once the setscrew has been fully tightened, loosen the tensioning tool
and bend the tool and band up and over the buckle. It is not
necessary to cut excess band material (allows for re-tightening of
band if necessary).
Repeat the band installation procedure for the opposite end of the
cover.
Figure 26
Band Termination
7.6.2.2
Boot Gasket Fender Assembly Installation
The stainless cover uses four boot gasket fender assemblies (two per
end) to protect the boot gaskets. The fender should be installed such
that the retaining clasp is next to the cover handles. The completed
cover assembly is shown in Figure 19.
Boot gasket tight against pipe
Buckle over protector plate
Allen wrench tightening
set screw on buckle
Band bent back
over buckle