Transitioning from copper, Planning manifold locations – Sioux Chief PEX F2159 User Manual
Page 3
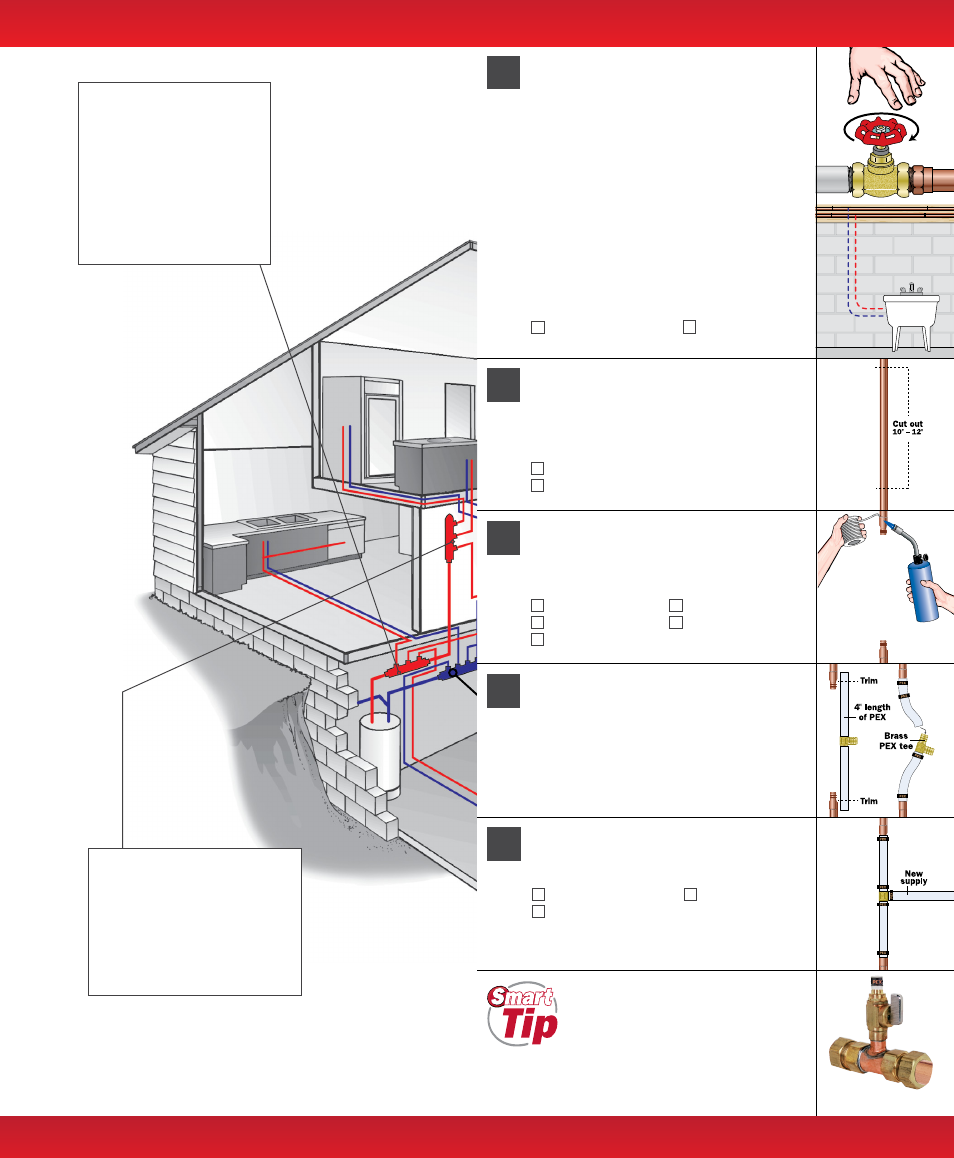
Cut out roughly 10″ to 12″ of copper
piping. Let excess water drain from
the system and deburr cut ends
of copper tube.
YOU’LL NEED
Copper cutting tool
Tape measure
Turn off water service to the entire
house. If you have a valve installed that
will turn off water to the affected area
only — turn off this valve instead. Drain
water from the system by opening both
the hot and cold sides of the lowest
faucet in the house.
Locate the nearest existing accessible
water line to the new fixture (toilet,
tub/shower, sink, etc.) and plan the
most direct route from that line to the
fixture (read ‘Running PEX Tube’
for tips/precautions).
YOU’LL NEED
Tape
measure
Ladder
Transitioning from Copper
Go torchless and reduce job
time to ten minutes using the
Add-A-Line. Only compress
Add-A-line to copper tube.
Planning Manifold Locations
A ‘Home Run’ installation
method uses manifolds in
one spot only (usually near
the water heater), and gives
a dedicated branch line to
each fixture in the house.
This layout best minimizes
pressure fluctuations,
which can cause scalding
and cold shocks.
A ‘Semi Home Run’ installation
uses Primary manifolds (usu-
ally near the water heater) and
secondary manifolds. To use
a Branchmaster manifold as
a secondary manifold, simply
plug one end with PEX pipe and
a PEX plug.
Clean and prepare two Sweat × PEX
adapter fittings and solder to the two
ends of the cut tube.
YOU’LL NEED
Solder
Soldering
torch
Sand cloth Flux
Flame retardant rags
Position the PEX tee and two equal
lengths of PEX tube between the Sweat
×
PEX fittings. Trim off excess tube and
crimp in the PEX assembly per the
‘Making Crimp Connections’ sheet.
(see page 11)
Crimp in the new supply line to
the fixture.
YOU’LL NEED
Crimp
tool Crimp
rings
Test gauge
10
3
Planning Manifold Locations
Transitioning from Copper
2
10 PEX Installation Tips
www.siouxchief.com 3
STEP
1
STEP
2
STEP
3
STEP
4
STEP
5