Table 6: summary of basic rc-ir2 setups, Table 7: summary of basic rc-ir2 operations – Kramer Electronics VS-1616A User Manual
Page 53
Viewing the MENU Commands Sequence
49
49
Infrared Remote Control Device
. Refer to the RC-IR2 Infrared Remote
Control Device user manual
, for full details.
summarize the setup and operational commands.
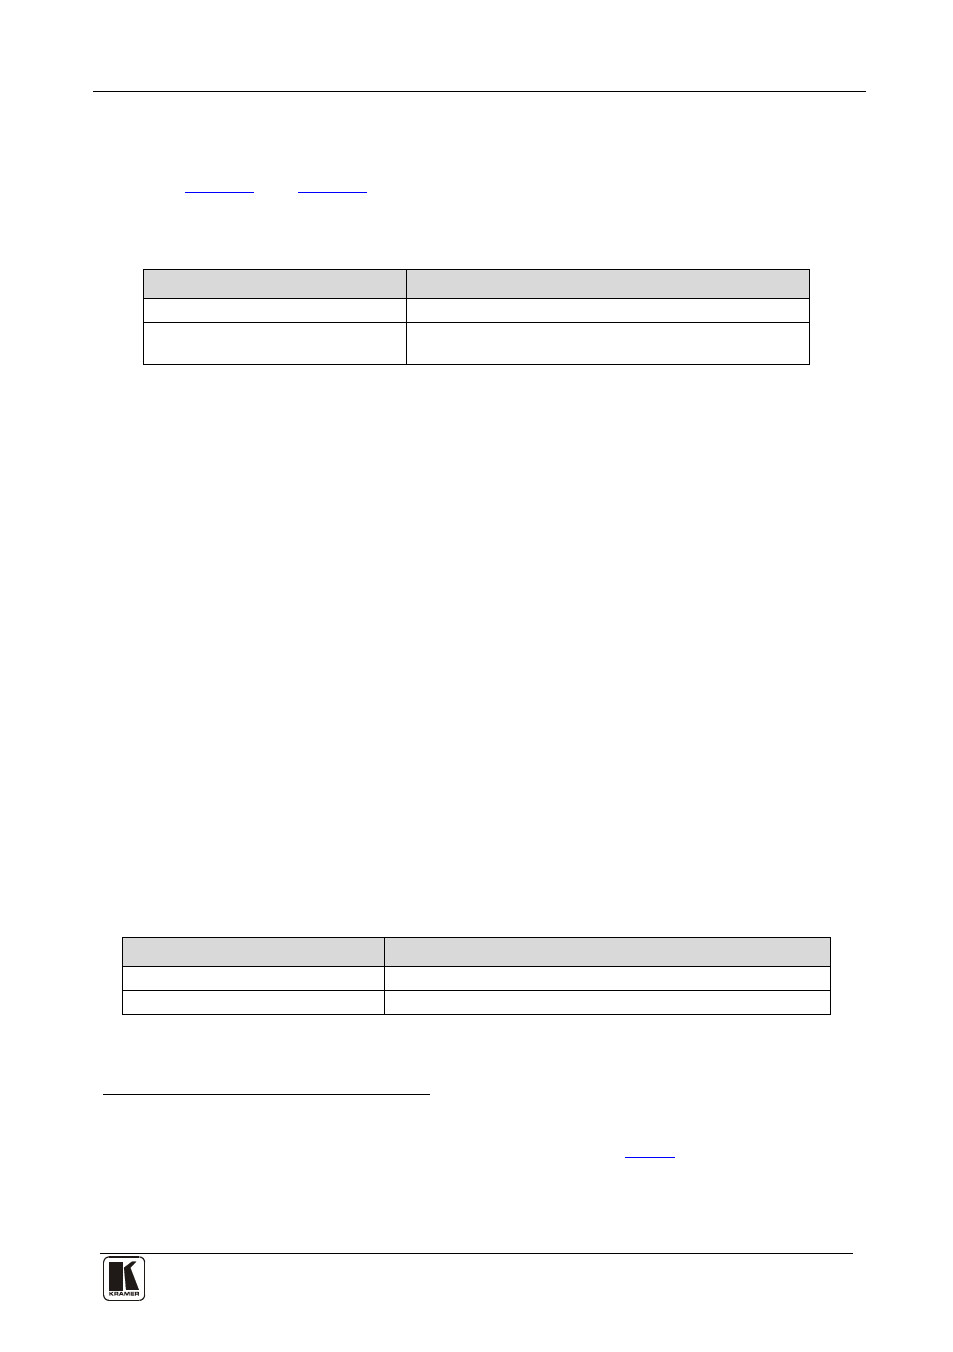
Table 6: Summary of Basic RC-IR2 Setups
To execute this command:
Press the following keys in this sequence:
Allocate the VS-1616A to Group 12 SHIFT + GROUP + 12
Set the MACHINE #
UNIT + # key
To enable IR REMOTE control (when set OFF), do the following:
(according to the VS-1616A DIP-switch
settings)
1. Press the MENU button until reaching the IR REMOTE setting.
The MATRIX Display shows the message:
IR REMOTE setting
yes -> TAKE, next -> MENU
2. Press the TAKE button.
The Displays show the messages:
Outkey 1: InfraredREMOTE OFF
2: InfraredREMOTE ON
current:
remote OFF
3. Press the OUT button 2.
The TAKE LED blinks and the Displays show the messages:
Turn ON infrared REMOTE ?
Press TAKE to execute
Current:
remote OFF
4. Press the TAKE button again.
The Displays show the messages:
Infrared REMOTE mode
changed
Current:
remote ON
Table 7: Summary of Basic RC-IR2 Operations
To execute this command:
Press the following keys in this sequence:
Switch an Input to an Output
# key (for the output) + # key (for the input)
Store/Recall a setup
SHIFT + STO/RCL + # key (for the setup)
1 After enabling the IR REMOTE control command, remotely control the VS-1616A via the RC-IR2 remote control
transmitter pointed at the remote receiver on the front panel of the VS-1616A (item 1 in
2 You can download it from the Internet www.kramerelectronics.com
3 For example, press UNIT + # 1 if the VS-1616A is set as MACHINE # 1
4 For example, press # 6 followed by # 2 to switch input 2 to output 6