Panasonic HX-A500H User Manual
Page 25
- 25 -
3
Hook the Head Mount to your ears
firmly so that the camera unit will be
positioned on the left side of your
face.
4
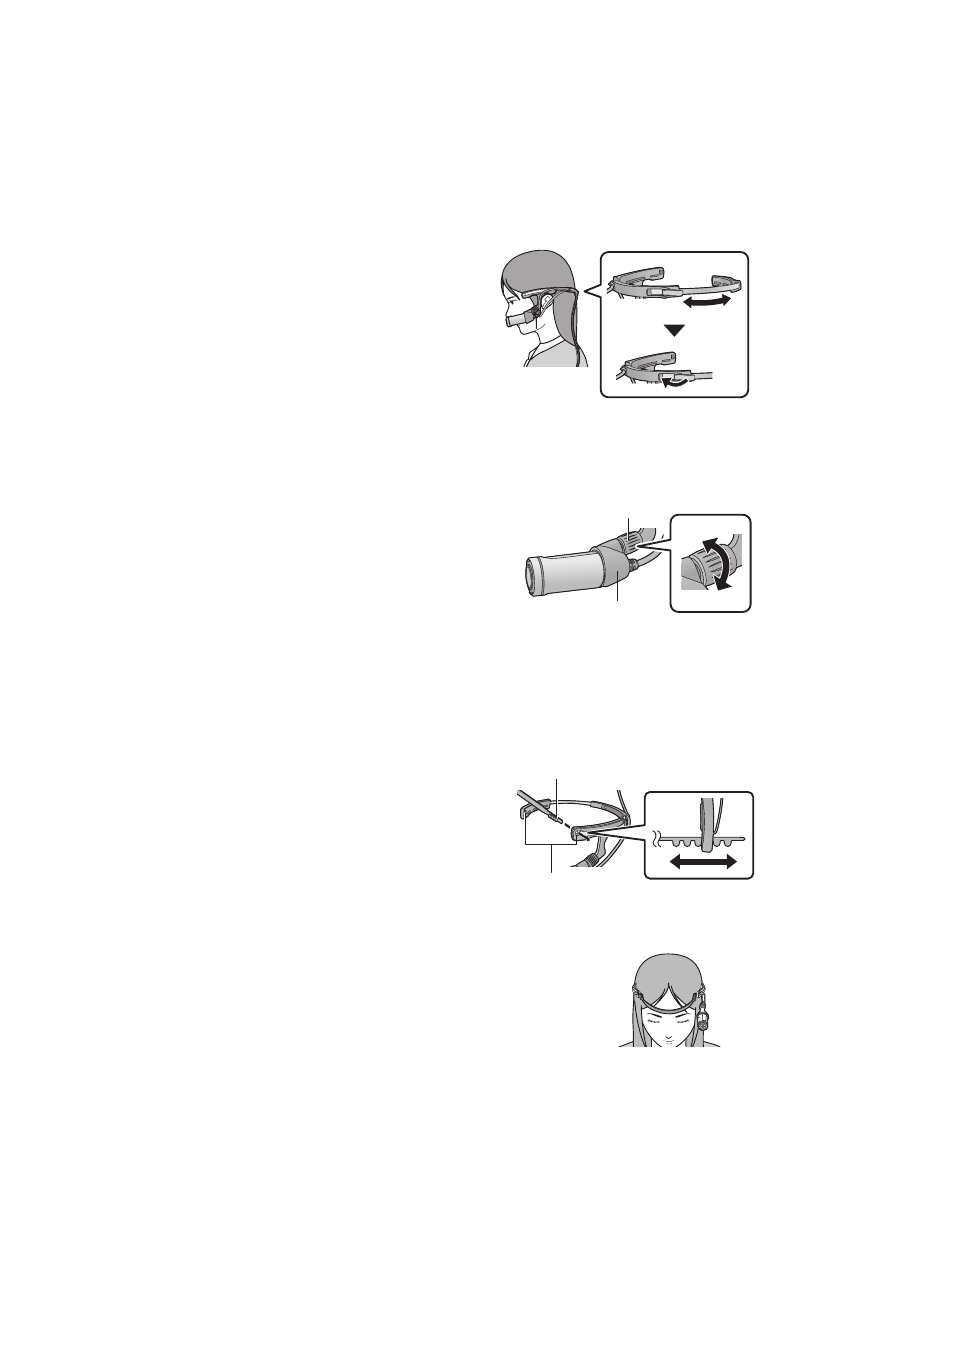
Adjust the size of the Head Mount,
and push down the lock lever to the
LOCK side.
≥ Adjust by slowly pulling the Head Mount (R)
sideways.
≥ If you adjust in such a way that the camera unit comes into close contact with the cheek, you can
record less blurry images.
5
Hold the camera holder, and adjust
the direction of the lens.
≥ To loosen the adjustment knob, rotate it
towards
1. To tighten the adjustment knob,
rotate it towards
2.
≥ If the direction of the lens cannot be changed,
loosen the adjustment knob slightly and tighten
it after adjusting the direction of the lens.
≥ If the camera unit is shaky, tighten the
adjustment knob.
∫ Attaching the Headband
When recording images full of motion such as sports, attach the Headband before putting on the
Head Mount.
1
Pass the Headband through the
Headband holes.
≥ Attach the Headband correctly so that it will not be
twisted.
≥ You can adjust the size of the Headband by fitting
the Head Mount into a different notch.
2
Put on the Head Mount.
≥ To change the size of the Headband, remove the Head Mount
before making the adjustment.
D
Adjustment knob
E
Camera holder
A
Notches
B
Headband holes