2 configuring the irga, Configuring the irga, 5. components and fittings of irga installation – Campbell Scientific AP200 CO2/H2O Atmospheric Profile System User Manual
Page 63
AP200 CO
2
/H
2
O Atmospheric Profile System
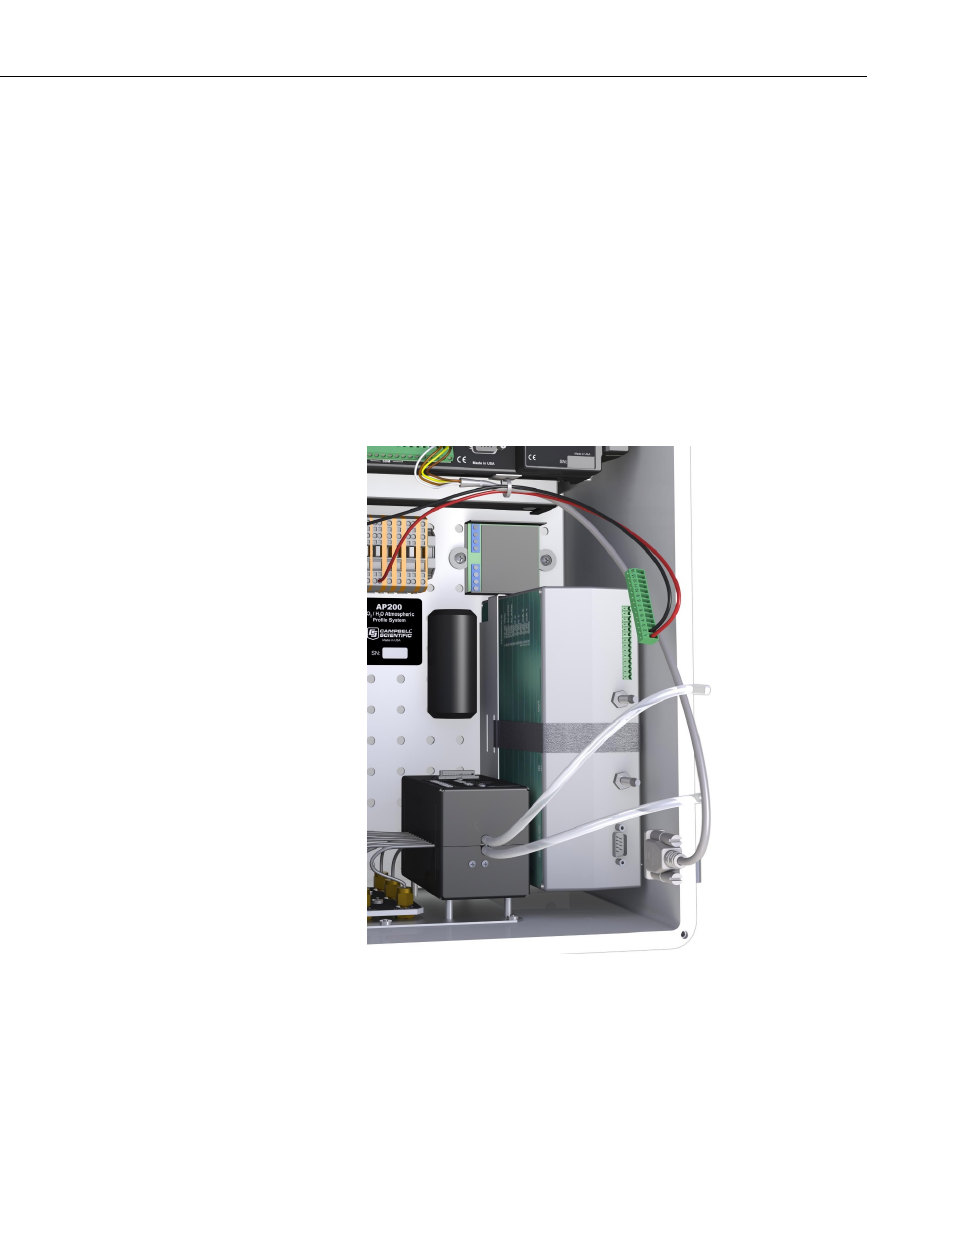
To remove the IRGA from the AP200:
1. Disconnect power from the AP200.
2. Disconnect the power connector from the IRGA. Leave the wires
connected to the terminal block and pull the terminal block out of the
IRGA. If the IRGA is to be powered outside the AP200, use the spare
terminal block supplied with the IRGA.
3. Disconnect the serial cable from the IRGA.
4. Disconnect the inlet and outlet tubes from the IRGA. Hold the tube to
prevent it from rotating while loosening the knurled nut. Pull the tube off
the fitting.
5. To keep the AP200 and the IRGA clean, connect the “
IN” tube to the
“
OUT” tube using the union fitting in the storage pocket in the door of the
AP200 system enclosure. Plug the IRGA fittings with the green, vinyl
caps.
6. Undo the Velcro strap and remove the IRGA from the mounting bracket.
FIGURE 7-5. Components and fittings of IRGA installation
7.4.2 Configuring the IRGA
The IRGA is automatically configured by the AP200 program. This
configuration is sent to the IRGA when the program compiles or if the IRGA
fails to respond for five consecutive samples. Messages are written to the
51