4 li-840a (irga), 1 installing and removing the irga, Li-840a (irga) – Campbell Scientific AP200 CO2/H2O Atmospheric Profile System User Manual
Page 62: Installing and removing the irga, 4. installed irga in system enclosure
AP200 CO
2
/H
2
O Atmospheric Profile System
7.4 LI-840A (IRGA)
Consult the LI-COR
®
LI-840A manual (a
for details on
maintaining the IRGA. The following section gives details on
installation/removal and configuration of the IRGA as it relates to its
installation in the AP200.
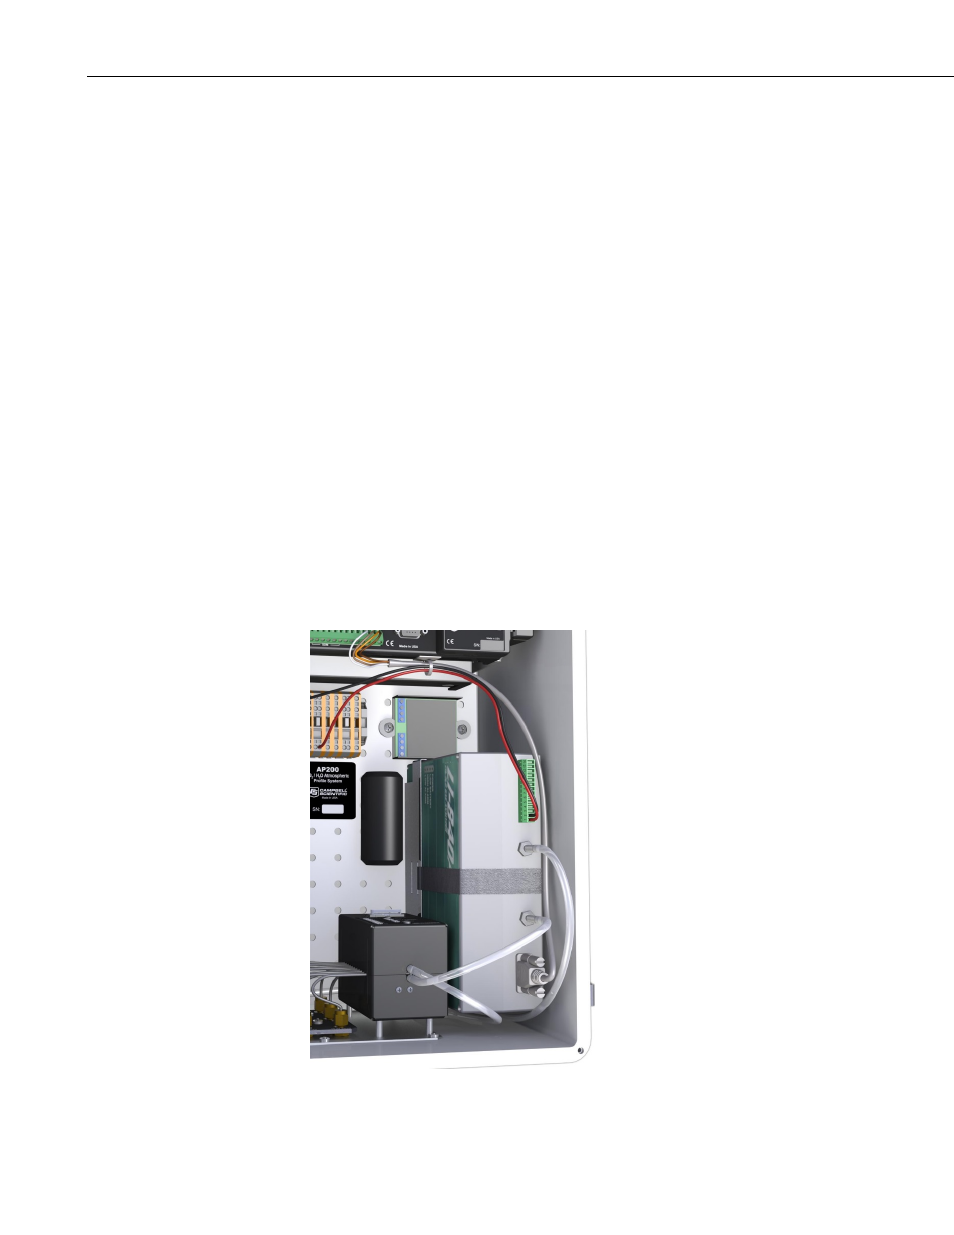
7.4.1 Installing and Removing the IRGA
The IRGA is easily installed or removed from the AP200 system. The installed
IRGA is shown in FIGURE 7-4.
To install the IRGA in the AP200:
1. Disconnect power from the AP200.
2. Insert the IRGA into its mounting bracket and secure it with the Velcro
strap.
3. Remove the union fitting that connects the “
IN” tube to the “OUT” tube.
Remove the green, vinyl caps from the IRGA fittings, slide the caps onto
the union, and store the union in the storage pocket in the door of the
AP200 system enclosure. Connect the inlet and outlet tubes to the IRGA
(connect “
IN” to “IN” and “OUT” to “OUT”). Push the tube fully onto
the fitting and tighten the knurled nut by hand. Hold the tube to prevent it
from rotating while tightening the nut.
4. Connect the serial cable.
5. Connect the power connector.
FIGURE 7-4. Installed IRGA in system enclosure
50