HP OmniBook 5000 Notebook PC User Manual
Page 30
29
To view or change the printer’s settings or port, use the printer’s property sheet (File
menu Properties command).
For infrared printing, if Infrared Monitor is running, it provides visual status and helps you
resolve communications problems. To start Infrared Monitor, in Control Panel double-
click Infrared.
1. In Program Manager, double-click the OmniBook Tools icon (in the Main group).
2. Click Connections, then click Printers.
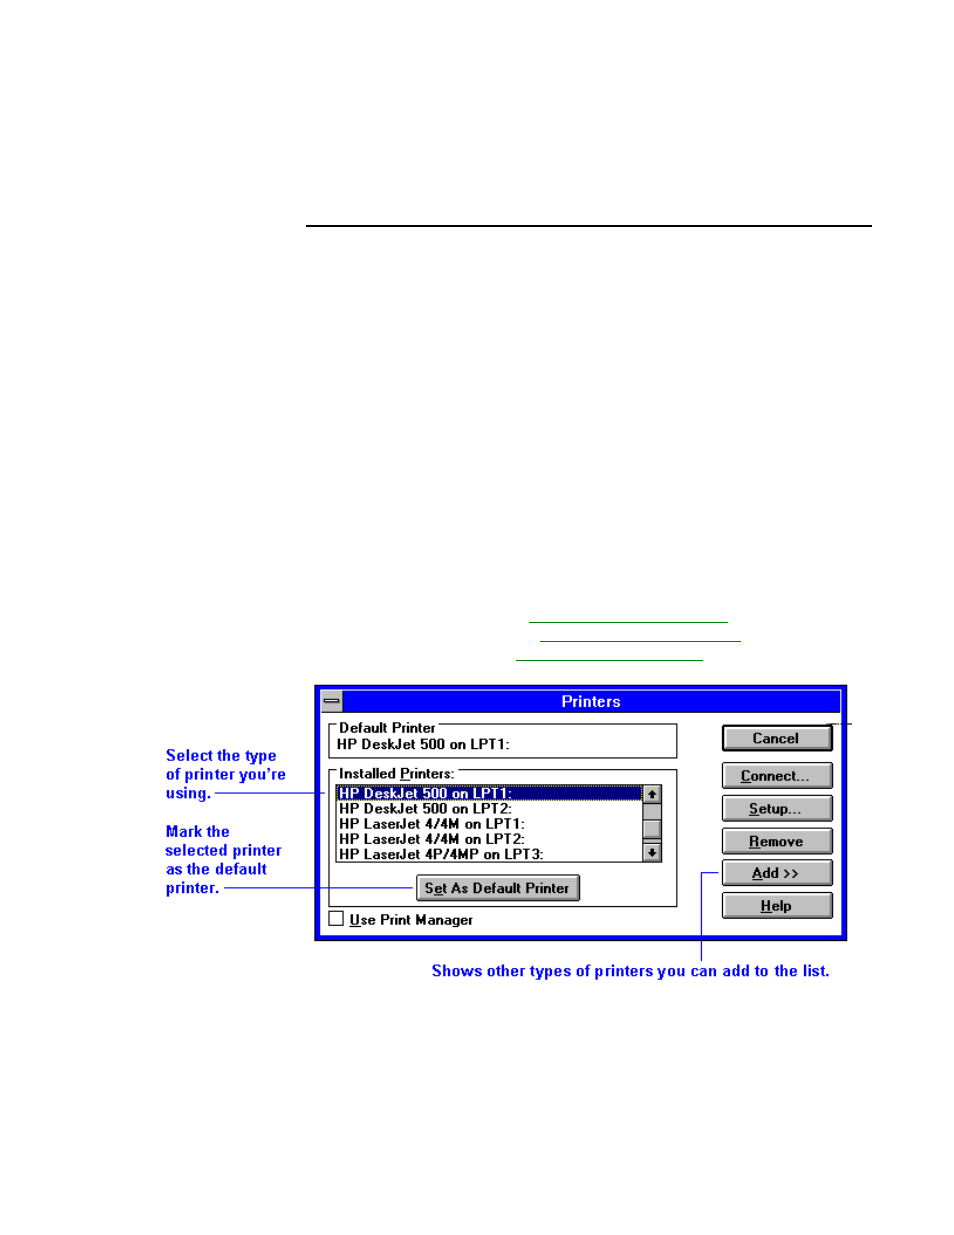
3. Check the list of Installed Printers for the type of printer you’re using.
If your printer type isn’t listed, choose Add and install the proper type. If you’re
prompted to insert a disk, you can type
c:\windows\options
. Or, if a floppy
disk comes with your printer, you can insert it in the floppy drive.
4. In the list of Installed Printers, select the type of printer you’re using.
5. Check the port that’s listed next to the printer—such as LPT1.
If the port is wrong, choose Connect, then select the correct port and choose OK:
•
For a parallel printer, select the parallel port, normally LPT1.
•
For an IrDA-compatible infrared printer, select the infrared printer port, LPT3.
However, you can print to an infrared printer only while Windows and
IrMonitor are running.
•
For a serial printer, select the serial port, normally COM1.
6. Choose Set As Default Printer.
7. Choose Close.
8. Make a connection between the printer and the OmniBook:
•
For a parallel printer, see
“Making Parallel Connections”
.
•
For an infrared printer, see
“Making Infrared Connections”
.
•
For a serial printer, see
“Making Serial Connections”
.
For more information about setting up a printer, see the
Windows Quick Start manual.