HP Color LaserJet CP6015 Printer series User Manual
Page 174
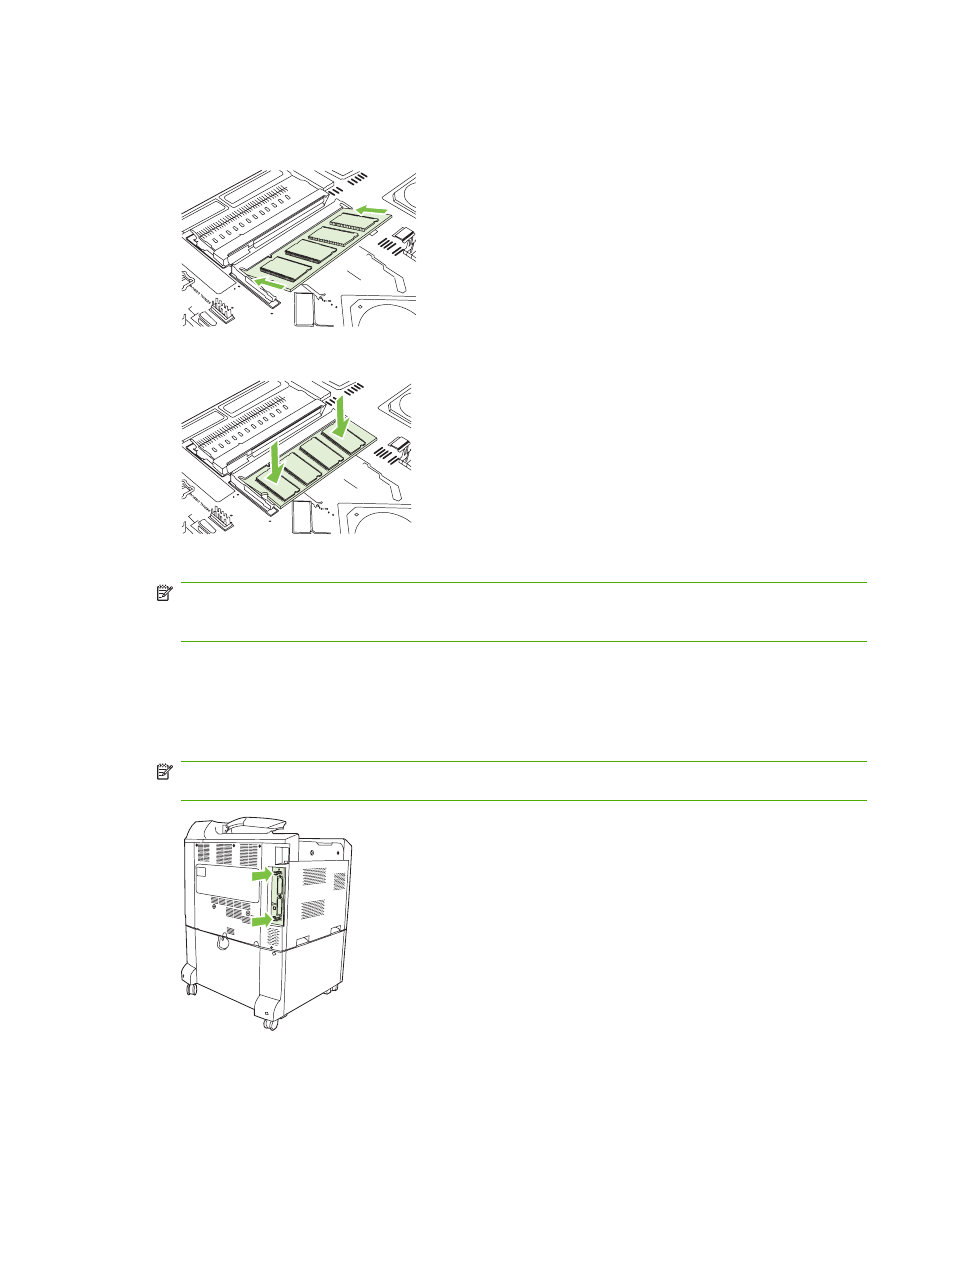
11.
Holding the DIMM by the edges, align the notch on the DIMM with the bar in the DIMM slot at an
angle and firmly press the DIMM into the slot until it is fully seated. When installed correctly, the
metal contacts are not visible.
XO
XO
XO
XO
XO
XO
XOXOXOXOXOXO
XOXO
XOXO
XO
XOXO
XOXO
XO
XOXO
XOXO
XO
XOXO
XOXO
XO
XOXOXOXOXOXO
XOXO
XO
XO
XO
XOXOXO
XOXOXO
XOXOXO
XOXOXO
XOXOXO
XOXOXO
XOXOXO
XOXOXO
XOXOXO
XO
XO
XO
XO
XO
XO
XOXOXOXO
XO
XO
XO
XO
XO
XO
XOXOXO
12.
Push down on the DIMM until both latches engage the DIMM.
XO
XO
XO
XO
XO
XO
XOXOXOXOXOXO
XOXOXOXOXOXO
XOXO
XO
XO
XO
XOXOXO
XOXOXO
XOXOXO
XOXOXO
XOXOXO
XOXOXO
XOXOXO
XOXOXO
XOXOXO
XO
XO
XO
XO
XO
XO
XOXOXOXO
XO
XO
XO
XO
XO
XO
XOXOXO
XIO
XIO
XIXO
O
XI
XO
XIO
XIO
XIO
XIO
XIXO
O
XI
XO
XIO
XIO
XIO
XIO
XIXO
O
XI
XO
XIO
XIO
XIO
XIO
XIXO
O
XI
XO
XIO
XIO
NOTE:
If you have difficulty inserting the DIMM, make sure the notch on the bottom of the DIMM
is aligned with the bar in the slot. If the DIMM still does not go in, make sure you are using the
correct type of DIMM.
13.
If you had moved the hard disk assembly to access slot 2, re engage the hinge taps, and snap the
release tab back into place on the formatter board.
14.
Align the formatter board in the tracks at the bottom of the slot, and then slide the board back into
the product. Be sure the pressure release tabs snap back into place.
NOTE:
To prevent damage to the formatter board, ensure the formatter board is aligned in the
tracks.
160 Chapter 11 Manage and maintain the product
ENWW