Apple Xserve G5 User Manual
Page 42
42
Chapter 3
Installing Your Server in a Rack
Note: You may need to bend the cord near its plug to fit it into the server. Bending the
cord will not affect its operation.
8
Connect the other end of the cables to the appropriate devices.
9
Close the server and tighten the thumbscrews to secure it in the rack.
10
After all connections are complete, plug the power cord into a power source.
For details on disconnecting cables from the server’s back panel, see “Disconnecting
Cables From the Server’s Back Panel” on page 55.
With the server in the rack and the cables in place, you can prepare to set up the
Mac OS X Server software.
Attach the Cable-Management Arm to the Support Brace
If the rear posts of your rack are more than an inch away from the server’s back panel,
you need to attach the cable-management arm to the support brace at the left side of
the server (not to the rear post). Otherwise the arm will not extend properly when you
open the server in the rack.
Warning:
This equipment is intended to be electrically grounded. Your server is
equipped with a three-wire grounding plug—a plug that has a third (grounding)
pin. This plug fits only a grounded AC outlet. This is a safety feature. If you are
unable to insert the plug into the outlet because the outlet is not grounded,
contact a licensed electrician to replace the outlet with a properly grounded
outlet. Do not defeat the purpose of the grounding plug!
Because you are installing the server in a rack with other equipment, be certain
that the power outlet and any other equipment, such as a power strip, used with
the rack is designed to carry the electrical load of multiple devices. Check the
documentation for your rack for any special instructions.
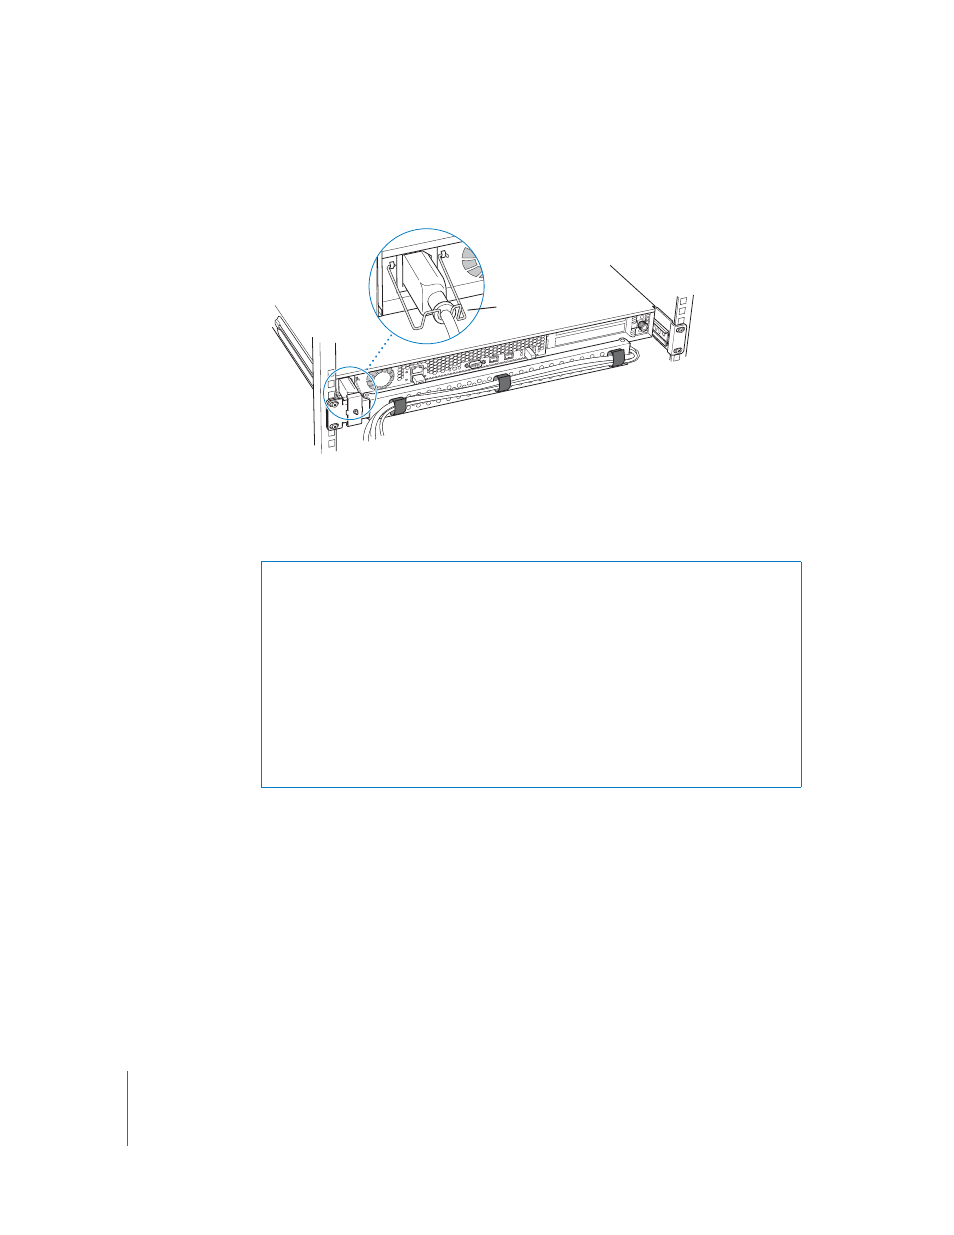
Attach the power cord
retainer clip to the two
loops on the back of
the server. Snap the
cord into the clip so that
it cradles the cord.