Trouble-shooting your alarm, Ac power fuse on pcb184 – Hired-Hand Emergency Back-Up and Alarms: Secondary Sensing System Expansion User Manual
Page 23
Manual No. 4801-3001 Rev 7-08
Secondary Sensing System Expansion
23 of 46
10. Trouble-Shooting
Your
Alarm
10.1 Low
Battery
If the battery in the S
3
Expansion drains down to approximately 10.6 volts, the Low Battery alarm condition
will be active. This is very common if the alarm has sounded for some time. If the Low Battery alarm is
active, the Alarm should be set so that no alarm condition exists and the battery should be allowed to
recharge. This may require the operator to disconnect the siren to allow the battery to build back up. If
recharging doesn’t fix the problem, then the battery must be replaced. Contact your nearest Hired-Hand
dealer for a replacement.
10.2 Power
Out
The Power Out alarm can occur in two cases. One is when the power has been out for more than one minute.
The other situation could be caused by the 120VAC 3 amp fuse blown on PCB184. If the Power-Out alarm
condition is active and you find that there is power present at the outlet where the alarm is plugged in, then
you should check the fuses.
10.3 No Siren at Test
If the siren fails to sound when the test button is pressed, several conditions could exist. The siren itself
could be bad. Check for 12VDC at the siren leads. And, of course, there could be a bad connection
somewhere in the siren circuit.
10.4 Replacing the Fuses
The S
3
Expansion includes three fuses; One PCB184 AC power fuse (F1 - 3 Amp), one DC primary power
fuse on PCB179 (F1 - 3 Amp), and also a PCB179 Back-Up Relay circuit fuse (F2 - 3 Amp).
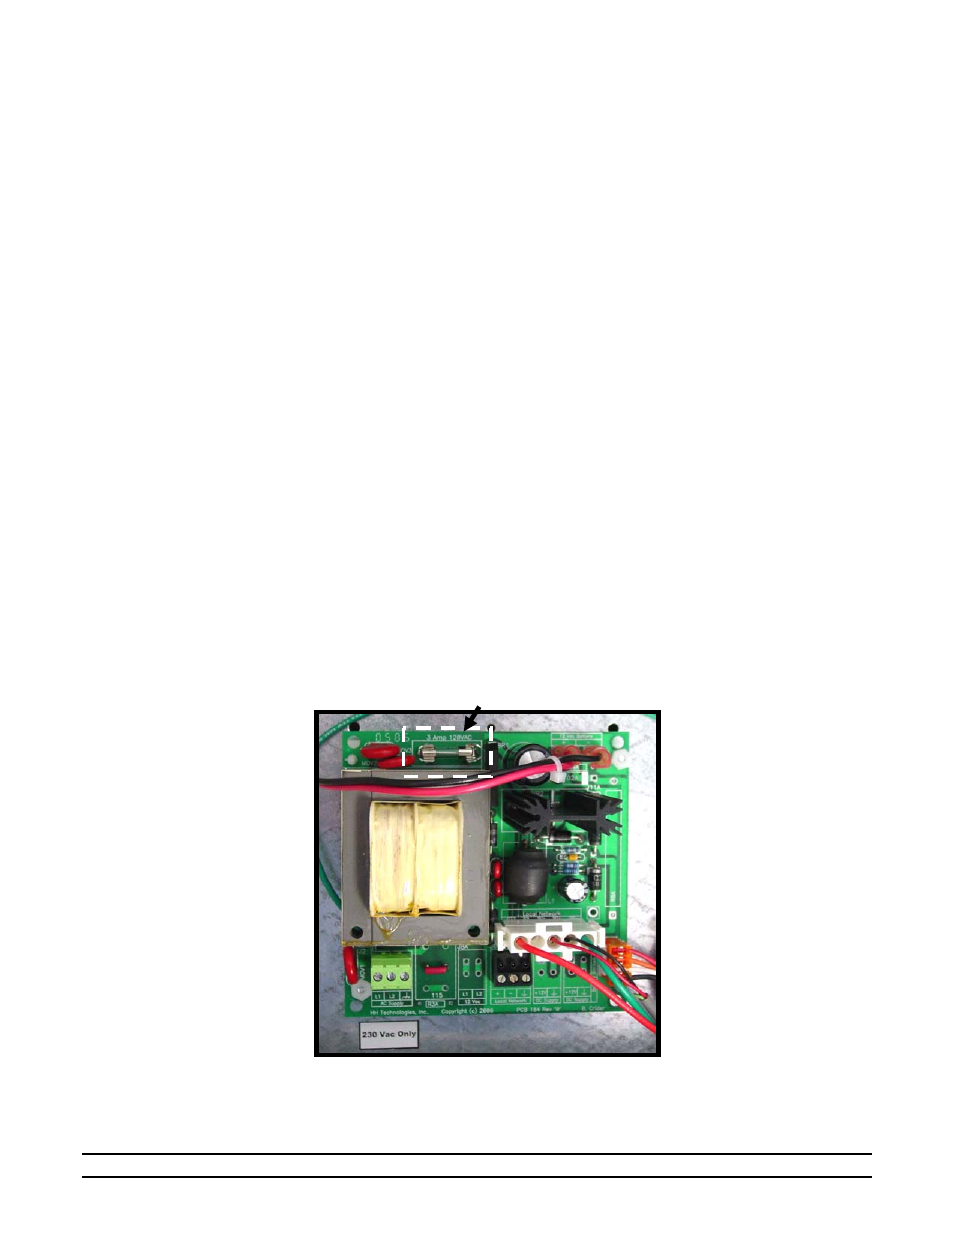
AC Power Fuse (F1, 3 Amp Slow-Blow)
The main AC Power Fuse is located on PCB184 circuit board. If power is present at the AC wall receptacle
and the S
3
Expansion front panel displays are not ON, first check the Power Switch then check the AC
Power Fuse for a blown fuse.
AC Power Fuse on PCB184