Program mode – Hired-Hand Emergency Back-Up and Alarms: Secondary Sensing System Expansion User Manual
Page 15
Manual No. 4801-3001 Rev 7-08
Secondary Sensing System Expansion
15 of 46
Parameter Number
Parameter Setting
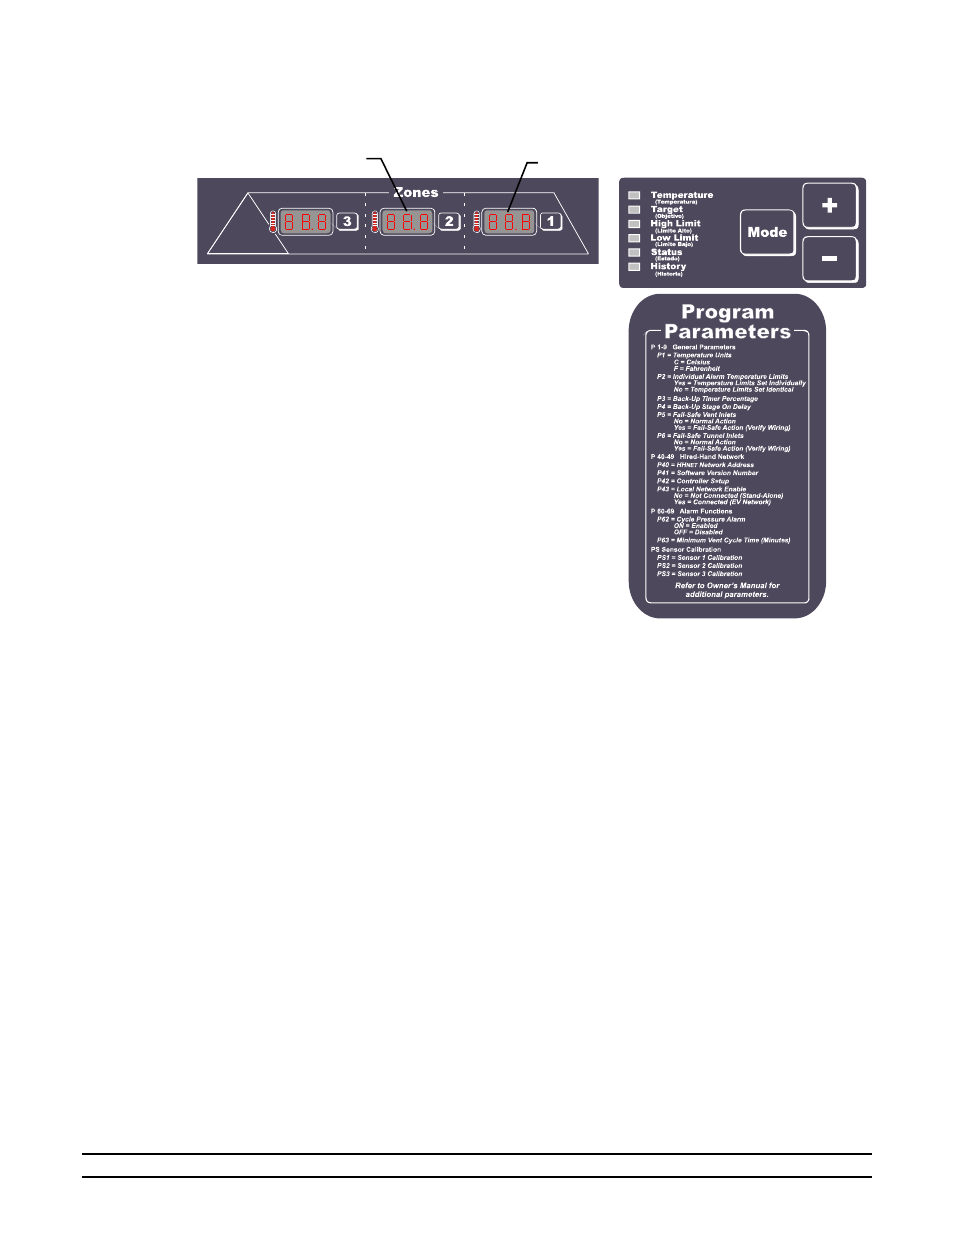
6. Program
Mode
By pressing and holding the Mode button for at least 5 seconds, the S
3
can be placed in the Program Mode as
discussed below and on the following pages.
Settings that are usually set up once per grow-out or maybe even just
for summer or winter are referred to as program parameters and are
accessed by taking the controller to program mode. To get to program
mode, press and hold the “Mode” button for five seconds. When the
controller has entered program mode, the Zone 1 display will show the
first parameter (P1) and the Zone 2 display will show the current
setting of parameter P1 (either C or F).
The “Pxx” is known as a parameter number. All the program items for
the controller have a unique parameter number assigned to them. The
numbers are listed in the following subsections with a short description
of each parameter. When in program mode, you change the value of
certain parameters by using the “+” and “-” buttons as needed. When
you have finished with the current setting, press the “Mode” button to
move to the next parameter.
6.1 General
Parameters
General parameters are associated with the operation and control of the S
3
:
P1 – Temperature Limits
This general parameter selects either Celsius (C = Celsius) or Fahrenheit (F = Fahrenheit) temperature
units. If P1 is set to “C”, the temperature units will be displayed in Celsius. If P1 is set to “F”, the
temperature units will be displayed in Fahrenheit.
P2 – Individual Sensor Limits
This general parameter determines how to program the Sensor High and Low temperature limits. As
indicated earlier, these limits can be set individually to different values. However, if it is desired to set
Sensor 1, Sensor 2, and Sensor 3 to the same values, this parameter changes the programming
procedure to allow limits to be entered only once but used for all sensors. If P2 is set to “YES”, the
high and low sensor limits are entered individually. If P2 is “NO” limits are entered once for all
sensors. To change the value of P2, press the Plus (+) button for “YES” or the Minus (-) button for
“NO”.