Foredom Series SR User Manual
Page 24
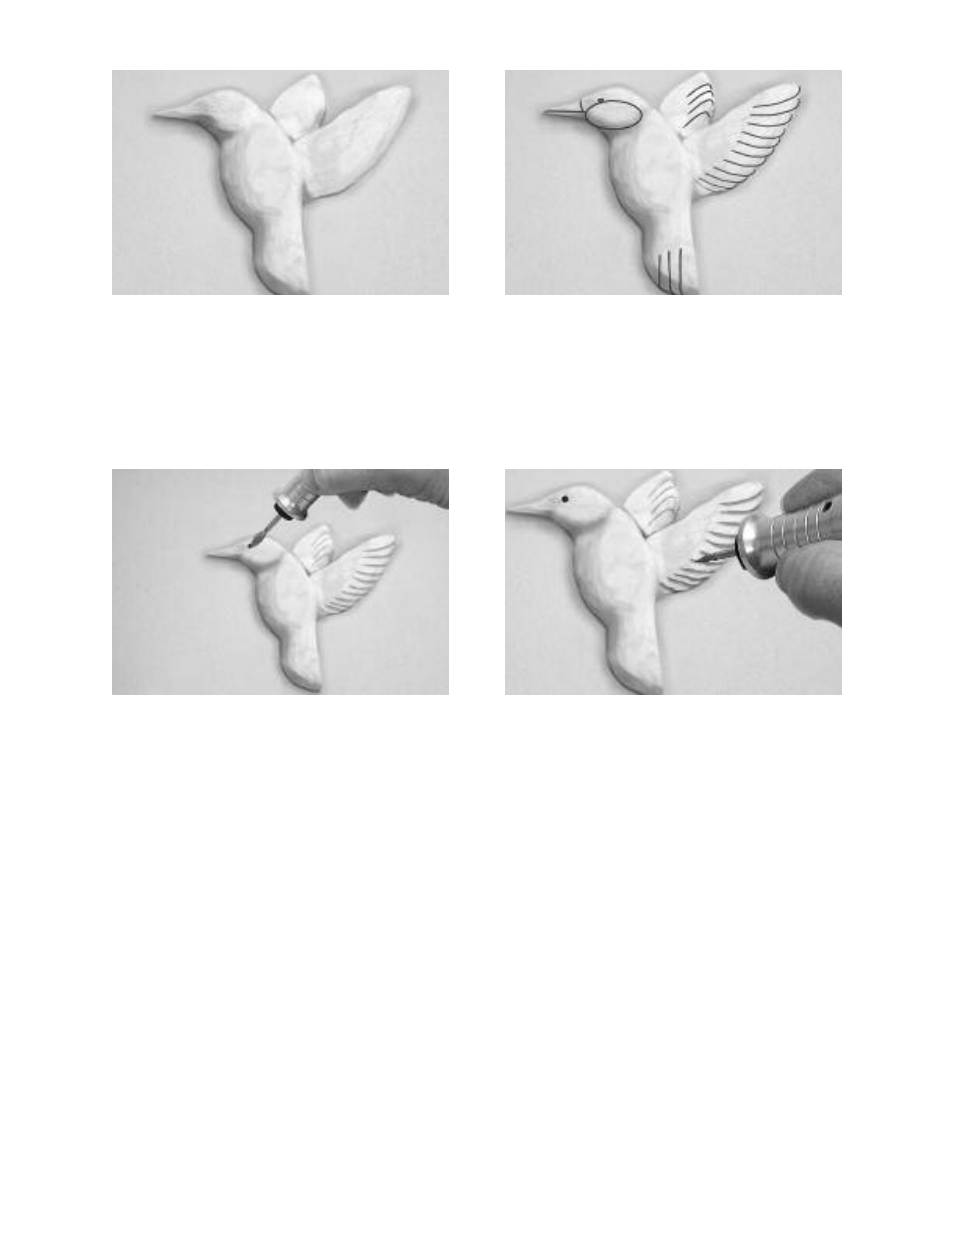
7 Sand the entire pin to shape using 120 grit
sandpaper followed by 150 and 220 grits. A
cloth-backed sandpaper works great for this step.
9 Separate the upper and lower mandible on the
bill and the bill from the head by using your
inverted cone shaped CeramCut Blue
®
Stone or a
woodburner with a 5/32″ knife tip. (A woodburner
can provide finer more precise detail but is not
required as long as you are careful in applying
your carving strokes.) Use a light touch with the
top edge of the inverted cone to make a thin,
sharp, and shallow groove separating the upper
and lower mandibles on the bill and the bill from
the head. Strengthen the bill by applying a few
drops of penetrating super glue. Now remove
some wood between the gorget and the body, to
better define this area. Next, decide on the type of
eye you are going to use–a 2mm black glass eye
or a ball of plastic wood to be painted or finished
later. Drill out a small eye hole with the
ruby carver.
8 After the sanding is complete, resketch the
cheek pouch, eye and bill, and sketch in the
primary and secondary feathers with a soft lead
pencil. I usually place eight to ten total feathers
on the bottom wing and four to six on the upper.
There is no need to sketch feathers on the back
side of the pin.
10 Relieve the wing and tail feathers with a stop
cut using a small cylinder shape CeramCut Blue
®
Stone or flame shaped diamond point. Feather
relief creates the impression of depth in the feath-
ers. Relieve (remove material) above the pencil or
burn line on the top wing and below the pencil or
burn line on the bottom wing.
24