Foredom Series SR User Manual
Page 23
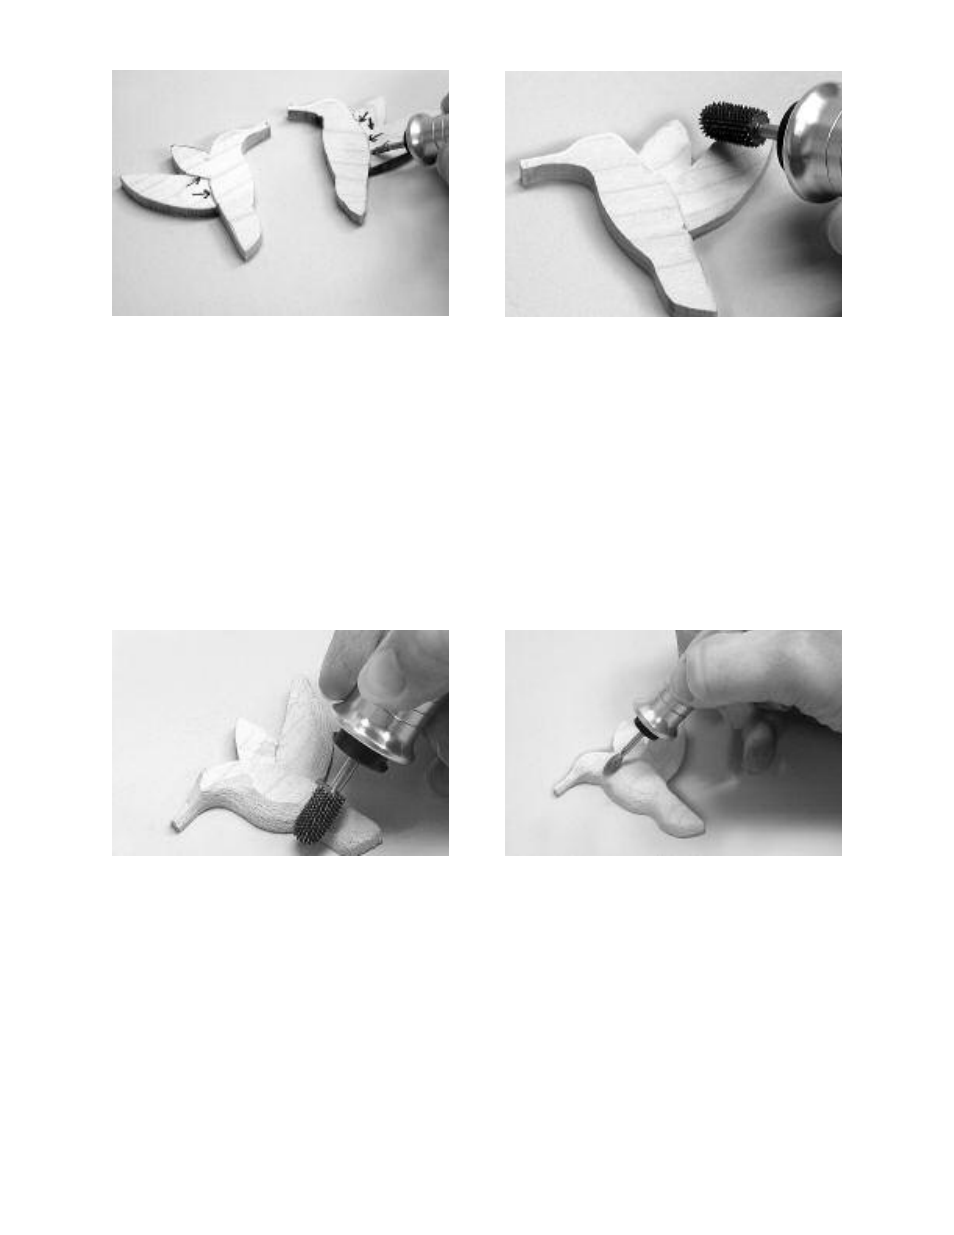
3 Make a stopcut as indicated by the black arrows
on the front and back of the pin with a flame
shaped diamond or ruby carver. This will keep
subsequent cuts from cutting into the body of the
hummingbird. Remove wood from the tip of the
wings to the stopcuts. On the front of the pin, the
highest point of the bottom wing is the tip of the
outermost primary feather. The lowest point is the
tip of the secondary nearest the body. You should
have a slight bevel from the body to the outer
wing. The top wing is cut deeper than the bottom
wing. This gives the impression that the wings are
on each side of the body.
4 Remove a small amount of wood from the top
wing using a ball nose blue Typhoon
®
. This cut is
only about 1/4″ from the body toward the wing tip.
The purpose of this cut is to indicate a separation
between the two wings. The wing can now be
tapered and shaped to final form using the same
Typhoon
®
bur followed by the diamond point or
ruby carver.
5 Define the tail using the ball nose Typhoon
®
bur. The tail should be thinned at the base and
dorsal side and tapered toward the center tail
feather. This cut should start to define the area
between the tail and the lower belly. Next, round
the front of the belly and chest.
6 Round the area under the chin (gorget) and the
bill using your choice of bur. The cheek pouch,
eye and bill can be sketched on the pattern with
a soft lead pencil and then shaped with the
flame shaped ruby carver. Define the area
between the neck and head and round the area
between the body and wings.
23