Caution, 6 adjusting the belt tension for the vertical axis – IAI America IX-NNC8040 User Manual
Page 47
41
6. Inspection/Maintenance
6.3.6 Adjusting the Belt Tension for the Vertical Axis
(1) Loosen the four M5 nuts [4] slightly, making sure the fastened points do not become overly loose.
(2) Loosen the lock nut [5], and then turn the bolt with urethane stopper [6] to tension the belt properly.
(3) Check the belt tension by referring to 6.3.4, “Checking the Belt Tension for the Vertical Axis.”
(4) Tighten the M5 nuts [4] loosened in step 1, and then tighten the lock nut [5].
(5) Check the belt tension again by referring to 6.3.4, “Checking the Belt Tension for the Vertical Axis.”
(If the deflection has changed, perform the adjustment again.)
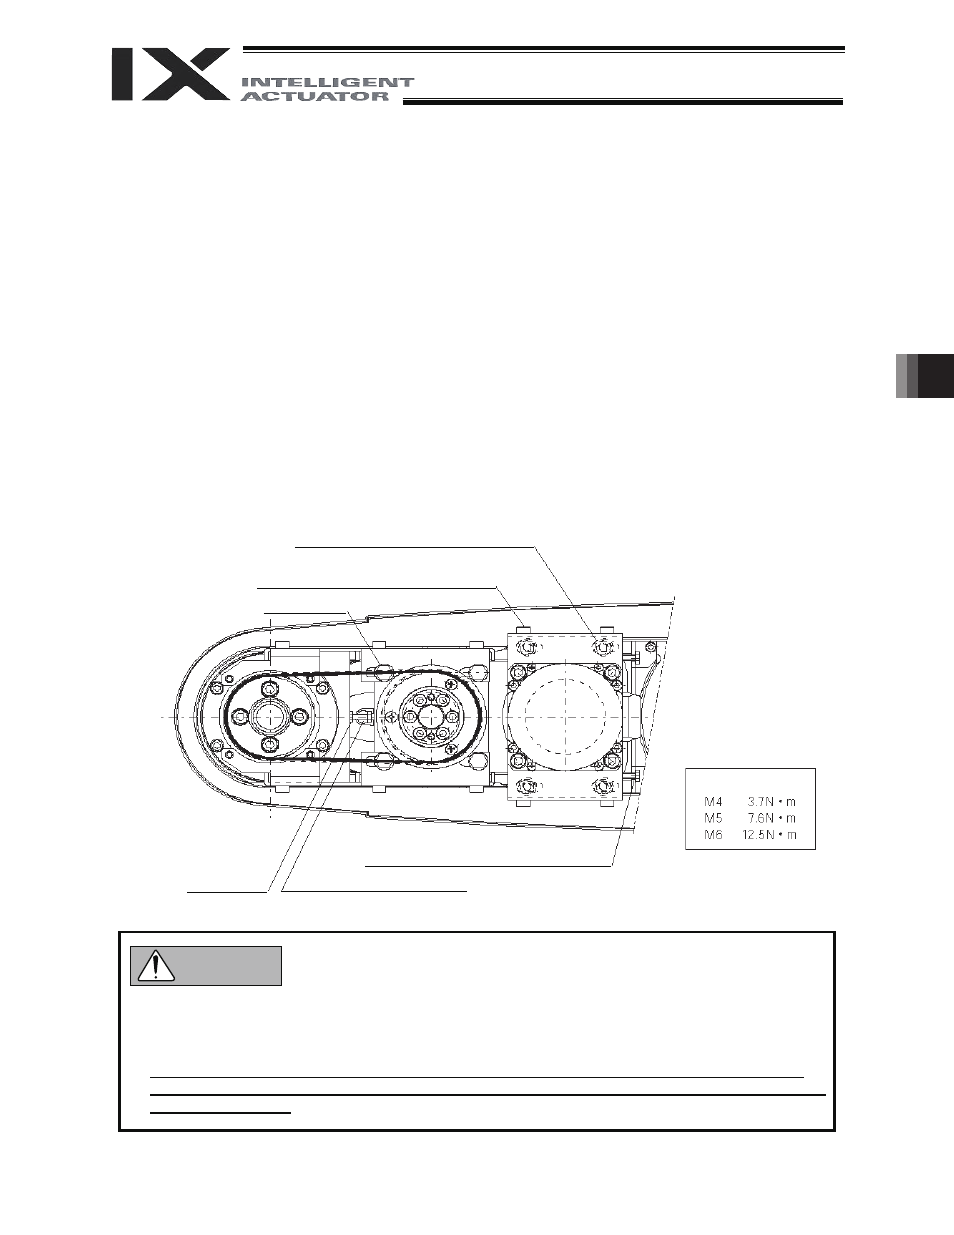
6.3.7 Adjusting the Belt Tension for the Rotational Axis
(1) Loosen the bolts [1] and [2] (four pieces each) slightly, making sure the fastened points do not become
overly loose.
(2) Turn the bolts [3] (two pieces) to tension the belt.
(3) Check the belt tension by referring to 6.3.5, “Checking the Belt Tension for the Rotational Axis.”
(4) Tighten the bolts [1] and [2] loosened in step 1.
(5) Finally, tighten the bolts [3] securely.
(6) Check the belt tension again by referring to 6.3.5, “Checking the Belt Tension for the Rotational Axis.”
(If the deflection has changed, perform the adjustment again.)
[2] 4 - M5 x 18 (IX-NNC50
/60 )
4 - M6 x 25 (IX-NNC70
/80 )
[4] 4 - M5 nut
[1] 4 - M4 x 10 (IX-NNC50
/60 )
4 - M5 x 10 (IX-NNC70
/80 )
Tightening torque
[3] 2 - M3 x 15 (IX-NNC50
/60 )
2 - M3 x 20 (IX-NNC70
/80 )
[5] Lock nut
[6] Bolt with urethane stopper
z Be careful not to overtighten screws [1], [2] and [4].
z After fixing the axis center, be sure to confirm once again that the deflection meets the specified
value.
z Disassembly of the cover generates dust. Before disassembling the cover, move the robot to a
location where dust will not cause problem, or cover the robot with a plastic sheet, etc., to prevent
dust from scattering.
Caution