Quick-start operating instructions – Dynasonics MFX Series Insertion MagProbe Flow Meter User Manual
Page 5
Rev. 01/11
-1.3-
MFX
This manual contains detailed operating instructions for all aspects of
the MFX instrument. The following condensed instructions are
provided to assist the operator in getting the instrument started up
and running as quickly as possible. This pertains to basic operation
only. If specific instrument features are to be used or if the installer is
unfamiliar with this type of instrument, refer to the appropriate section
in the manual for complete details.
1. SELECT THE MAGPROBE LOCATION
A. In general, select a mounting location
on the piping system with a minimum
of 10 pipe diameters (10
the pipe
inside diameter) of straight pipe
upstream and 5 straight diameters
downstream. See Table 2.1 for
additional configurations.
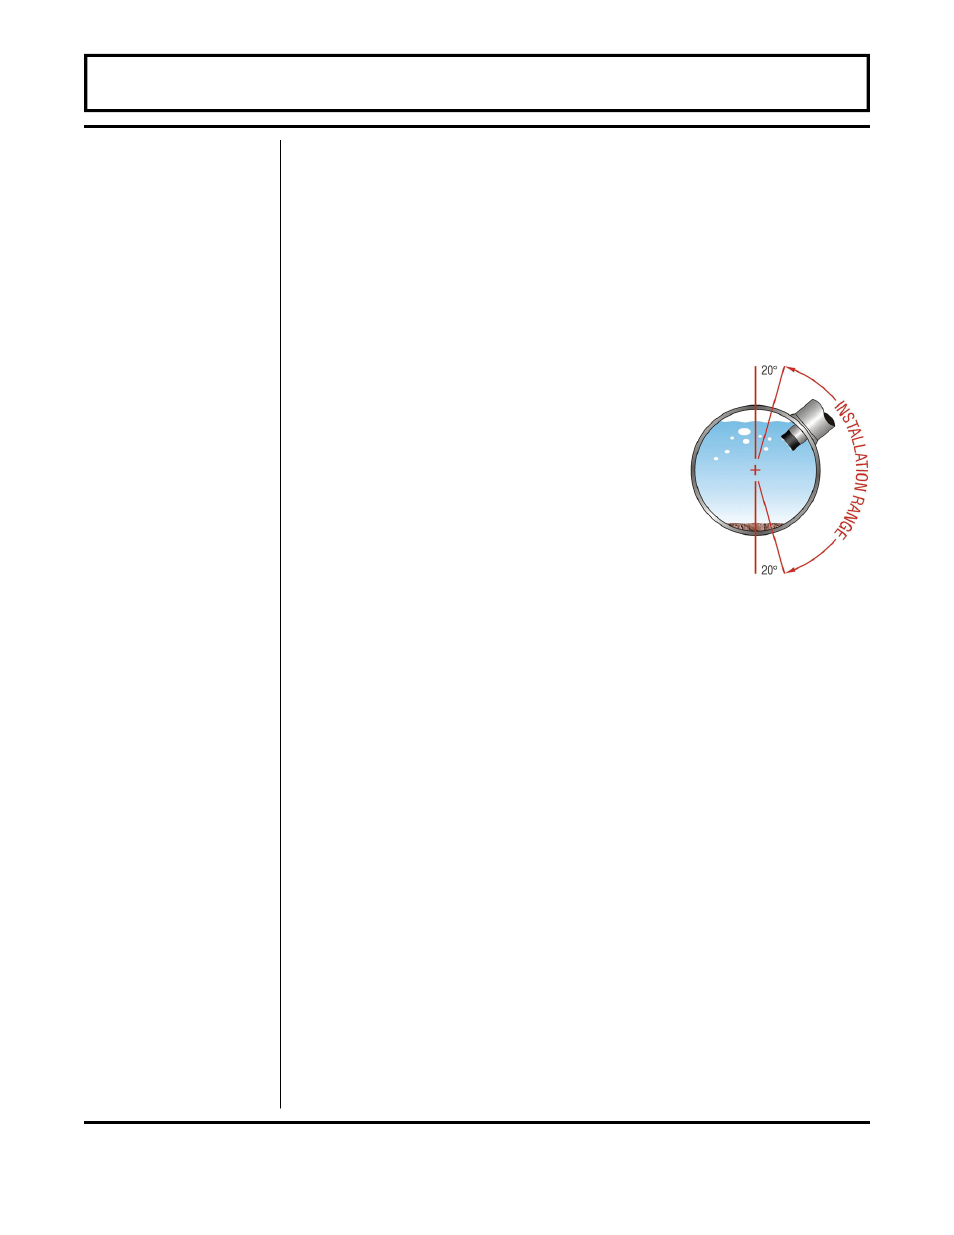
B. When the probe is installed on
a horizontal pipe, the preferred
orientation for the probe is between 1
and 5 o’clock as shown in Figure 1.1.
Ensure that the probe is installed
square and centered on the pipe.
2. HOT TAP CONFIGURATION
A. Verify that all components being permanently installed or used
during the installation procedure are rated for operation at the
greatest system pressure anticipated.
B. Mount the pipe saddle or weld fitting at the location
determined in step 1. Install the close nipple and ball valve.
Drill a hole in the pipe that is at least ǩ" (3 mm) larger than the
MagProbe tip. Close the ball valve.
C. Install the MagProbe insertion fitting.
3. INSERT THE MAGPROBE INTO THE PIPE
A. To obtain greatest accuracy, the measuring tip of the
MagProbe must be inserted a proper distance into the pipe.
For long, straight runs of pipe, this is 12.5% of the pipe
internal diameter.
B. Before inserting the MagProbe into the insertion fitting, it is
best to make all of the necessary measurements on the probe
and installation fittings and place a insertion depth mark on the
probe.
MagProbe
Location
Inserting
MagProbe
Top of Pipe
QUICK-START OPERATING INSTRUCTIONS
Figure 1.1
Horizontal Installation