Replacing labels, Replacing labels -5, 5 medialink controllers • installation – Extron Electronics MLC 206 AAP EC User Guide User Manual
Page 13: P-touch
2-5
MediaLink Controllers • Installation
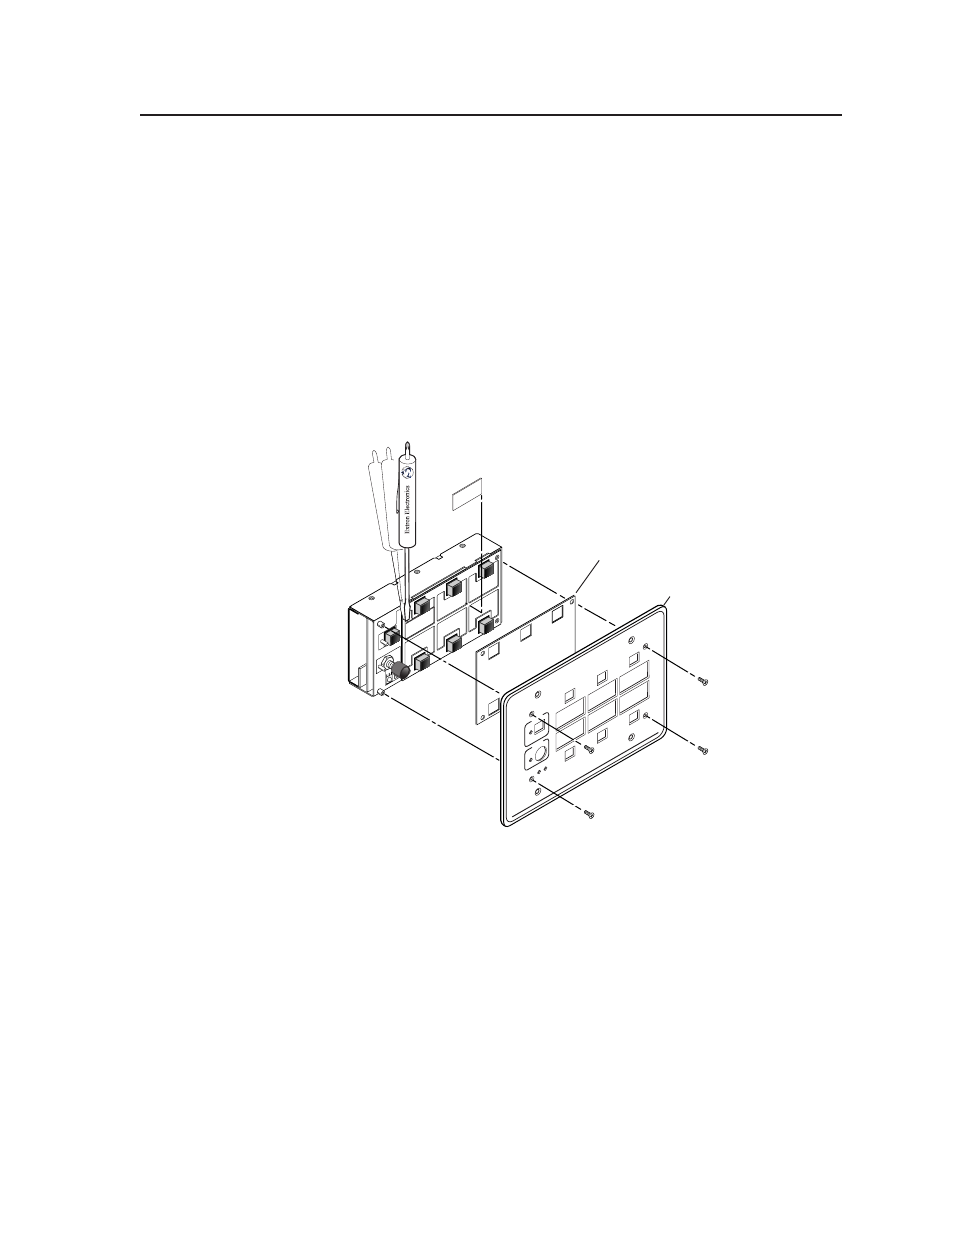
5.
Detach one of the preprinted labels or one of the blank labels from the sheet of
labels that is included with the MLC 206. Remove the protective film from the
front of the label. To create customized labels, use a label maker, such as a
Brother
®
P-touch
®
, and clear label material to print text to place on the blank
labels.
6.
Insert the new label into the opening from which the other label was removed.
7.
Repeat steps four through six for each label you wish to replace.
8.
Place the plastic window back onto the MLC to cover the labels.
9.
Align the openings in the faceplate with the buttons, knobs, and LEDs of the
MLC, and place the faceplate on the MLC.
10.
Replace the four screws removed in step 1, and hand tighten them.
VCR
DVD
Extr
on
Medi
aLi
nk C
on
trol
ler
ML
C 20
6
DIS
PL
AY
PO
W
ER
VO
LU
ME
MAX/
MIN
Window Labels
Remove four screws.
Plastic Window
Faceplate
Replacing labels
The backlit input selection labels are inaccessible once the MLC is installed into a
wall or furniture. The faceplate must be removed to gain access to the labels.
1.
Use a small Philips screwdriver to remove the four faceplate attachment
screws, and keep them for later use.
2.
Lift the faceplate off the MLC.
3.
Lift off the transparent, protective, plastic window that covers the labels.
4.
Lift off the transparent, rectangular label you want to replace, being careful
not to damage the circuits beneath it. You may need to use a small, flat
bladed screwdriver to gently pry the label out.