Ocean Optics S1024DW Install User Manual
Page 67
64
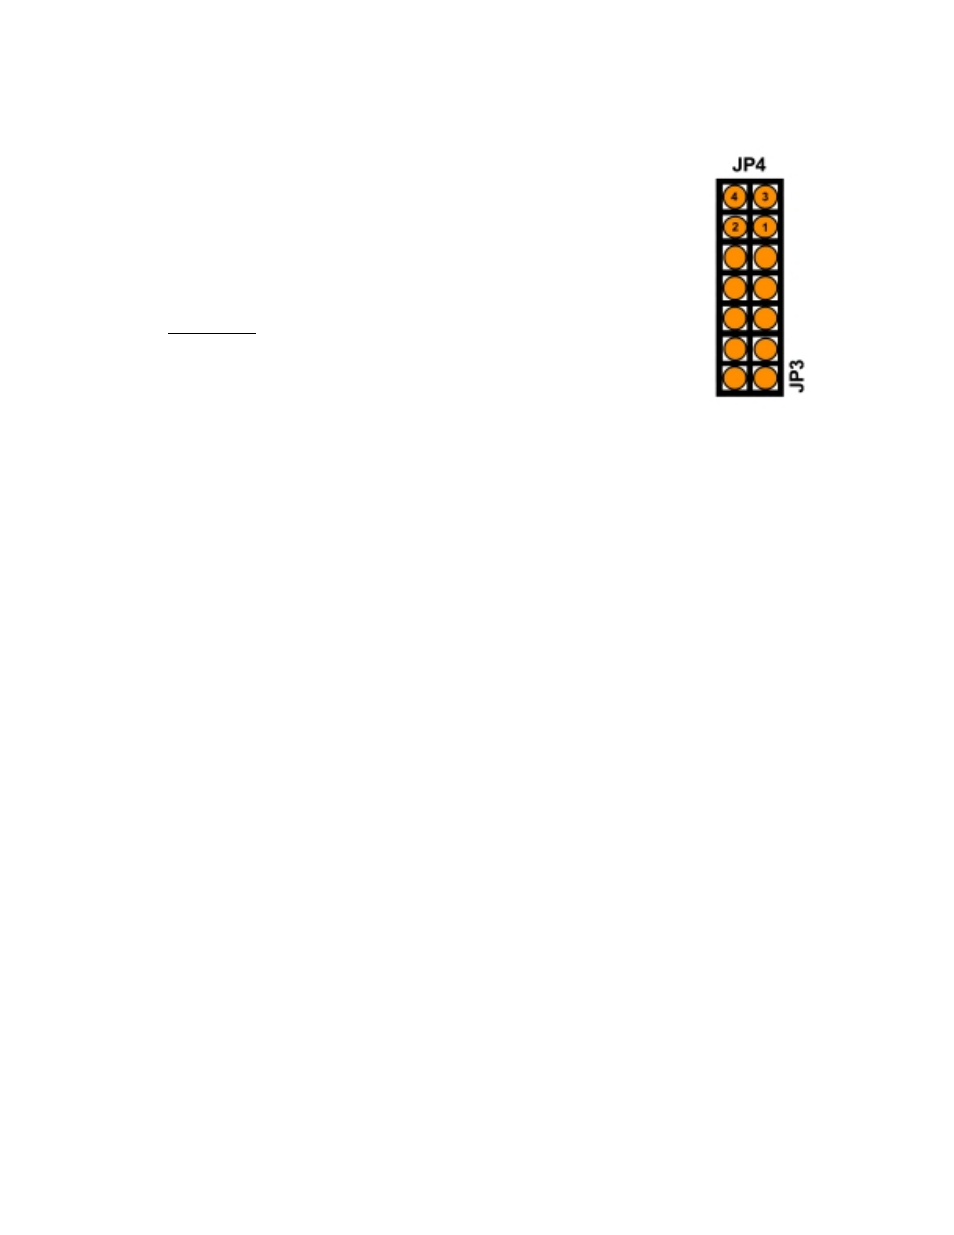
4. Once you have selected the integration time, note the configuration of the pins in
the Jumper Block 4 column of the chart.
5. Remove your spectrometer from its housing. Do not tamper with the optical
bench. (If you have more than one channel in your system, you may have to
disconnect the channels from one another. The master spectrometer is always on
the bottom of a multiple channel system.) In the center of the green circuit
board, near the optical bench, find Jumper Block 4, labeled JP4. (See the figure
to the right.) Jumper Block 4 consists of the first four pins, which are numbered
1, 2, 3, and 4. Using jumpers, configure the pins to match the integration time
you selected.
For example:
•
You have an S1024DW and a SAD500 A/D converter
•
Out of your four choices for an integration time, you select 60 milliseconds
•
Pins 1-2 must be open and Pins 3-4 must be shorted
•
Leave Pins 1-2 uncovered and place a jumper over Pins 3-4
6. Set other acquisition parameters such as averaging and boxcar smoothing in the software via the
Acquisition Dialog Bar or the Configure Data Acquisition dialog box. To access the dialog box, click
the Data Acquisition icon or select Spectrum | Configure Data Acquisition from the menu.
7. Select Spectrum | Configure Data Acquisition from the menu. Choose the External Trigger page
and select Hardware Trigger.
8. To save processed data with each external trigger, enable the Automatically save file on trigger
box. If you enable this function, you will be presented with a file save dialog box with each trigger.
To avoid manually naming a file for each trigger, you can enable the Autoincrement Filenames
function by selecting File | Autoincrement Filenames | Enabled from the menu. Choose a base
name and starting index for the autoincremented files.
9. Once you select an external trigger mode, it will appear on your computer that your spectrometer is
unresponsive. Instead, it is waiting for the trigger. Activate your triggering device. The acquisition
parameters, name of the window acquiring data and trigger mode are displayed in the main status bar.
It is important to note that if you apply triggers faster than the fixed integration time, you will miss
acquisitions.