Ocean Optics S1024DW Install User Manual
Page 60
57
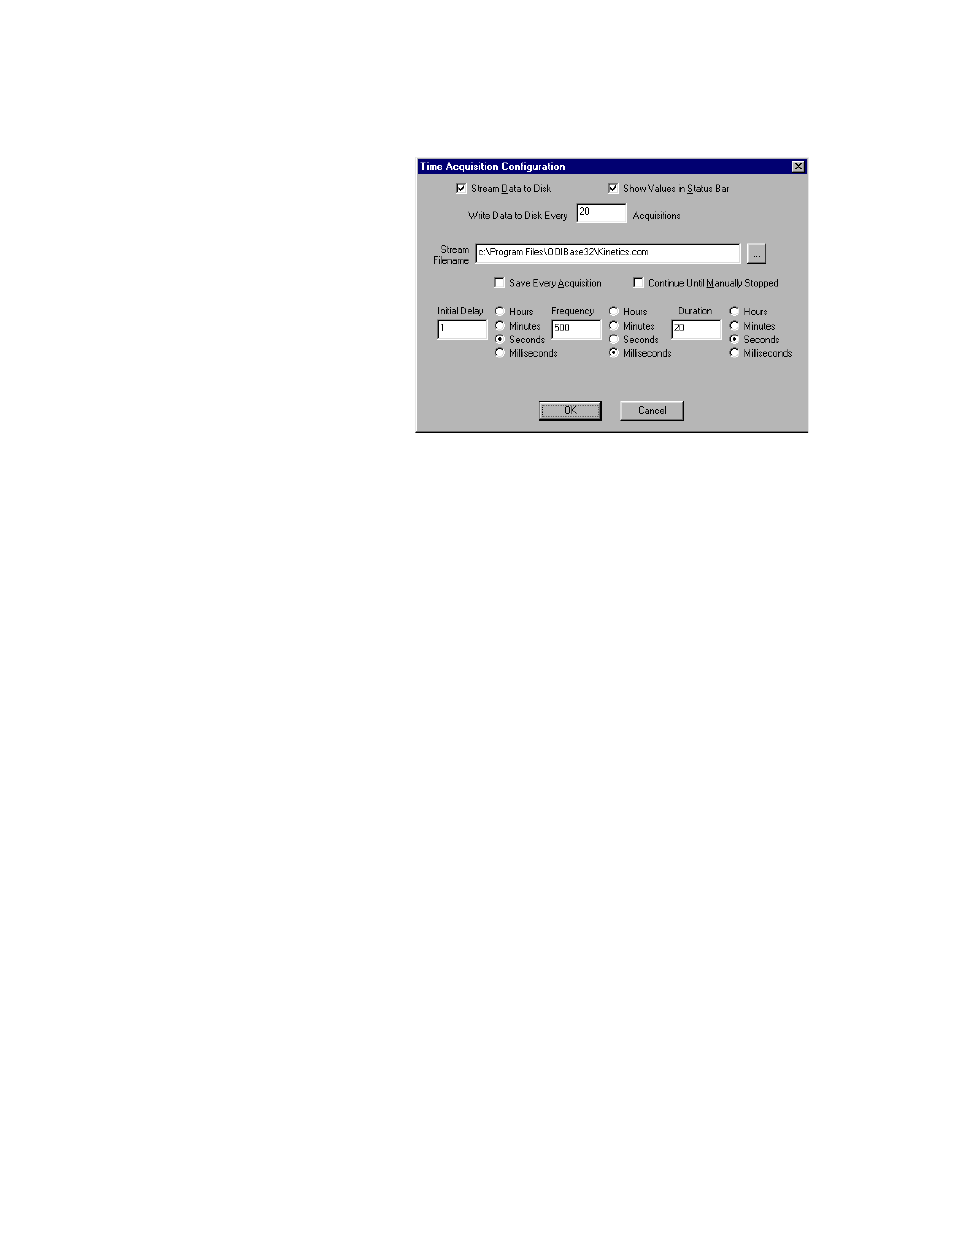
7. Access the Time Acquisition Configuration dialog box by selecting Time Acquisition | Configure |
Configure Acquisition from the menu.
•
Enable Stream Data to Disk to
save time acquisition data.
•
Enter a value in the Write Data
to Disk Every X Acquisitions
box to set the frequency for
saving data. The smaller this
number, the more frequently
data is saved. The larger this
number, the less frequently
data is saved; but entering a
large number enhances the
performance of the time
acquisition process.
"
"
"
"
At specified time intervals, data
from OOIBase32 is stored into
time acquisition channels or
combination channels. This data can be simply plotted in a spectral window, or streamed to disk, or
both. Up to 2048 acquisitions can be displayed in a spectral window. If more than 2048 acquisitions
are gathered, only the last 2048 of them will be displayed. To store more than 2048 acquisitions,
you must stream the data to disk. Writing data to the disk is a slow process (relative to the speed of
some spectral acquisitions) and causes a decrease in system performance. However, writing data
to disk more frequently gives a larger margin of safety.
•
Enable Show Values in Status Bar to see the time acquisition values in the status bar. These
values replace the cursor values.
•
Name the Stream Filename for the time acquisition process. Clicking on the ellipsis to the right
of this box opens a file save dialog box allowing you to navigate to a designated folder.
•
Enable Save Every Acquisition to store data for every spectral acquisition during the time
acquisition process.
"
"
"
"
There are options to either store data for each acquisition, or to collect data only after a specified
delay. Several factors affect the minimum time acquisition frequency, including integration time,
number of spectrometer channels, samples averaged, and computer speed. If you specify you want
data to be stored every 100 milliseconds, the delay will be at least 100 milliseconds, but could be
much longer depending on your experimental configuration. OOIBase32 spends a large amount of
time calculating, rendering and displaying the spectra in a spectral window. You have the option to
suspend graph display, which greatly improves performance.
•
Enable Continue Until Manually Stopped to store data until you manually stop the acquisition
process by clicking on the stop icon or selecting Time Acquisition | Stop.
•
Enter an Initial Delay to set the delay before the time acquisition process begins. However, the
delay countdown cannot begin until you initiate the time acquisition process by clicking on the
start icon or selecting Time Acquisition | Start from the menu. Be sure to select Hours, Minutes,
Seconds or Milliseconds immediately to the right of the initial delay entry.
•
Enter a value to set the Frequency of the data collected in a time acquisition process. Data from a
time acquisition is stamped with a time that is accurate to 1 millisecond. Be sure to select Hours,
Minutes, Seconds or Milliseconds immediately to the right of the frequency entry.
•
Enter a value to set the Duration for the entire time acquisition process. Be sure to select Hours,
Minutes, Seconds or Milliseconds to the right of the duration entry.
8. Click the OK button for the Time Acquisition Configuration dialog box.
9. Initiate the Time Acquisition mode by either clicking on the alarm clock icon in the Time Acquisition
toolbar or selecting Time Acquisition | Activate Time Acquisition from the OOIBase32 menu. You
can then start a time acquisition process by selecting the start icon or by selecting Time Acquisition |
Start from the menu.