Selecting fonts, Changing the font number setting – Xerox 4512N User Manual
Page 82
F o n t s
4-6 ❖ D o c u P r i n t 4 5 1 2 / 4 5 1 2 N U s e r G u i d e
Selecting Fonts
Selecting fonts is rarely done manually, due to the use of WYSIWYG
(What You See Is What You Get) application software, which enables
you to control the look of your output from the computer monitor.
There may be times, however, when you want to print older text files
without going through application software. At such times, you can
print files straight to the printer, using the printer’s default font. Any of
the printer’s resident fonts can be set as the default, as described in the
following section.
Changing the Font
Number Setting
You can set the printer’s default font at the Control Panel. Table 4.5 lists
the procedure. The factory default is 0 (zero). The ‘=X’ indicates the
current setting, the ‘=N’ indicates a new setting, and the asterisk (*)
indicates that the new setting has been entered.
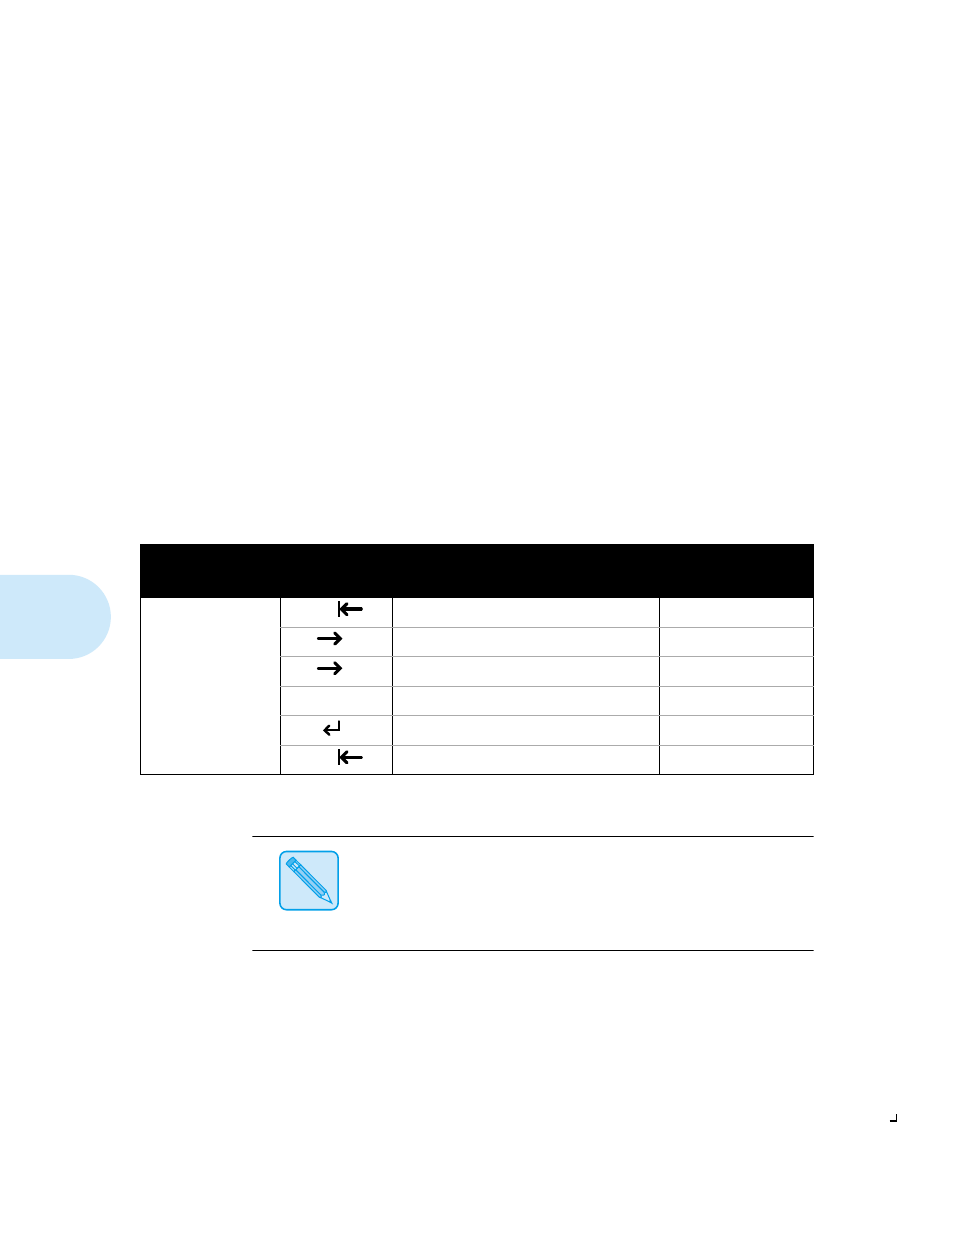
Table 4.5
Using the Control Panel to change the font number setting
Task
Key Press
Sequence
†
Action/Response
Display Shows
Change the Font
Number setting.
Choices:
0-45
On Line
Takes the printer off-line.
Printing Menu
Item
Displays the Copies item.
Copies=X
Item
Displays the Font Number item.
Font Number=X
Up or Down
Changes the font number.
Font Number=N
Enter
Saves the new value.
Font Number=N*
On Line
Returns the printer on-line.
PCL 5e A4/A4
† The number of menus and menu items will vary, depending on whether or not you have option boards installed in the printer.
Therefore, the number of times you have to press the Menu or Item key may vary from that shown in this table.
Note
The PCL 5e Font List contains the names and corresponding numbers of
the fonts that can be set with the Font Number item. Downloaded fonts
cannot be selected through the Control Panel.