Tascam GigaStudio User Manual
Page 35
TASCAM GigaEditor 4 Manual
35
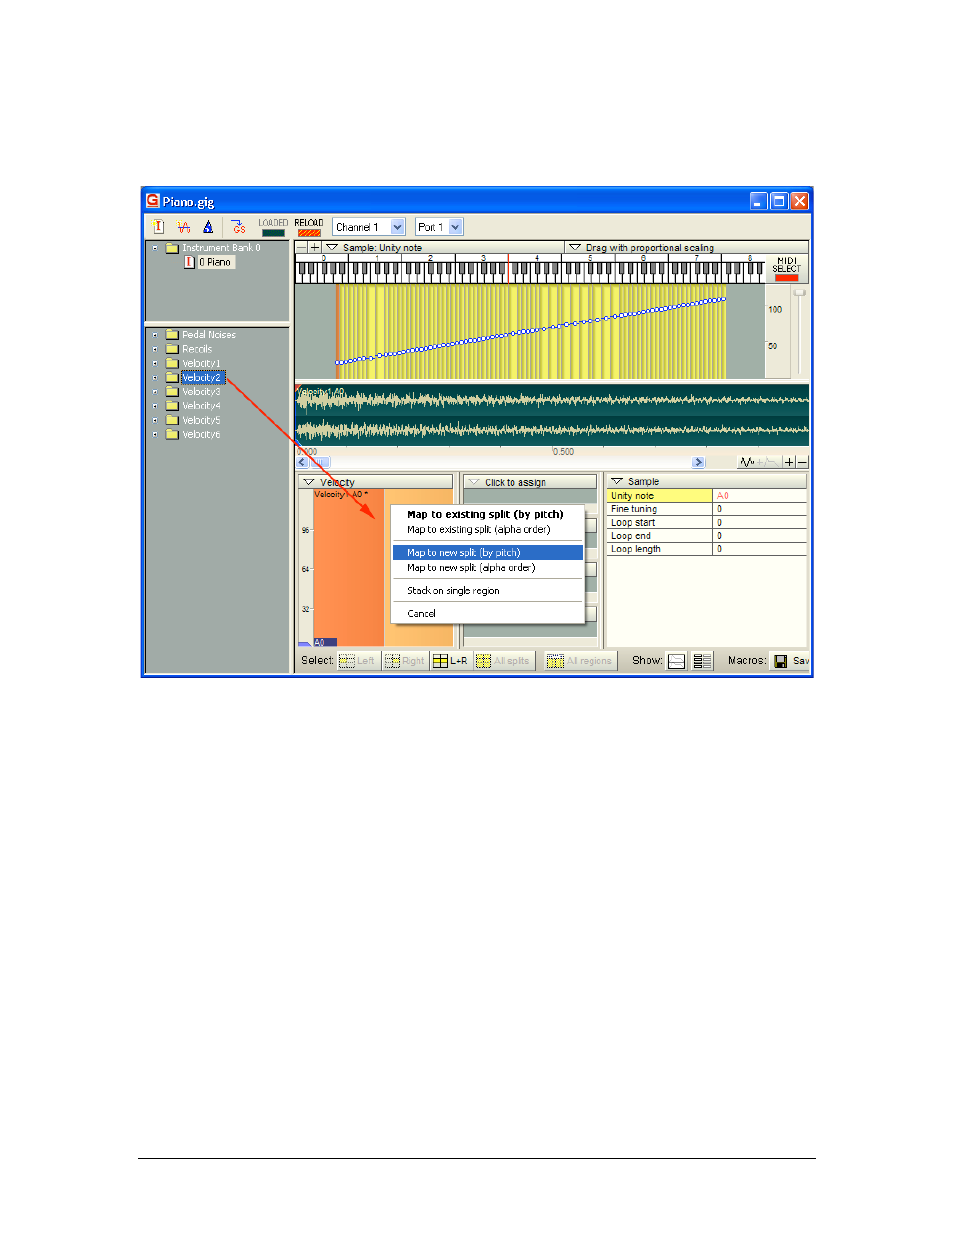
Next, we’ll map the second velocity layer using the samples in folder “Velocity2”. Instead of dropping this
folder in the Region Window (which would just replace the existing mappings), we’ll drop it on the
Velocity Window and use the right mouse button. Th is brings up a context menu at the point of the drop:
Th e context menu gives several options:
Map to existing split (by pitch).
This option would replace the samples in the existing split with
samples from the dropped folder, using pitch to decide their placement. Note that this applies not
just to a single region, but to every region across the keyboard that has the same dimensions and
splits as the focus region. (Note that this is the default option – the one that will execute if you
drop a folder in this window with the left mouse button.)
Map to existing split (alpha order).
Replaces the samples in the existing split with samples from
the dropped folder, mapping the samples alphabetically by name. Th e editor assumes you are
dropping unpitched samples and turns off pitch tracking in the mapped splits.
Map to new split (by pitch).
Creates a new split at the point where you dropped the folder, and
maps the folder’s samples into the new split according to pitch. Again, this operation is applied to
all possible regions across the keyboard. If you drop in the upper half of an existing split, the new
split is created above the existing one. If you drop in the lower half of an existing split, the new
split is created below the existing one.
Map to new split (alpha order).
Creates a new split at the point where you dropped the folder,
and maps the folders into the new split in alphabetical order. Th e editor assumes you are
dropping unpitched samples and turns off pitch tracking in the mapped splits.