2 xeon processor and heatsink installation – SUPER MICRO Computer X6DHi-G2 User Manual
Page 22
2-2
X6DH3-G2/X6DHi-G2 User's Manual
IMPORTANT: Always connect the power cord last and always remove it before add-
ing, removing or changing any hardware components. Make sure that you install
the processor into the CPU socket before you install the CPU heatsink.
2-2 Xeon Processor and Heatsink Installation
When handling the processor package, avoid placing direct pressure
on the label area of the fan. Also, do not place the motherboard on a
conductive surface, which can damage the BIOS battery and prevent the
system from booting up.
!
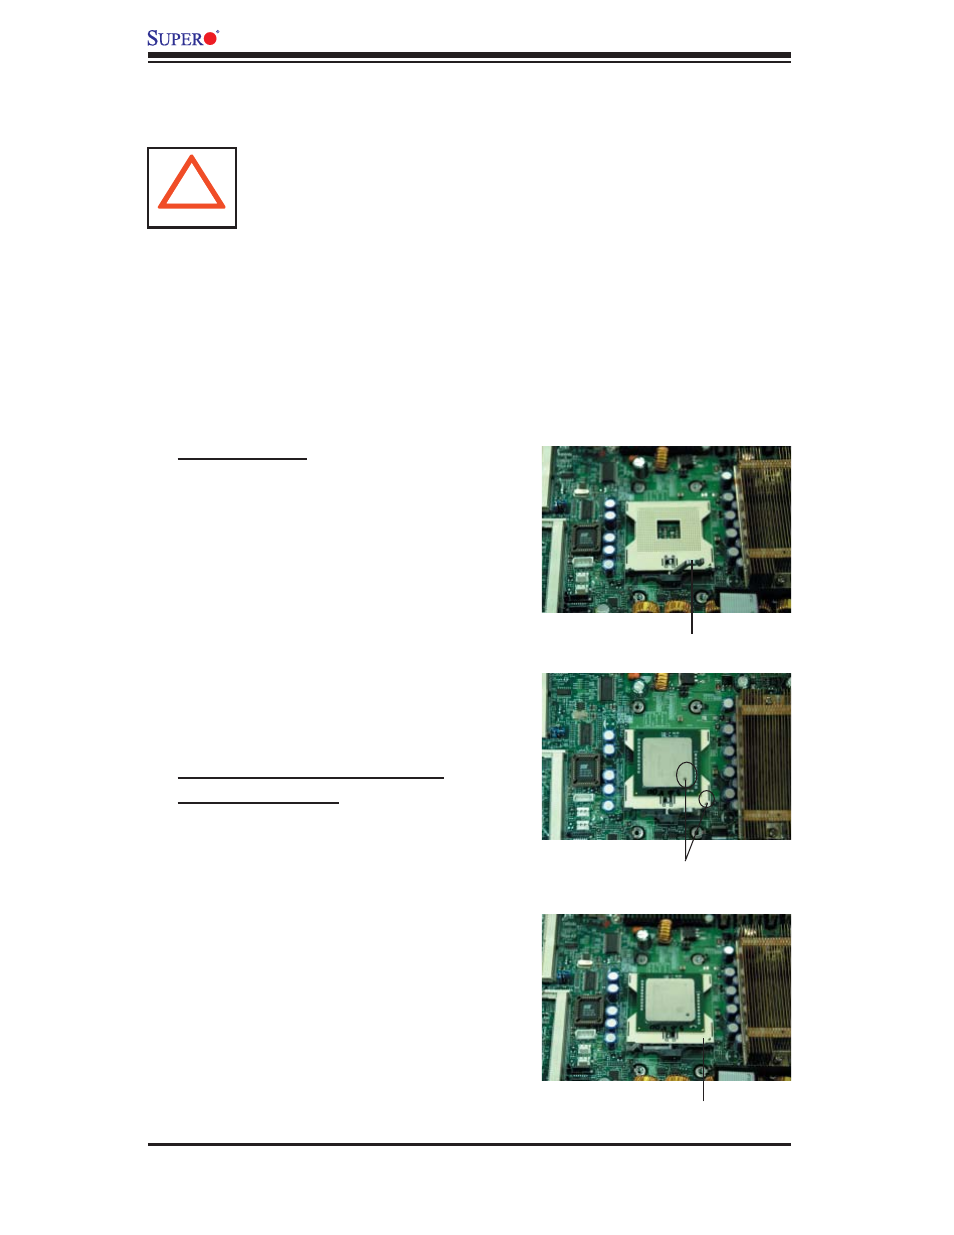
Socket lever
CPU Installation
1. Lift the lever on the CPU socket:
lift the lever completely as shown on
the picture on the right; otherwise,
you will damage the CPU socket
when power is applied. (Install
CPU1 fi rst.)
2. Insert the CPU in the socket,
making sure that pin 1 of the CPU
aligns with pin 1 of the socket (both
corners are marked with a triangle).
When using only one CPU, install
it into CPU socket #1 (Socket #2 is
automatically disabled if only one
CPU is used).
3. Press the lever down until you
hear the click, so you can be sure
that the CPU is securely installed in
the CPU socket.
Pin 1
Socket lever in the
locking Position