Post-production setup, Bouncing/summing using bus outs, Digital x bus – MACKIE DIGITALXBUS X.200 User Manual
Page 72
72
X.200
Digital X Bus
Post-Production Setup
The Digital X Bus is an amazing tool, no matter
what the setup. However, the more complex the
setup, the more amazing the Digital X Bus becomes.
Post-production provides the potential to use any
tracks, effects, snapshots, automation moves, and
general madness mayhem.
Most post-production facilities use house sync to
lock all video equipment together. The same piece
of gear that generates house sync can provide the
Digital X Bus and all connected audio gear with the
necessary word clock to get everything functioning
properly together.
In order for the Digital X Bus to follow external
word clock, the Sample Clock setting for the Sync
card must be set to “Word Clock.”
This is also the type of setup that might be found
in a home studio that incorporates a central sync
generator.
Bouncing/Summing Using Bus Outs
You may fi nd that you need to free up some more
tracks to get everything to fi t. You can do a submix
and combine several tracks into one (or two) using
the BUS 1–8 Submasters.
Maybe you have six separate tracks for the kick
drum, snare drum, cymbals left, cymbals right, tom
1, and tom 2. You can free up fi ve extra tracks by
bouncing these down to one track, or free up four
extra tracks if you want to bounce them down to a
stereo pair of tracks.
The following steps show an example of how to
bounce tracks 1–6 down to tracks 7 and 8 by using
Bus 1 and 2. By using Buses 1 and 2, whatever pan
positioning you’ve set up is retained.
1. Turn off the L-R assignments for the six chan-
nels serving as the tracks 1–6 returns. Turn off
the L-R assignments for any other channels you
don’t want to monitor while bouncing down.
2. Assign the six channels to Bus 1 and Bus 2.
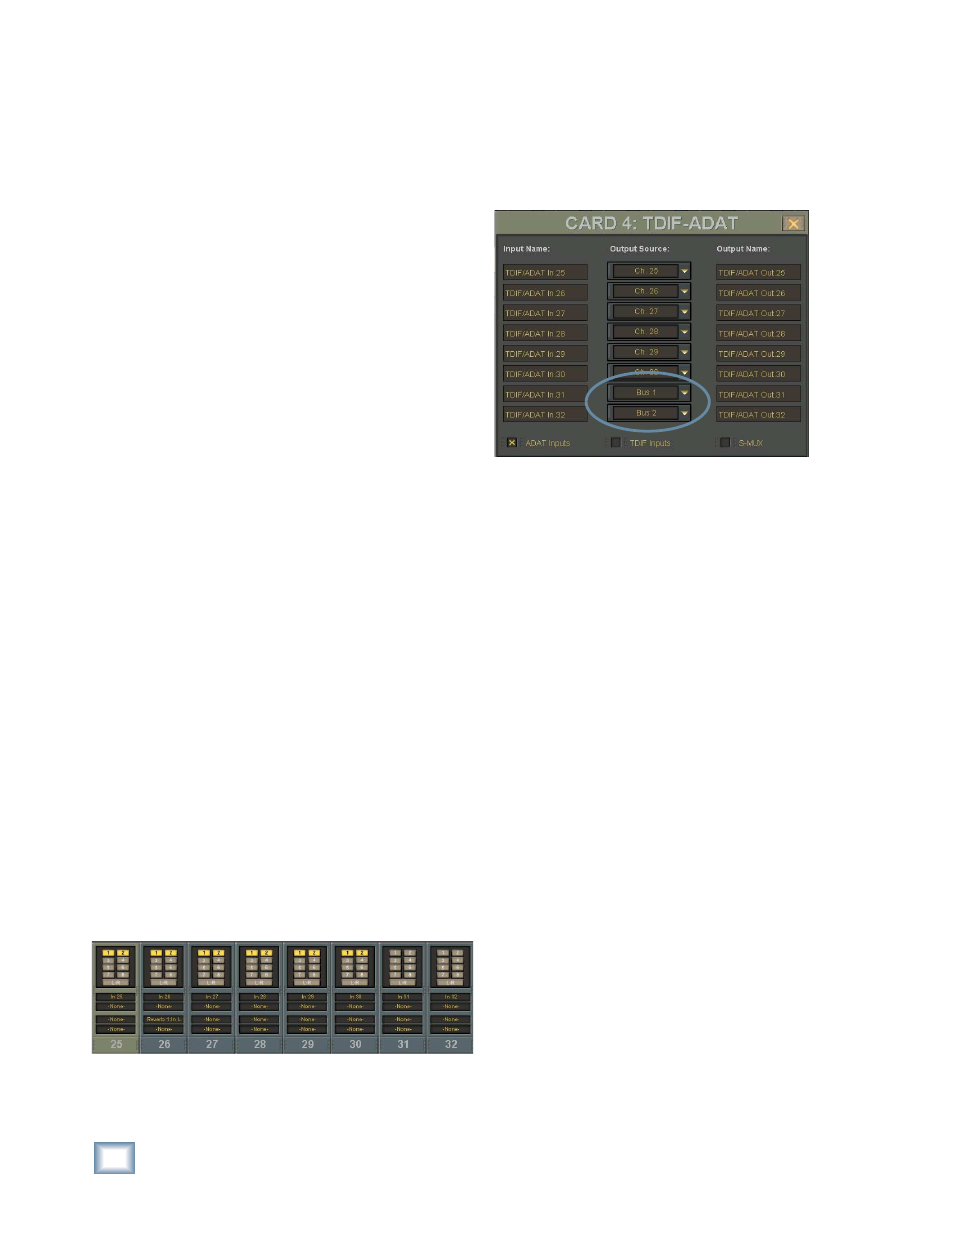
3. Open the I/O Confi guration Window, and select
Bus 1 and Bus 2 as the Output Source for two
unused outputs on an I/O card. Route the two
outputs to tracks 7 and 8 inputs on the record-
ing device.
4. Press the MSTRS button next to the Master
Fader to select Fader Bank 4. The Bus Masters
default to unity gain, but you can adjust the Bus
1 and 2 Masters to optimize the signal going to
the recording device.
5. On the recording device, select record ready on
tracks 7 and 8.
6. Play the song while recording tracks onto the
multitrack.
7. After recording, with the original 6 channels
muted, monitor the bounced tracks (7 and 8)
through the Digital X Bus tape in channels.