Digital audio workstation setup, Cabling and hookup settings, Digital x bus – MACKIE DIGITALXBUS X.200 User Manual
Page 70
70
X.200
Digital X Bus
Digital Audio Workstation Setup
When connecting the Digital X Bus to a Digital
Audio Workstation ( Digital Performer, Studio Vision
Pro, Cakewalk Pro, etc.), word clock synchroniza-
tion must be addressed; the master and slaves must
be established; the clock rate must be consistent
throughout; and the audio path into the console
must be intelligently confi gured.
Let’s consider a common computer-based setup
using:
•
A combination digital audio/MIDI software
package
•
A MIDI interface (or in this example, two 4x4
USB MIDI interfaces)
•
A digital audio interface with lightpipe audio
connections
Cabling and Hookup
(Refer to illustration on the next page.)
1. Connect the Digital X Bus lightpipe output,
from the DIGITAL card, to the digital audio
interface lightpipe input. Likewise, connect the
lightpipe output from the digital audio interface
to the Digital X Bus' lightpipe input.
2. Connect the digital audio interface to the com-
puter per the manufacturer’s specifi cations.
3. Connect the SMPTE I/O from the Digital X Bus
Sync card to the SMPTE I/O on the digital audio
interface to provide time code communication.
4. Connect the two 4x4 USB MIDI interfaces
together via their MIDI IN and OUT connectors,
and connect one to the USB port on the Digital
X Bus and the other to the USB port on the
digital audio interface.
Settings
Digital X Bus
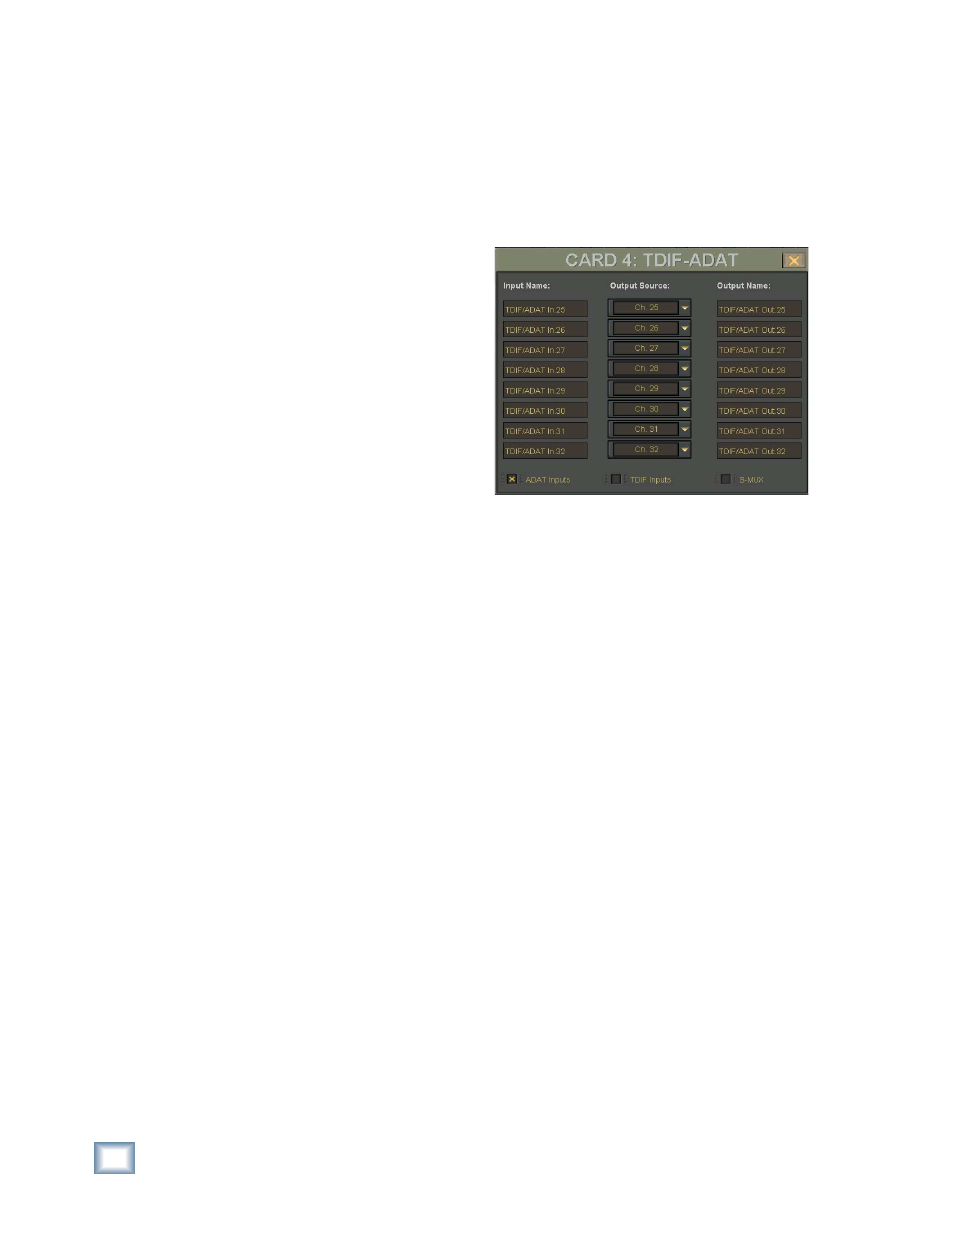
1. Open the I/O Confi guration window.
2. Click the Digital Card to open the TDIF-ADAT
Setup window.
3. Click the ADAT Inputs box at the bottom of the
TDIF-ADAT Setup window.
4. The inputs and outputs for the Digital card are
confi gured for their default settings based on
the card's position in the card cage. You can
change the output settings in the TDIF-ADAT
Setup window, and the input settings in the
input Assign window.
5. Open the I/O Confi guration window and click
the Sync card to open the Clock Setup window.
6. Set the Digital X Bus Sample Rate to match
the computer’s sample rate (typically 48kHz or
44.1kHz). Selecting “Internal” in the Sample
Clock drop-down box establishes the Digital X
Bus as the master. Everything else in the digital
chain must be capable of slaving to the Digital
X Bus.
DAW
1. Set the digital audio interface to follow ADAT
optical at the interface input (from the Digital X
Bus lightpipe output).