Servicing instructions, Replacing parts – Stovax Studio 22 User Manual
Page 36
36
SERVICING INSTRUCTIONS
REPLACING PARTS
16. PRESSURE AND LEAk TESTING THE
APPLIANCE
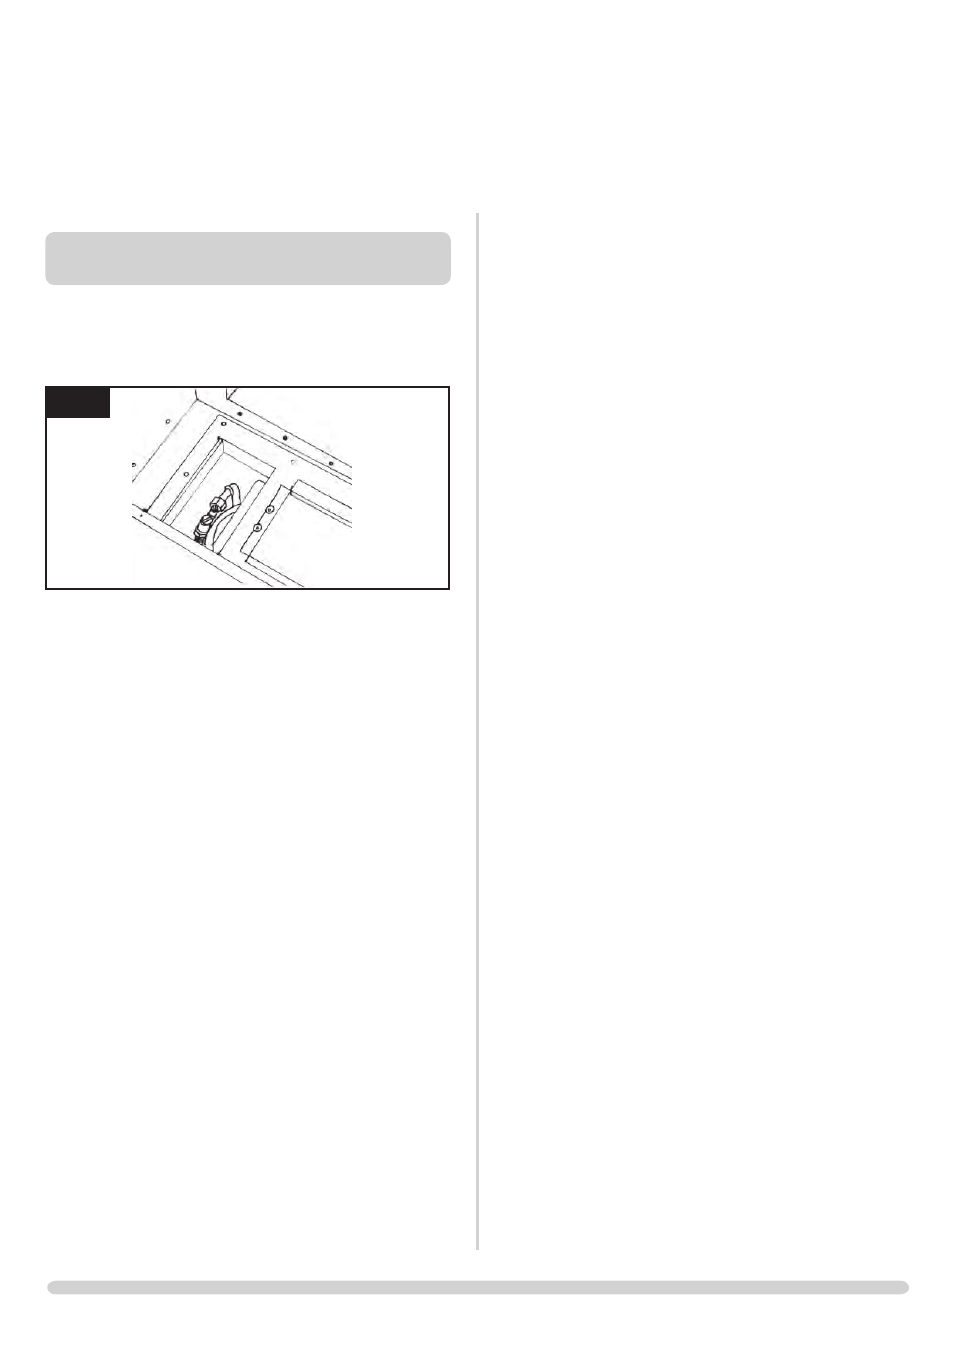
16.1 Follow Section 7, Main Control Assembly:
• Access to the pressure test point can now be reached,
Diagram 19
19
AR2130
16.2 To leak test any gas joints on the appliance, the control
assembly must first be undone and tilted backwards, see
Section 7, 7.3 Diagram 11
16.3 Because there is now no burner fitted to perform a leak test,
place a manometer tube over the injector tip.
• Light the appliance and spray any joints with leak
detector fluid
• Tighten joints or replace as required