Servicing instructions, Replacing parts, Glass window – Stovax Studio 22 User Manual
Page 31: General, Decorative frame, Window frame assembly
2
AR2119
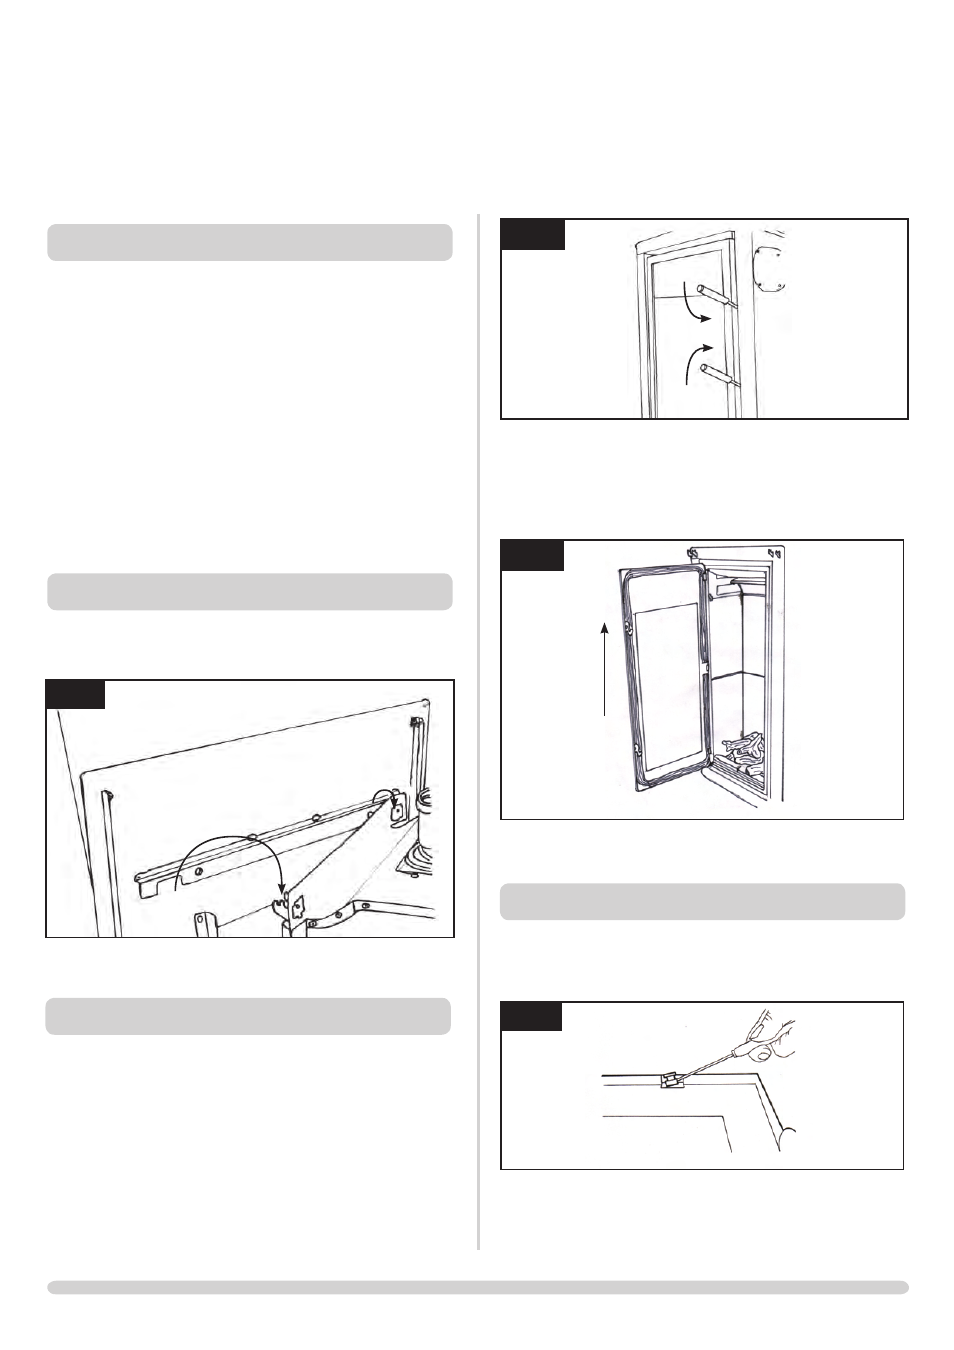
3.2 To completely remove the glass front:
• Open the door at a right angle to the fire
• Lift the door vertically off its hinges and place to one
side, Diagram 3
3
AR2137
• Refit in reverse order
• Refit in reverse order
4. GLASS WINDOW
4.1 Remove the two clips and brackets from either side of the
frame, Diagram 4
4
AR1864
• Lift the glass clear from the lock bracket at the top of the
frame and slide out
1. GENERAL
1.1 All main components can be replaced without removing the
appliance from its installation. It is essential that the gas
supply to the appliance is turned off at the isolation device
before proceeding further.
1.2 • DISCONNECT BATTERIES BEFORE SERVICING THE
APPLIANCE
1.3 Removal of Flue
If, for any reason, the flue has to be removed from the
appliance, the seal must be replaced in the inner spigot.
1.4 Access to the controls is restricted and the whole of the
control assembly is to be removed as one unit. Refer to
Section 7 below
2. DECORATIVE FRAME
2.1 The same method is used to remove each frame.
• Lift the frame upwards off the four support brackets,
Diagram 1
1
AR2136
NOTE: THE STEEL FRAME IS HEAVy. TAkE CARE WHEN
LIFTING
3. WINDOW FRAME ASSEMBLy
3.1 Using the allen key provided to release the upper and lower
catches on the right side of the door:
• Slide the allen key into the gap between the door and
frame and locate the catch of the upper lock
• Push the allen key DOWN
• Slide the allen key into the gap and locate the lower lock
• Push the allen key UP
• Open the door outwards
When closing the door ensure the door catches are fully
engaged
.
31
SERVICING INSTRUCTIONS
REPLACING PARTS