Replacing the floppy disk drive – HP KAYAK XM600 User Manual
Page 42
2 Installing and Replacing Hardware Parts in Your PC Workstation
Replacing the Floppy Disk Drive
42
Replacing the Floppy Disk Drive
Removing the
Floppy Disk Drive
1
Switch off the display and PC Workstation. Disconnect all power cables
and any LAN or telecommunications cables.
2
Remove the PC Workstation’s cover and front upper bezel (refer to page
25 for these instructions).
3
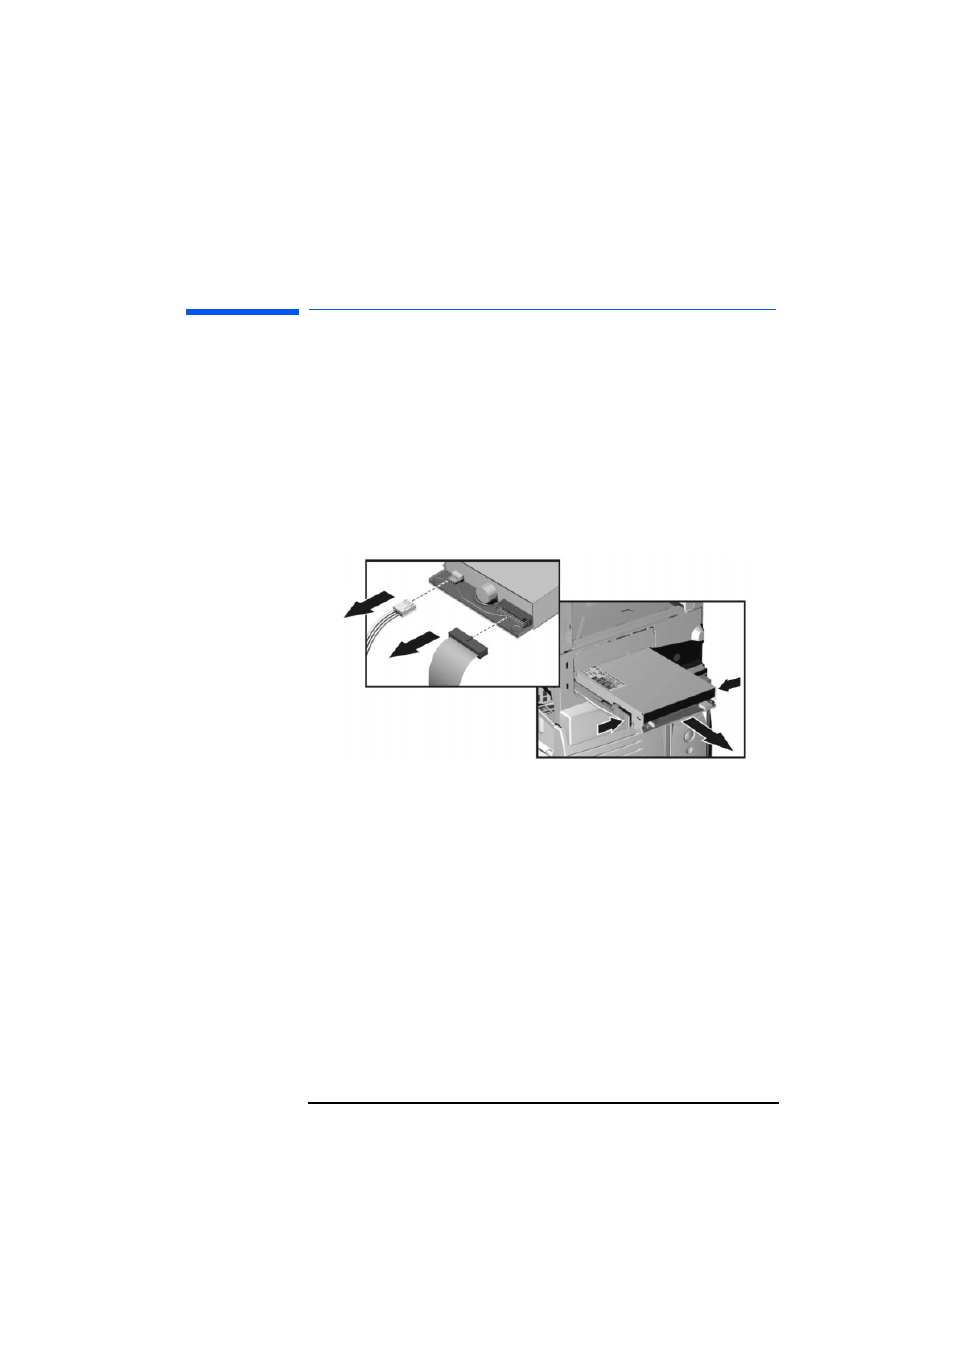
Disconnect the power and data cables from the old drive.
4
Remove the drive. To do this, press the two front clips inward and,
pushing from the rear, slide out the drive.
5
Remove the two short green guide rails by gently prying them off the
drive. These guide rails will be required for the new drive.
Installing the Floppy
Disk Drive
1
Add the short green guide rails to the new drive. Insert the guide rail
labeled “L” on the left-hand side (cable connectors facing towards you
and positioned at the top), and the guide rail “R” on the right-hand side
of the hard disk drive.
2
Align the guide rails on both sides of the drive with the internal shelf
guides, then slide the drive until it clicks into position.
3
Connect the power and data cables to the new drive and any installed
drives. The connectors are shaped to go in one way only.
4
Replace the front bezel and PC Workstation’s cover (refer to page 25).
Reconnect all the power and telecommunications cables.
5
Turn to page 43 to complete the installation.
➍