Replacing the cd-rom drive (or dvd-drive) – HP KAYAK XM600 User Manual
Page 41
2 Installing and Replacing Hardware Parts in Your PC Workstation
Replacing the CD-ROM Drive (or DVD-Drive)
41
Replacing the CD-ROM Drive (or DVD-Drive)
Removing the
Old Drive
1
Switch off the display and PC Workstation. Disconnect all power cables
and any LAN or telecommunications cables.
2
Remove the PC Workstation’s cover and front upper bezel (refer to page
24 for instructions).
3
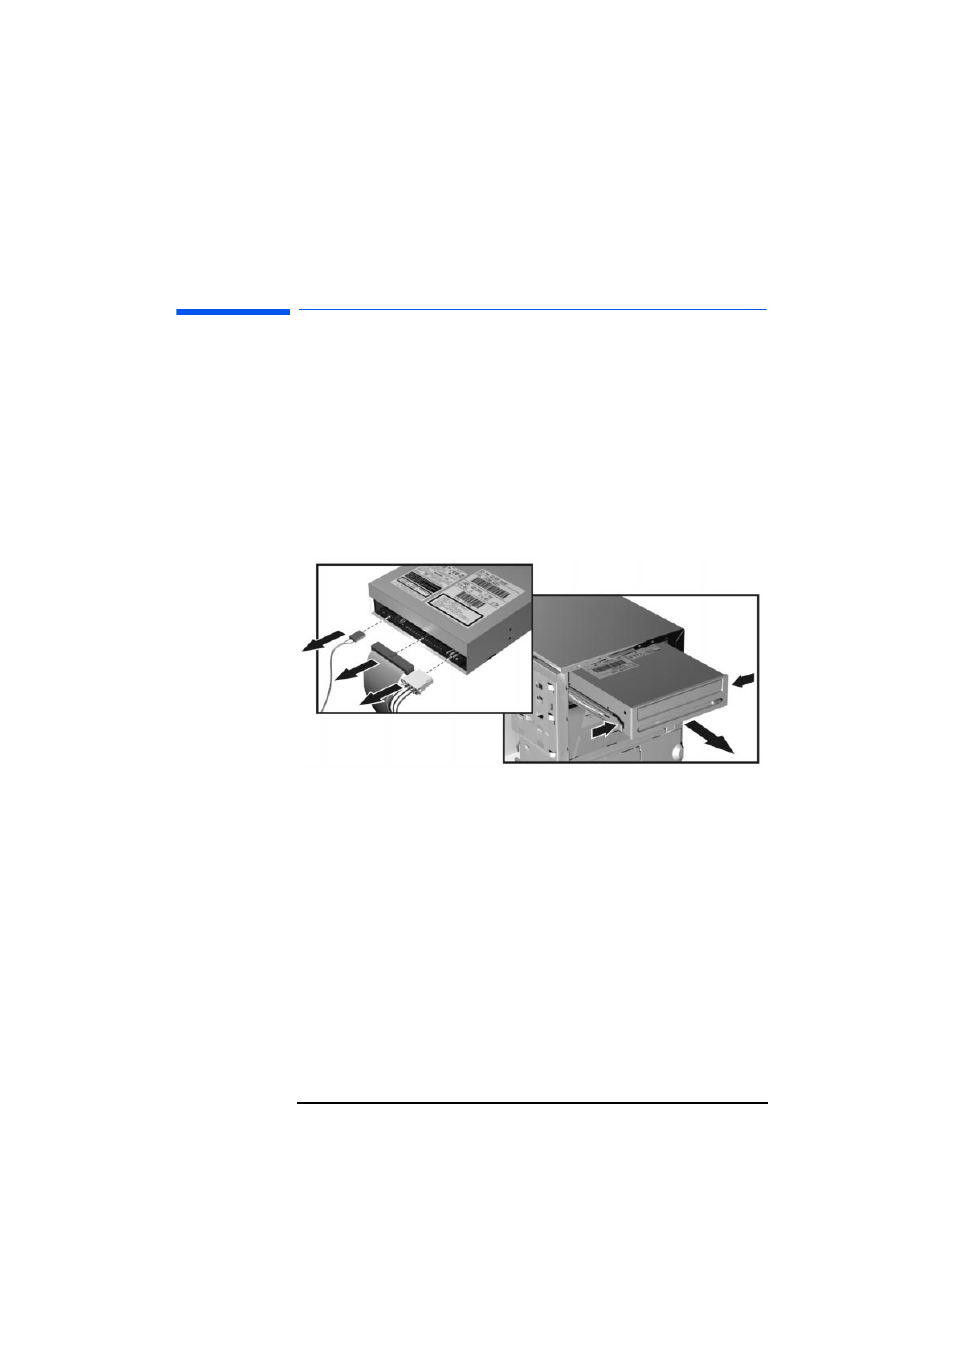
Disconnect the power and data cables from the old drive.
4
Remove the drive. To do this, press the two front clips inward and,
pushing from the rear, slide out the drive.
5
Remove the two long green guide rails by gently prying them off the
drive. These guide rails will be required for the new drive.
Installing the
New Drive
1
Add the guide rails to the new drive. The guide rails are inserted in the
two holes located at the bottom of the drive. There is no specific side to
which these guides must be installed.
2
Align the guide rails on both sides of the drive with the internal shelf
guides, then slide the drive until it clicks into position.
3
Connect the power cable and the data cable to the rear of the new drive.
The connectors are shaped to go in one way only. If you are not sure
which connector to use, refer to "Installing Mass Storage Devices", on
page 32.
4
5
Turn to page 43 to complete the installation.
➍