Using the pads, Playing the pads, Stopping the pad sound – Roland E-A7 61 Key Expandable Arranger Keyboard User Manual
Page 36: Pad settings, Viewing the pad settings, Editing the pad settings, Ad (p. 36), Ts (p. 36), Play phrases, Play tones
36
Using the Pads
Playing the Pads
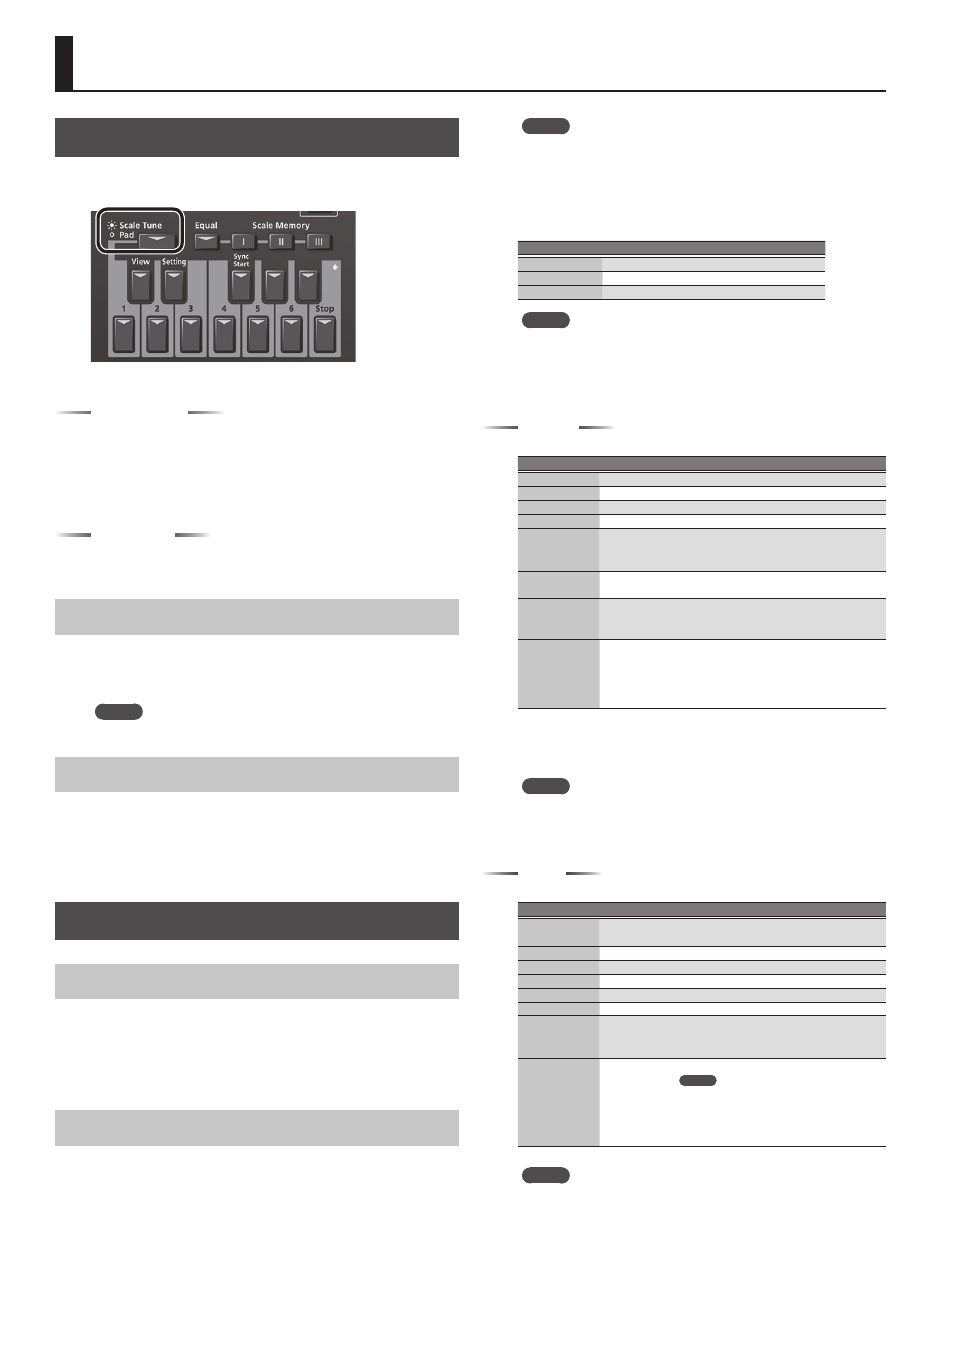
When the
[Scale Tune/Pad]
button is unlit, the keyboard buttons
perform the Pad function.
You can use the Pad function to do the following two things.
Play Phrases
Phrases are sequence data for a single part such as guitar strumming
or a shaker.
Phrases are tempo-synchronized with the Style or SMF, and also
support chord detection.
* Phrases will not synchronize with WAV or MP3 songs.
Play Tones
You can play a specific note number (keyboard location) of a tone.
This is a convenient way to play sound effects or drum sounds.
Playing the Pads
1.
Press any one of the Pad
[1]
–
[6]
buttons.
A sound or phrase is heard according to the settings of Pad Setting 1.
&
MEMO
You can play up to six pads simultaneously.
Stopping the Pad Sound
1.
Press the Pad
[Stop]
button to stop all sound.
If multiple pads are sounding, pressing one of the sounding pad
buttons stops the sound of only that pad button.
If you press a pad button while a tone is sounding, the tone begins
sounding again.
Pad Settings
Viewing the Pad Settings
1.
With the
[Scale Tune/Pad]
button unlit, press the View
button.
The Pad Assign View screen appears.
In this screen you can view the phrases or tones that are assigned to
each pad.
Editing the Pad Settings
1.
With the
[Scale Tune/Pad]
button unlit, press
[Setting]
button.
The Pad Setting screen for the selected pad appears.
If you want to switch the Pad number, select
“Pad number”
with
direct button, then use the Value
[-]
[+]
buttons.
MEMO
You can also access this via
[Menu]
0
“User Program Edit”
0
“Pad Setting.”
You can also access from
“Pad Assign View”
screen.
2.
Use the direct buttons to select Pad Type.
3.
Use the Value
[-]
[+]
buttons to edit the Pad Type.
Pad Type
Explanation
Off
No assign
Phrase
A phrase is assigned to Pad
Tone
A tone is assigned to Pad
MEMO
5
The setting items differ depending on the Pad Type.
5
If you specify Off, pressing that pad does not produce sound.
4.
Use the direct buttons to make other settings.
The following items are available for each Pad Type.
Phrase
Parameter
Value
Explanation
Phrase
Phrase Name
Select a Phrase.
Volume
0–127
Volume of the phrase.
Reverb Send
0–127
Adjusts the reverb send amount.
Chorus Send
0–127
Adjusts the chorus send amount.
MFX
Off, Mfx, A, B
Select the routing to Effect
Mfx:
Effect used on Keyboard Parts
A or B:
Effect used on Acomp Parts
Loop
Off, On
If this is On, the phrase continues playing
repeatedly.
Sync Switch
Off, On
If this is On, the phrase starts at the
beginning of measure divisions in the
Arranger or SMF.
Sync Start
Off, On
If this parameter set ON, Style and SMF
playback start then also begins to ring
Phrase at the same time.
While Style and SMF stop, Pads what this
param set ON is blinking.
Selecting a Phrase
If you select the Phrase parameter, the Phrase List screen appears.
Use the direct buttons to select a phrase.
MEMO
You can switch Sync Start setting On/Off, when you hold down
the Pad
[Sync Start]
button and press the Pad
[1]
–
[6]
button.
* Valid only when the Pad Type is set to Phrase.
Tone
Parameter
Value
Explanation
Tone
Tone Num,
Name
Tone number, name
Note
0 (C-)–127 (G9) Note number
Velocity
1–127
Velocity
Volume
0–127
Tone volume
Reverb Send
0–127
Adjusts the reverb send amount.
Chorus Send
0–127
Adjusts the chorus send amount.
MFX
Off, Mfx, A, B
Select the routing to Effect
Mfx:
Effect used on Keyboard Parts
A or B:
Effect used on Acomp Parts
Hold
On, Off
Holds the sound.
MEMO
A sample that is set to Loop On can be played
continuously (Sample Loop setting: p. 30). A
short audio phrase or a drum pattern can be
imported as a sample, and then assigned to a
tone so that you can play it from the pads.
MEMO
In the case of a tone, you can’t specify Loop or Sync.
Selecting a Tone
If the Pad Type is set to Tone, the Tone List screen appears in the right
display.
Use the direct buttons of the right display to select a Tone.