Connecting the e-a7 to a computer, Installing the music rest, Placing the e-a7 on a stand – Roland E-A7 61 Key Expandable Arranger Keyboard User Manual
Page 11: Connecting your equipment, If the computer does not recognize the e-a7, Rear view, Side view
11
Connecting Your Equipment
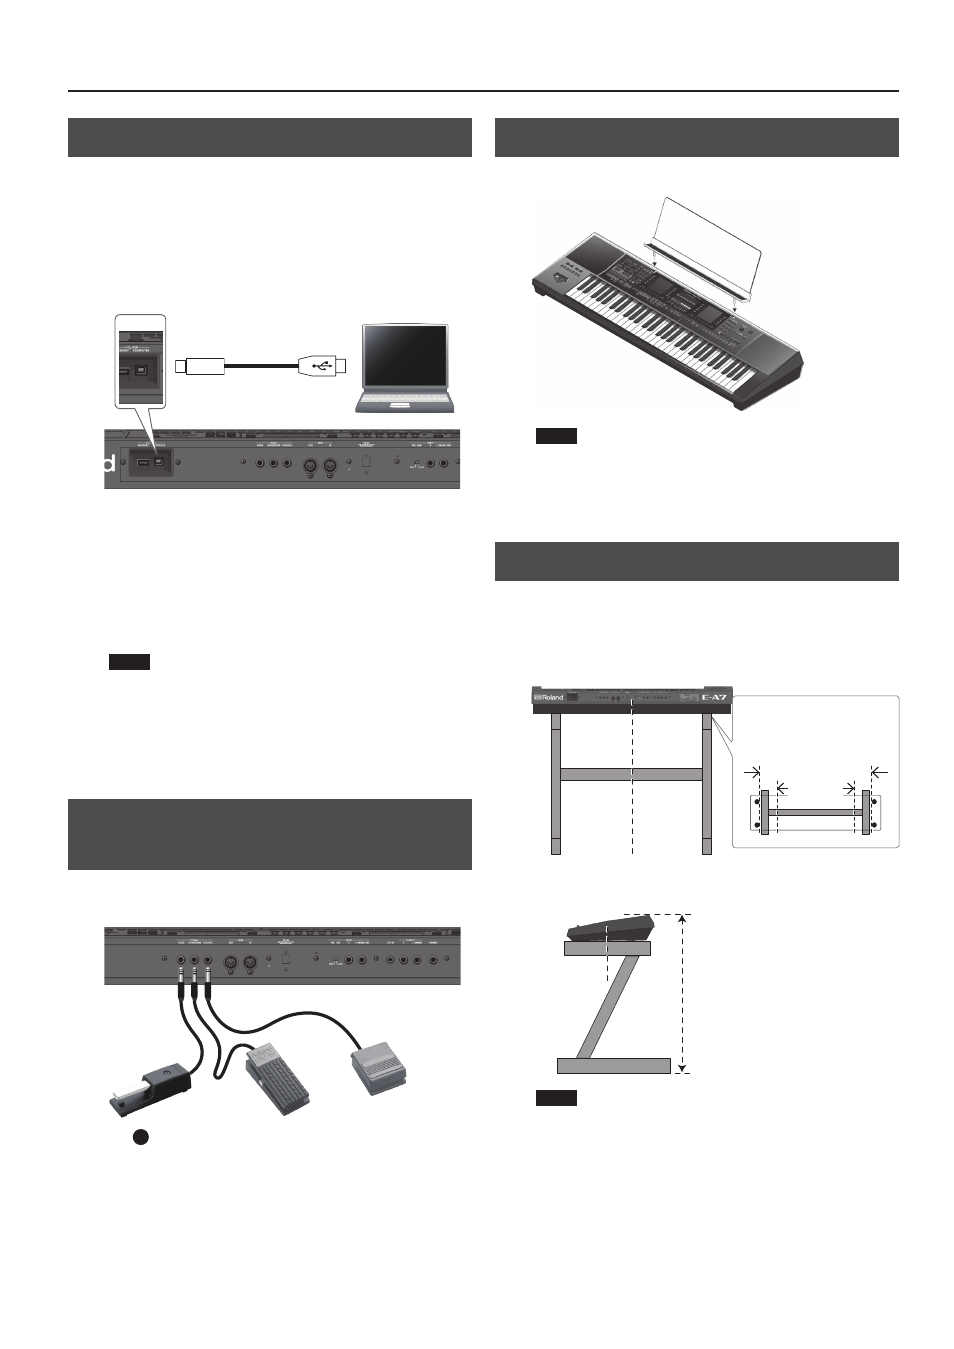
Connecting the E-A7 to a Computer
If a USB cable (sold separately) is connected between the E-A7’s rear
panel USB COMPUTER port and a USB port of your computer, you’ll
be able to do the following things.
5
Use the E-A7 as a sound module.
5
Produce and edit music by transferring MIDI data between the E-A7
and your sequencer.
1.
Use a standard USB cable (sold separately: A
0
B type
cable) to connect the E-A7 to your computer.
If the computer does not recognize the E-A7
When connecting the E-A7 to your computer, there is normally no
need to install a driver. If you experience problems, or if the speed is
too slow, you may be able to solve the problem by installing Roland’s
dedicated driver.
For details on downloading and installing the dedicated driver, refer
to the Roland website.
http://www.roland.com/support/
NOTE
5
Only MIDI data is transmitted and received via the USB cable.
The audio data cannot be transmitted or received via USB.
5
Power-on the E-A7 before you start the MIDI application on
your computer. Never power-on or power-off the E-A7 while
the MIDI application is running.
&
For details on USB settings, refer to
“Reference Manual
(English)”
(PDF).
Connecting a Separately Sold Footswitch
or Hold Pedal
You can connect a pedal switch (sold separately: DP series) or
expression pedal (sold separately: EV-5) to the E-A7’s PEDAL jacks.
&
“ Foot Pedal jack”
Installing the Music Rest
1.
Install the music rest as shown in the illustration.
NOTE
5
When moving the E-A7, be sure to remove the music rest as a
safety precaution.
5
Do not apply excessive force to the music rest.
5
The music rest is not designed to accept the placement of
laptops or other heavy objects.
Placing the E-A7 on a Stand
If you want to place the E-A7 on a stand, use the Roland KS-18Z.
Be careful not to pinch your fingers when setting up the stand.
Place the instrument on the stand as follows.
Rear view
Place the E-A7
so that it is in
the center of
the stand
Adjust the outer width of the stand
within the range shown below.
800 mm–between the rubber feet
of the E-A7
Top view
Between the rubber feet
800 mm or
more
Side view
Place the E-A7
so that it is in
the center of
the stand
Adjust so that the height does not
exceed 1 meter (Adjust the stand
to a level no higher than the third
level from the bottom).
NOTE
5
When placing the E-A7 on a stand, take care not to pinch your
fingers between the instrument and the stand.
5
Using any other combination of instrument and stand
could produce an unstable situation, possibly causing the
instrument to fall or tip over and cause injury.
5
If the instrument is not placed correctly, it will be unstable,
possibly causing the instrument to fall or tip over and cause
injury.
5
For details on assembling the stand, refer to the owner’s
manual of the stand.
B