7 managing quotas – PLANET NAS-7410 User Manual
Page 64

4-Bay SATA NAS RAID Server with iSCSI
NAS-7410
64
To create a list of the UNIX/Linux host:
1. Go to Security→Account menu.
2. Click the UNIX/Linux Host tab.
3. Enters a single host IP address in the first text box.
4. Or, enter the start IP address in the first text box and the last 3 digits of the end IP address in the
second text box to input a range of the host IP addresses of the Host IP field.
5. Click the Add button to add the host IPs to the host list.
6. Click Apply to save the setting.
6.7 Managing quotas
Configuring user quota:
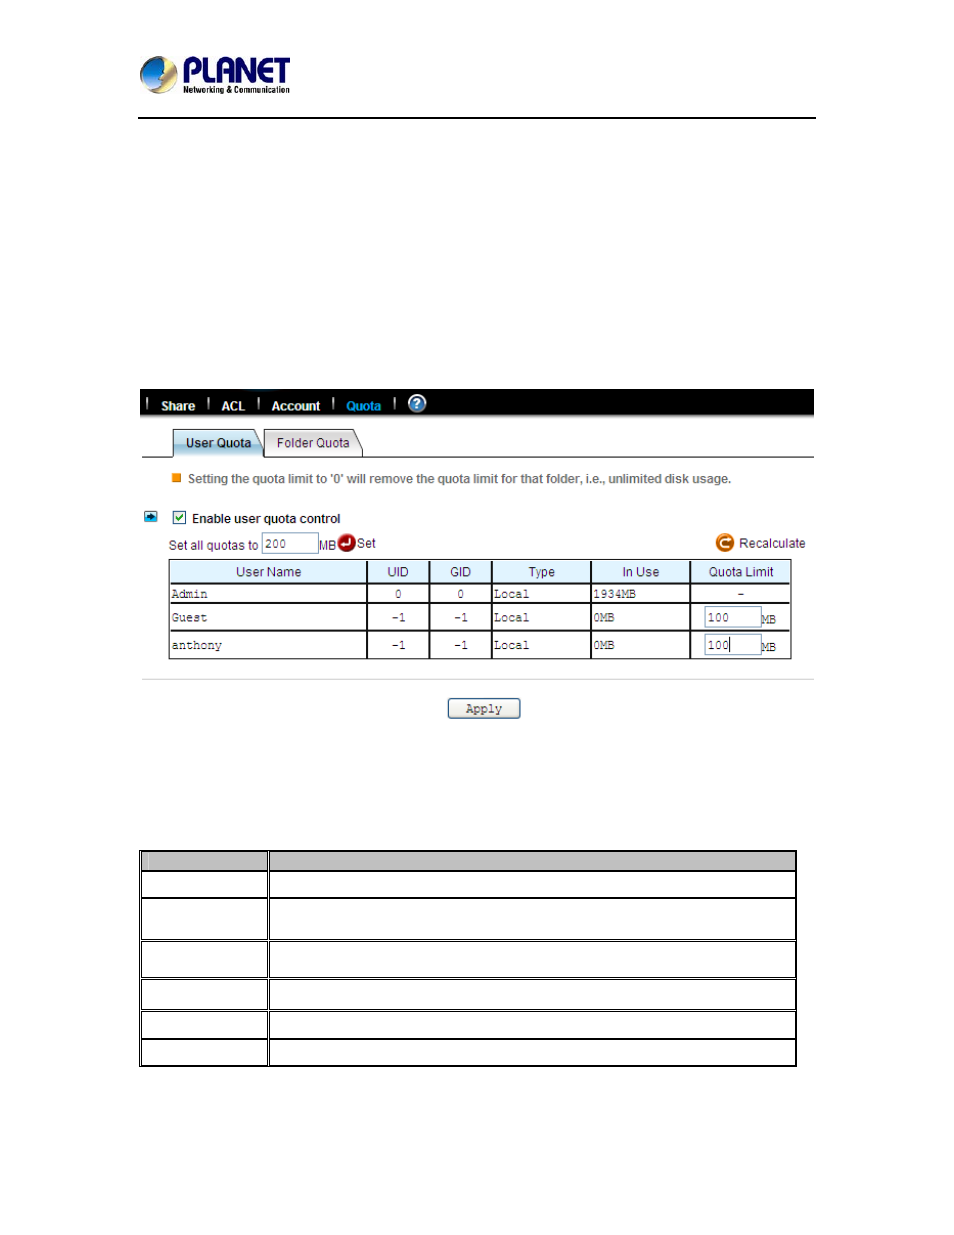
NAS server supports two types of quotas: user quota and folder quota. User quota monitors the
disk space usage of each user. It is based on file ownership, and is independent to which volume
that the file and folder located. Below are the descriptions of the parameters when setting up user
quotas.
Item
Description
User Name
User name in the local user database.
UID
The user ID set in the user mapping table in “Network → UNIX/Linux”
menu.
GID
The group ID set in the user mapping table in “Network → UNIX/Linux”
menu.
Type
User type “Local” or “Domain”.
In Use
Total amount of disk space used by the user.
Quota Limit
The amount of disk space in MB a user is allowed to use.
1. Click the Enable user quota control checkbox to enable user quotas.
2. Enter quota limit in MB for the user under the Quota Limit column.
