5 - mode and settings, Enabling chrono – MCZ Yari AIR User Manual
Page 35
On (Off)
ATTIVA
CRONO
07:30
INIZIO
PROGRAM.1
09:30
FINE
PROGRAM.1
33
5 - MODE AND SETTINGS
Technical Dept. - All rights reserved - Reproduction is prohibited
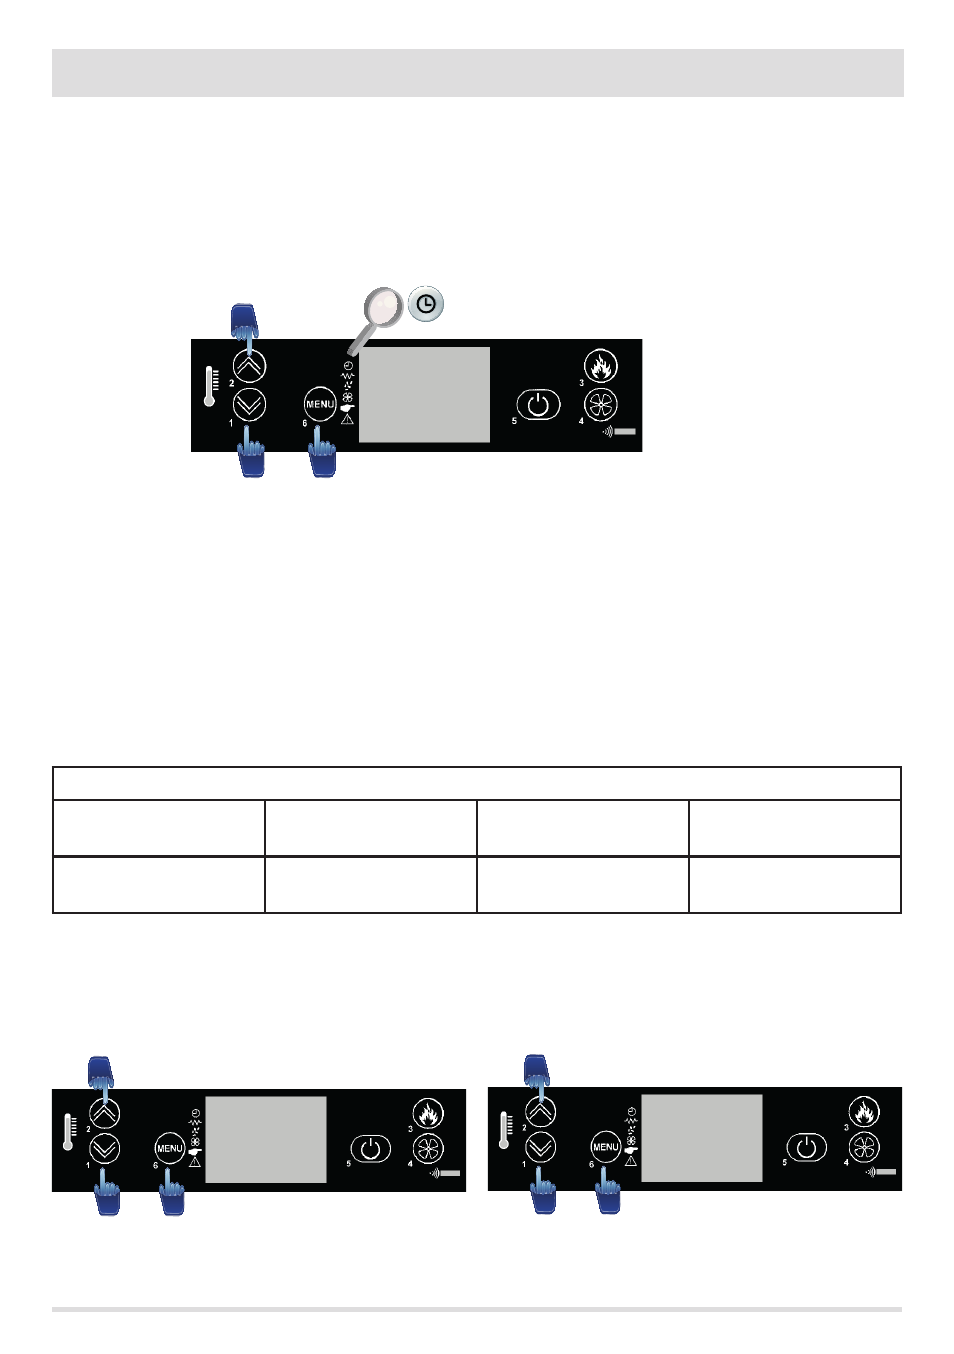
Enabling chrono
Below is an explanation of how to ENABLE THE CHRONO FUNCTION:
press button 6 MENU followed by button 1 to access the “SET CRONO” screen, followed by 6 MENU again to enter the first chrono
entry “ATTIVA CRONO” (ENABLE CHRONO); with buttons 1 or 2 set chrono at ON. The signal on the light on the symbol will come on
instantaneously, indicating that chrono is enabled. To keep scrolling through the various chrono on/off programmes, simply press button
6.
To exit the chrono menu at any time, press button 5.
To DISABLE THE CHRONO FUNCTION repeat the same procedure as you did to enable it: in this order, press button 6 menu > button 1 >
menu 6, followed by buttons 1 or 2 to set “ATTIVA CRONO” (ENABLE CHRONO) at OFF, disabling chrono. Press 5 to exit.
PROGRAMMING
The stove can be set with up to 4 operating programmes, organised over the day or entire week. Each programme features three basic
settings:
• Stove ignition times (between 00:00 and 23:30)
• Stove switch-off time (between the ignition time + 20’ and a maximum of 23:50)
• The days in which stove ignition and switch-off must be ENABLED or DISABLED.
Please look at PROGRAMME 1 (summarized in the following table). It is the first of four programmes in the programming sequence.
PROGRAMME
MENU’ SET CRONO (SET
CHRONO MENU)
INIZIO PROGRAM.1 (START
PROGRAM.1)
FINE PROGRAM.1 (END
PROGRAM.1)
GIORNI PROGRAM.1 (DAYS
PROGRAM.1)
Acronym on display
Ignition time
Switch-off time
Enabled or disabled days - On/
Off
• Press 6 MENU followed by button 1 until you reach the “set crono” (set chrono) screen on the display.
• At this point press 6 MENU twice and set the ignition time for programme 1: use buttons 1 and 2 to increase or decrease the start
time (at 10-minute increments), then confirm with 6 MENU.
• This screen refers to the "end" of the programme: use buttons 1 and 2 here as well to increase or decrease the end time, then confirm
with 6 MENU.