Setting up time-lapse recording – Eneo PNR-5108 User Manual
Page 66
Operating Instructions
58
NOTE: In the schedule setup,
“Preset” indicates a single setting in which the setting values of Time Coverage,
Condition or Action are saved.
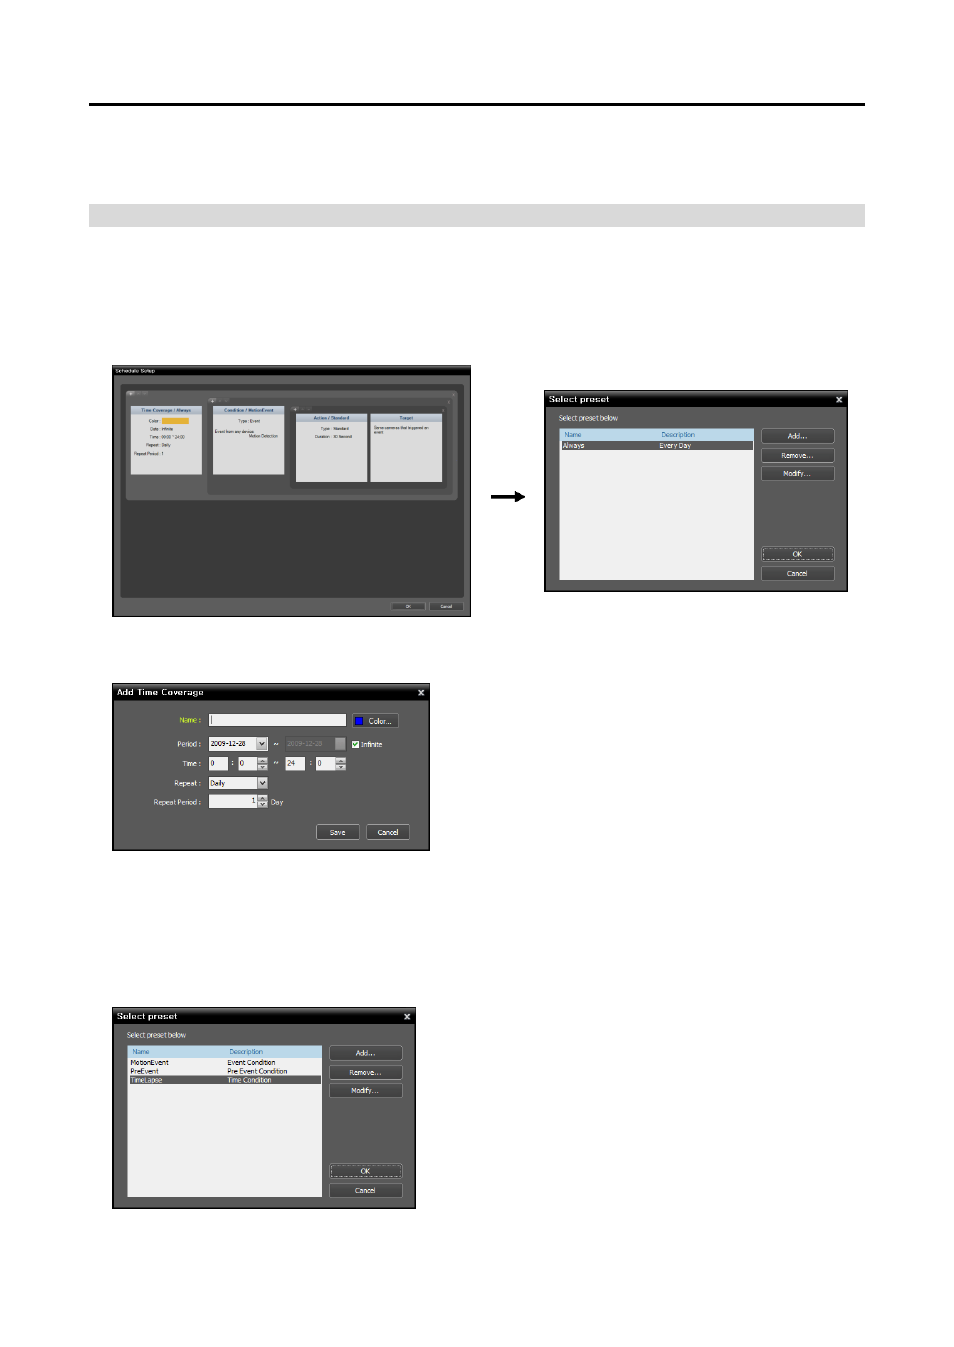
Setting up Time-Lapse Recording
During Time-Lapse recording, the NVR system performs recording continuously based on the schedule
settings for the scheduled time (supported only for devices registered on the recording service).
1. Set up the schedule time by double clicking the Time Coverage schedule window, and then selecting
a desired Preset.
You can add a new Preset or edit a saved Preset by clicking the Add or Modify button. Refer to the
following explanation for setting up a schedule.
Name: Enter the Preset name.
Color: Click the button and select a desired color. The
scheduled time section will be highlighted with the
selected color in the schedule table.
Period: Set up the schedule time. Selecting the Infinite
option causes continuous recording based on the
Condition, Action and Target preset settings without
limiting the period.
Time: Set up the schedule time.
Repeat, Repeat Period: Set up the recording interval and interval period. The NVR system will
perform recording at the designated interval during the interval period.
2. Set the recording mode to the Time-Lapse Recording mode by double clicking the Condition schedule
window and selecting a desired Preset of time condition.
You can add a new Preset or edit a saved Preset by clicking
the Add or Modify button. Clicking the Add or Modify
button displays the following setup screen.