On the lcd, To record an audio track, On the vga – Teac SX-1 Quick Start Guide User Manual
Page 30: Chapter 7 –basic moves
Chapter 7 –Basic Moves
30
TASCAM SX-1
Quick Start Guide
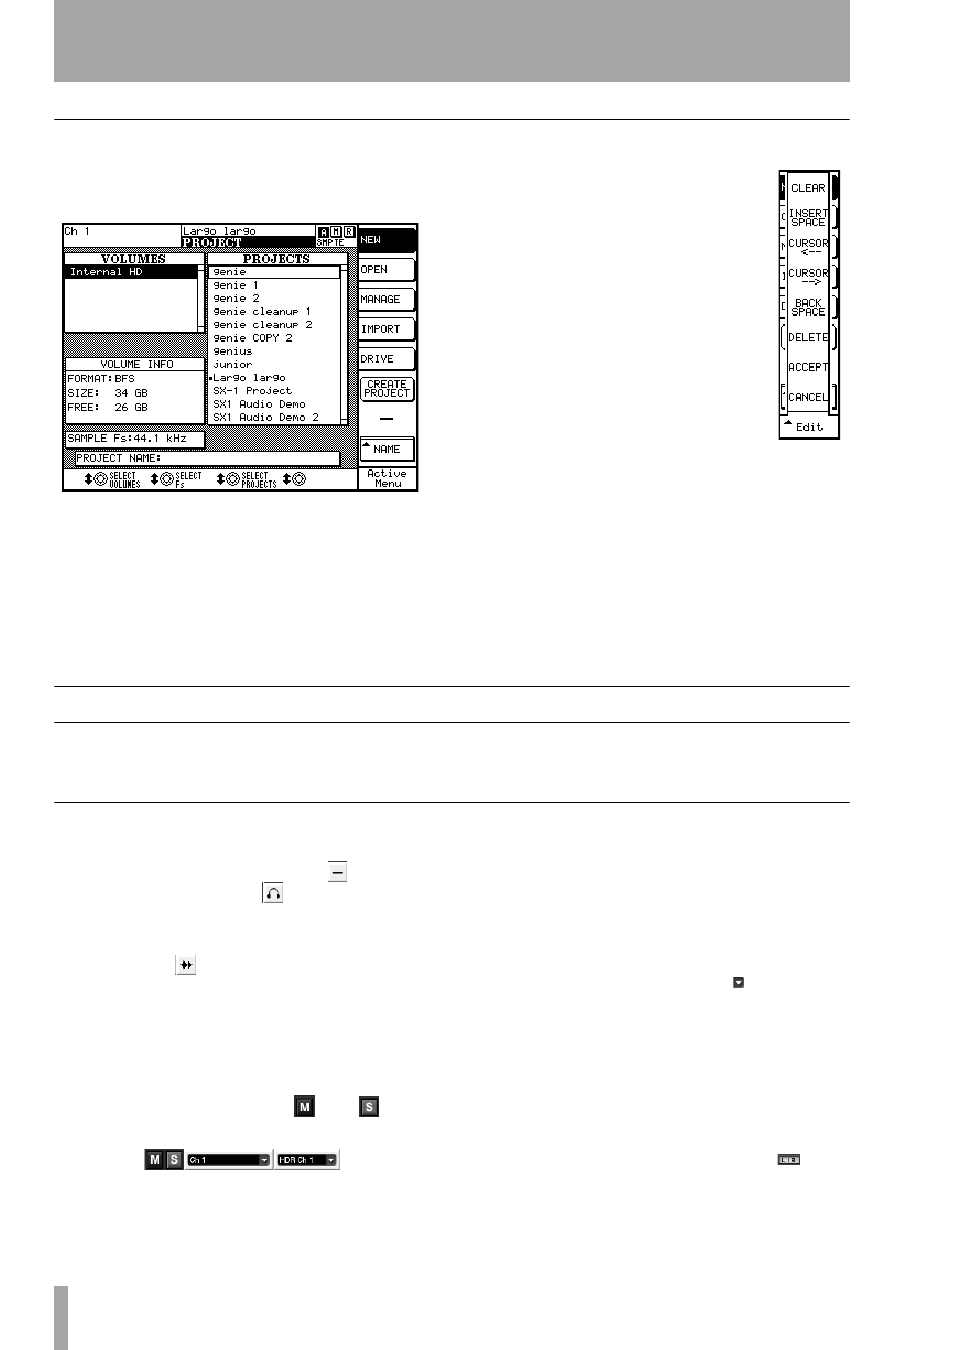
On the LCD
1
Press the
PROJECT/BACKUP
key in the
MAIN DISPLAY MODES
section of the
surface:
2
Press the
NEW
soft key (top right) if it is not
already highlighted.
3
Press the
NAME
soft key (bottom
right). You will see this menu
appear on the right side of the
screen.
4
Name your project as
Test Project
by using the keys of the numeric
keypad (the way this works is the
same principle as the keys on a
mobile/cellular telephone). Use
the cursor keys to move back-
wards and forwards without
changing anything, or user the
Backspace key just like the
Delete key on a PS/2 keyboard.
This process may take a minute or two to
master, but all the naming functions on the
SX-1 use the keyboard functions in this way,
so this learning time is time well spent.
5
When you’ve finished, press the
ACCEPT
key.
6
Press the
CREATE PROJECT
button and you’re
finished. You have now created a new
project.
To Record an Audio Track
Follow these steps to record an audio track. For both
the VGA and LCD examples, make sure an audio
source is connected to analog input 1 on the top
panel.
On the VGA
1
On the
Track
page, locate the slots on the left
side of the screen, and click the
icon with
the mouse (next to the
icon).
2
From the pulldown menu that appears, select
New Audio Take
and release the mouse. A wave-
form icon (
) should now replace the pre-
vious “dash” icon.
3
Click in the field containing
New Audio Take 1
and rename it to
Audio Test
using the PS/2 key-
board. Press [ENTER] on the keyboard to
finish the naming process.
4
Directly to the right of the
and
but-
tons, you will see two pulldown menus:
The first field displays the input to the Take
we are recording on, and the second displays
which voice we will be using to play back the
Take (there are 16 playback voices). Chang-
ing the voice will change where the output of
that track appears to the console.
The first field should display
CH1
(signifying
Channel 1’s Direct Out) as the source. If it
does not say this, click on the icon (pull-
down menu, and select
Ch1
from the menu.
5
Press the
MIXER
key on the
MAIN DISPLAY
MODE
section, and then press the
1–16
key in
the
FADER BANK
section on the slanted front
panel.
6
Bring up fader 1 (analog input 1) to unity (
0
).
7
Use the mouse to click Channel 1’s
button (to remove Channel 1’s output from
the L/R bus).