Scotsman Prodigy Series User Manual
Page 62
January 2015 Page 62
Test Procedures - Liquid Line Solenoid
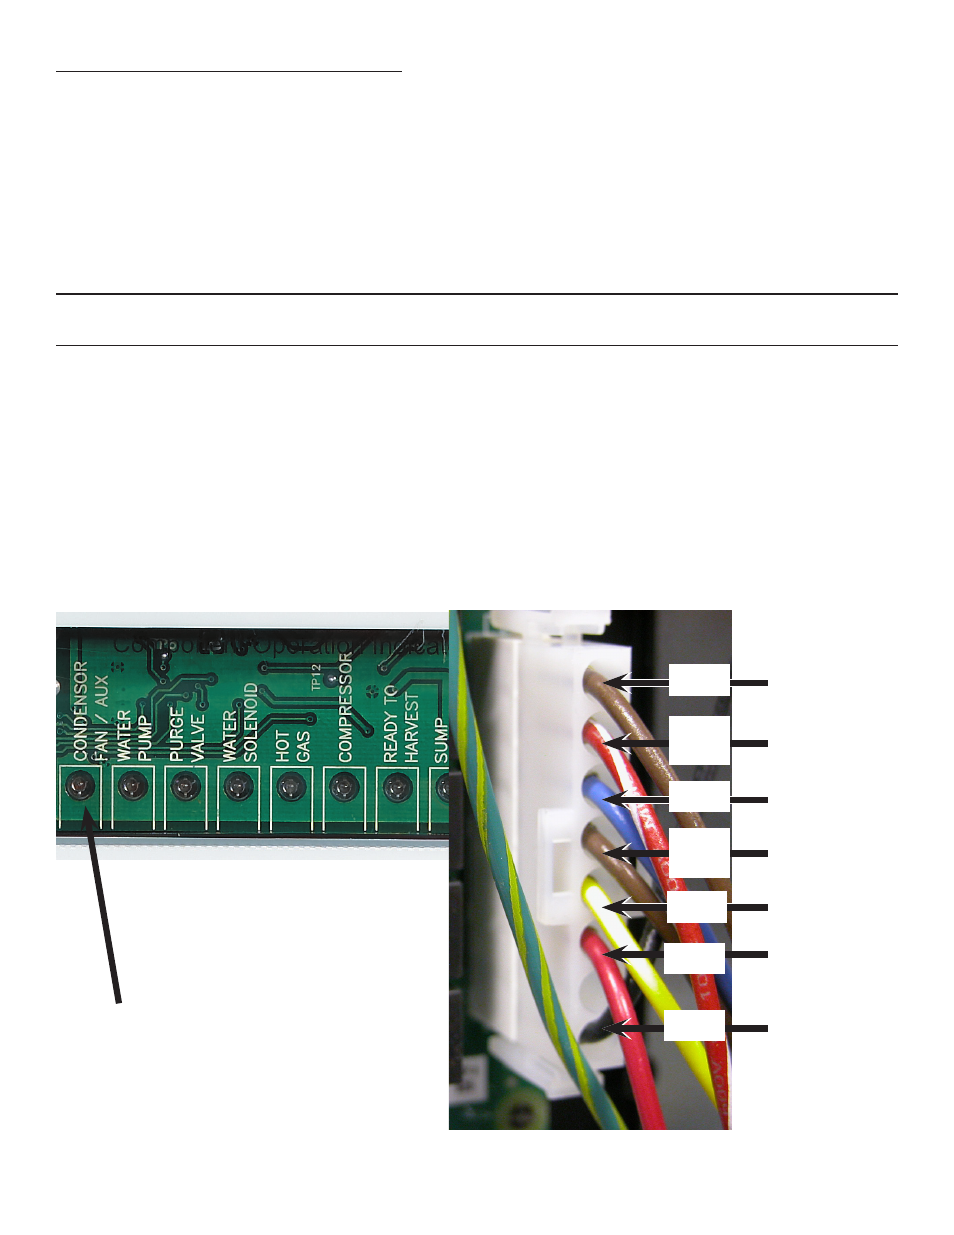
1. Test using the controller’s indicator lights. Put the controller into test mode (depress Off for 3 seconds
then depress Clean for 3 seconds). At the end of the test cycle, the liquid line valve will be powered and the
Condenser Fan motor indicator light will be on. The liquid line valve should be open at that time.
If it is not, repeat the test but check the voltage to the liquid line valve coil, it must receive full voltage at the
liquid line lead connection at the end of the test. If there is voltage and the valve does not operate, replace the
valve coil.
If there is no voltage, check the controller high voltage harness connection. The liquid line solenoid lead is the
top wire. Check voltage from it to ground, at the end of the test, when the Condenser Fan indicator light is On,
there must be voltage from this pin to ground or, on 220 volt models, to the other power leg.
Note: high voltage power is supplied to the bottom pin from the contactor line. Refer to the machine
wiring diagram as needed.
2. Test using an ohmmeter. Disconnect electrical power. Unplug liquid line coil from harness. Measure liquid
line coil resistance. If open, replace the liquid line valve coil.
8 - Fan Motor
7 - Inlet Water Sol
6 - Water Pump
5 - Hot Gas Valve
4 - Compressor
3 - Purge Valve
1 - Line In
Brown
Blue
Yellow
Red
Black
Red
White
Brown
White
Indicator light for Liquid Line Coil