Test procedure – Scotsman Prodigy Series User Manual
Page 59
January 2015 Page 59
Test Procedure -
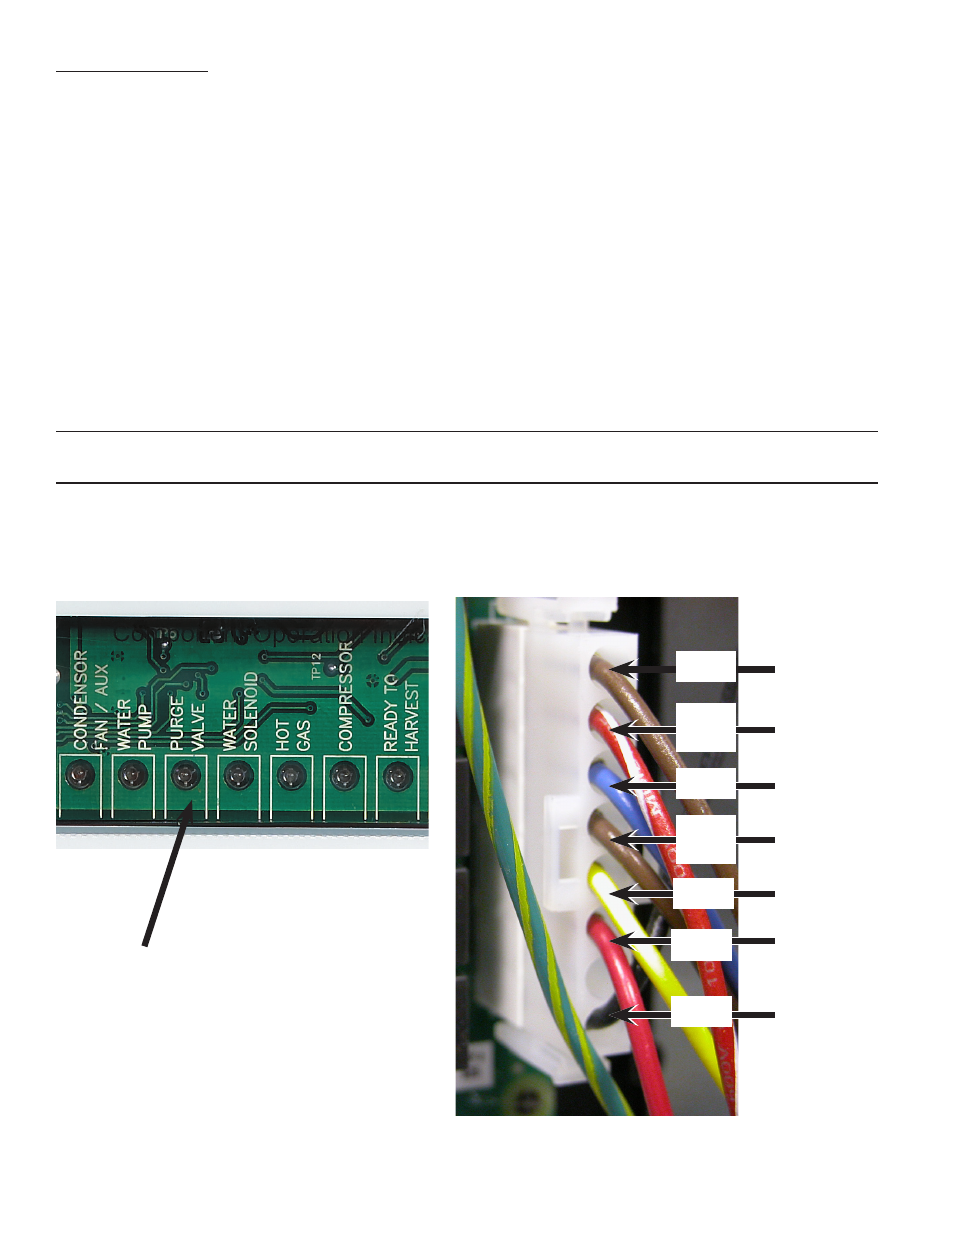
Purge valve
1. Test using the controller’s indicator lights.
• Shut unit off by holding the Off button for 3 seconds. Wait four minutes.
• Push and release the On button, observe the Purge Valve indicator light. As the unit drains the reservoir,
the purge valve will be powered. When it gets power, the indicator light will be ON.
• If the purge valve does not open to drain the reservoir when its indicator light is on, do a voltage check.
Shut the unit down by holding the Off button in for 3 seconds. Unplug the harness connection from the
purge valve.
• Wait four minutes. Push and release the On button to restart the machine.
• As the unit drains the reservoir, the purge valve connection should receive full voltage. If it does, the
purge valve should be replaced. If there is no voltage, check voltage from the controller to ground. The
purge valve pin is 3 (dump valve on wiring diagram). If there is voltage from that pin to ground, but low
voltage at the valve harness connection, the harness has a broken wire or poor connection and must be
replaced.
• If the voltage to ground is low, the controller should be replaced.
Note: The coil of this valve is internally rectified, and will normally show infinite resistance when
tested with an ohmmeter
This light will be ON
when the Purge Valve
is powered.
8 - Fan Motor
7 - Inlet Water Sol
6 - Water Pump
5 - Hot Gas Valve
4 - Compressor
3 - Purge Valve
1 - Line In
Brown
Blue
Yellow
Red
Black
Red
White
Brown
White