Section 2 - assembly and installation, Installing the head assembly, Nstalling the – Rena T-950 User Manual
Page 16: Ssembly, Caution
ASSEMBLY AND INSTALLATION
10
SECTION 2 - Assembly and Installation
The XPS-ProTab 4.0 is shipped in two cartons, on a single skid. The Base unit is located below
the Head Assembly. Remove the carton, which contains the Head Assembly, from the top of the
carton that contains the Base unit. Remove the cardboard carton from the pallet to expose the
base unit. Next remove the Base unit from the pallet and place it on a stable floor surface.
Remove the Head Assembly from its packaging material and follow the assembly instruction
below.
The T-950 is shipped in one carton, on a skid. Remove the cardboard carton from the palette, and
then remove the Head Assembly from the packing material. Next, remove the Base unit and
place it on a flat working surface. Please follow the assembly instruction below.
Installing the Head Assembly
CAUTION
The Head Assembly is heavy. It is strongly recommended that two
technicians install the Head Assembly of the tabber to the base.
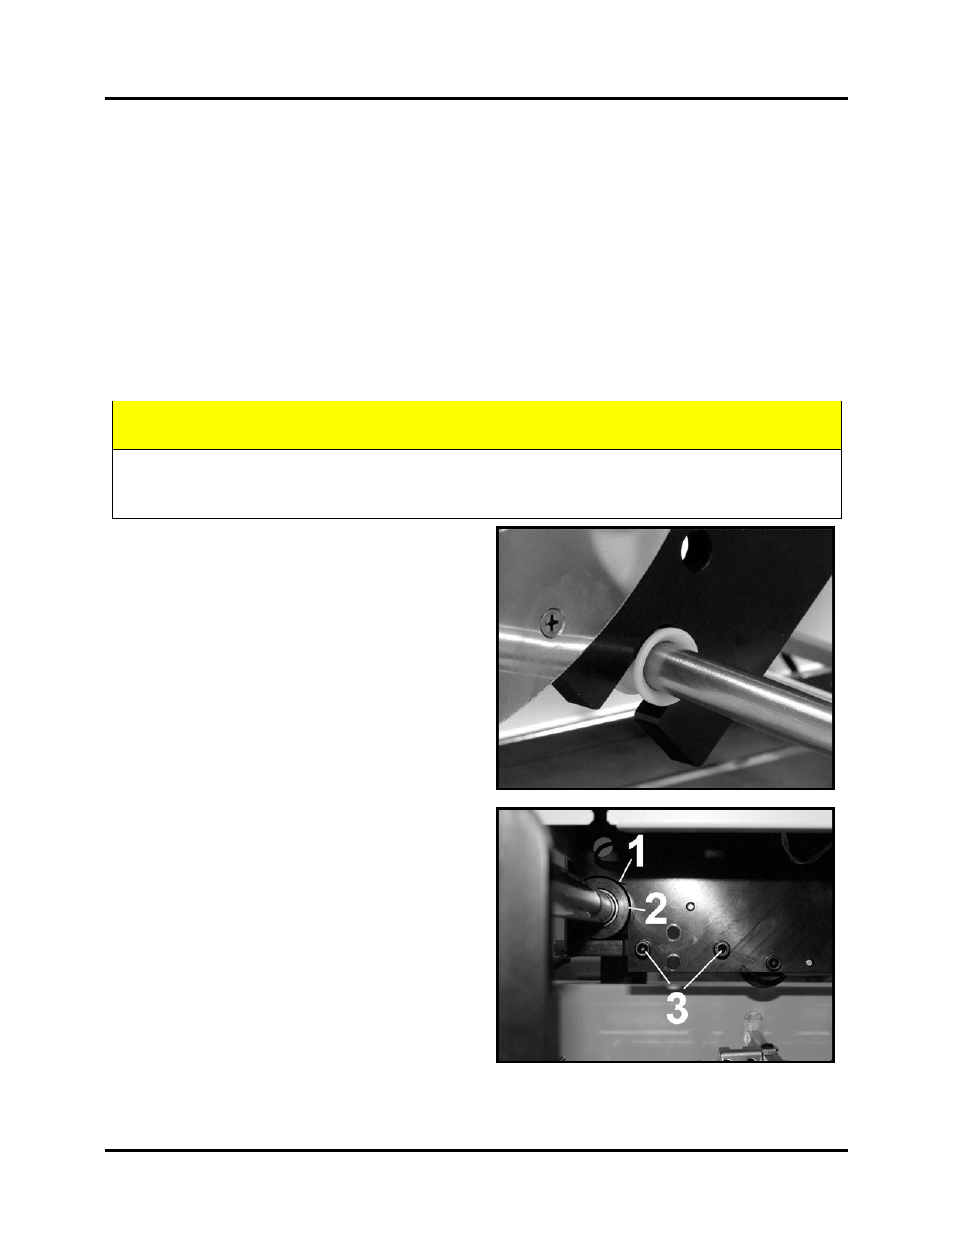
1. Place the open slot of the Head Assembly
over the nylon bushing on the base unit.
The Head Assembly has to be tilted at an
angle to accomplish this.
2. Lower the head into position over the
Head-adjusting guide. There are two
flats cut into the adjusting guide. One at
the top [1] and one on the left hand side
[2]. The Head Assembly frame should
rest in the top flat [1] and against the left
hand flat [2]. When the head assembly is
properly positioned, the two screws [3]
that attach the Head assembly to the
adjusting guide can be installed.