Modeling – Ivoclar Vivadent IPS e.max Press Abutment Solutions v.2 User Manual
Page 10
10
Modeling
Fabricationofaresincoping
To prepare the wax-up, a resin coping is prepared if both hybrid abutments and hybrid abutment crowns
are fabricated. Please observe the following procedure:
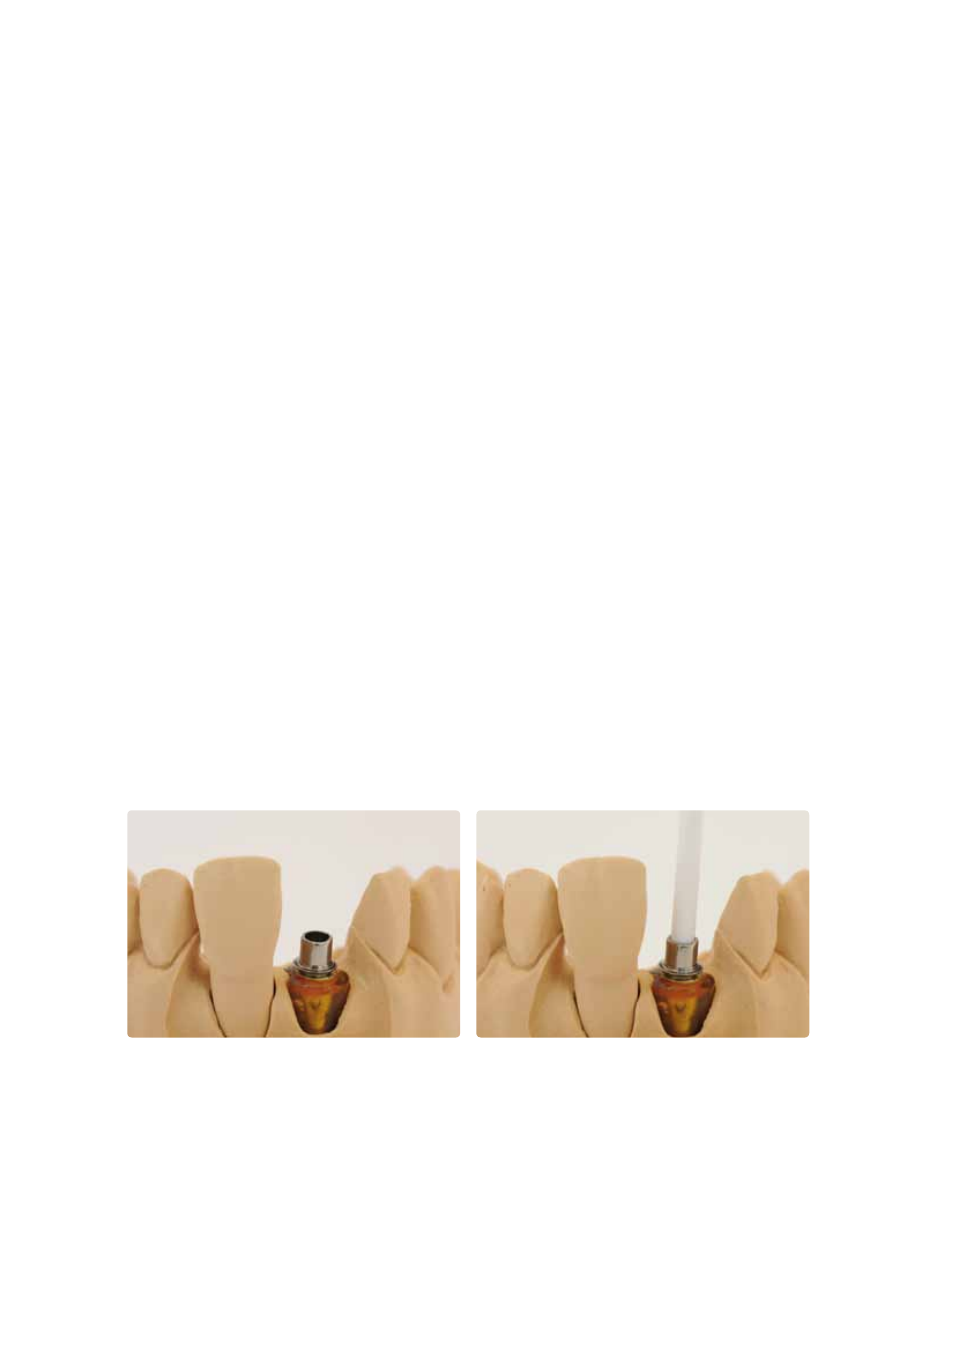
– Check the implant position and inclination with regard to the position of the screw channel.
– Screw the Ti base onto the model analog with the corresponding screw.
– Tip: Make sure that an additional model analog is available as this will facilitate some steps.
– Clean the Ti base with a steam cleaner.
– Insert a pin with the same diameter as the screw channel to "seal" and "extend" the screw channel.
– Do not apply die spacer.
– Isolate the Ti base and the pin with a thin application of separator. If too much separator is used, this
might result in uneven areas on the inner aspect of the pressed object.
– In order to achieve a sound fit and to facilitate the subsequent wax-up, a coping is first fabricated on
the Ti base with modelling resin. Design the coping in such a way that it can subsequently be com-
pletely covered with modelling wax. Please observe the instructions of the manufacturer regarding the
processing of modelling resin.
– Remove the Ti base from the model.
– Eliminate possible over-contoured areas of the resin coping at the transition area to the Ti base by
means of rubber polishers. Do not damage the Ti base.
– Remove the resin coping together with the pin from the Ti base.
– Loosen and remove the pin by rotating the resin coping.
– Screw the Ti base onto the model analog again.
– Place the resin coping back on the Ti base and check the fit and dimension (e.g. silicone key). If
necessary, adjust the coping by means of rotary instruments.
Screw the Ti base onto the model analog with the corresponding screw.
–
Insert a pin with the same diameter as the screw channel to "seal" and "extend"
the screw channel.