Installing esata, Connect hdmi monitor, Connect vga monitor – Grandstream GVR3550 User Manual User Manual
Page 20: Installing, Sata, Connect, Hdmi, Monitor, Igure, Gvr3550
Grandstream Networks, Inc.
GVR3550 User Manual
Page 20 of 120
Firmware Version 1.0.0.65
Last Updated: 10/2014
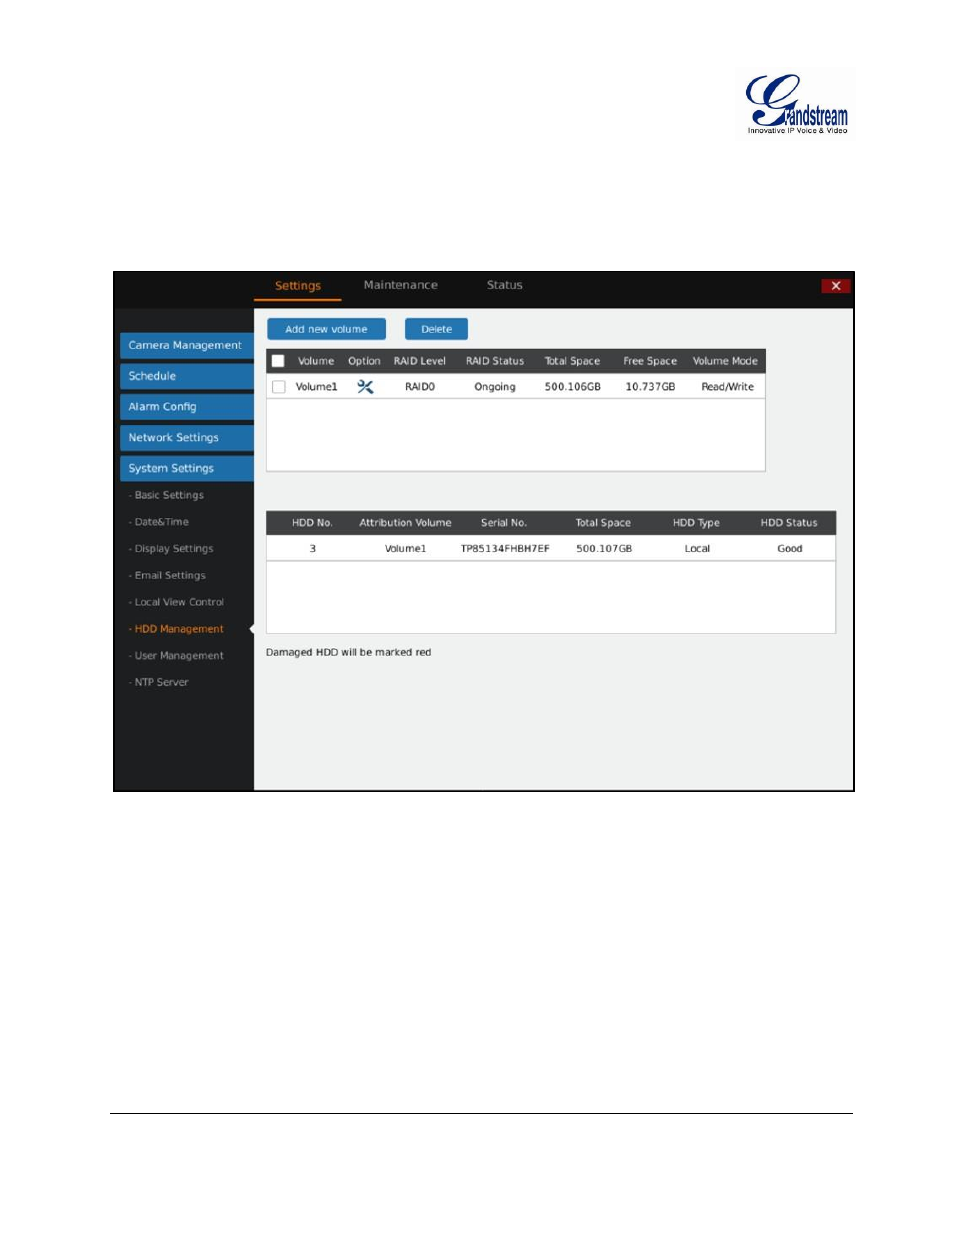
INSTALLING eSATA
Plug in the eSATA cable to the corresponding interface on the rear panel of the GVR3550, power up
eSATA or electrify it with USB cable (according to eSATA specific situation).Users could go to Settings-
>System Settings->HDD Management to view details like HDD Space, Free Space, HDD Status, HDD
Type after installing eSATA. For details, please refer to the chapter HDD Management.
Figure 9: GVR3550 HDD Management Page
CONNECT HDMI MONITOR
Connect one end of the HDMI cable to the port on the rear panel of the GVR3550, and the other end to the
corresponding port of the HDMI monitor. Once powered up, one preview screen of the GVR3550 appears
on the HDMI monitor. GVR3550 can automatically adapt to HDMI monitor with 1080p and 720p
resolution.
CONNECT VGA MONITOR
Connect one end of the VGA cable to the port on the rear panel of the GVR3550, and the other end to the
corresponding port of the VGA monitor. Once powered up, the boot screen of the GVR3550 appears on the
VGA monitor.