Figure 7 – Gasboy Atlas Discharge User Manual
Page 12
Installing the M06228K001 or M06228K002 Kit
Page 12
MDE-4503 Atlas Discharge and Valve Conduit Retrofit Kit • July 2005
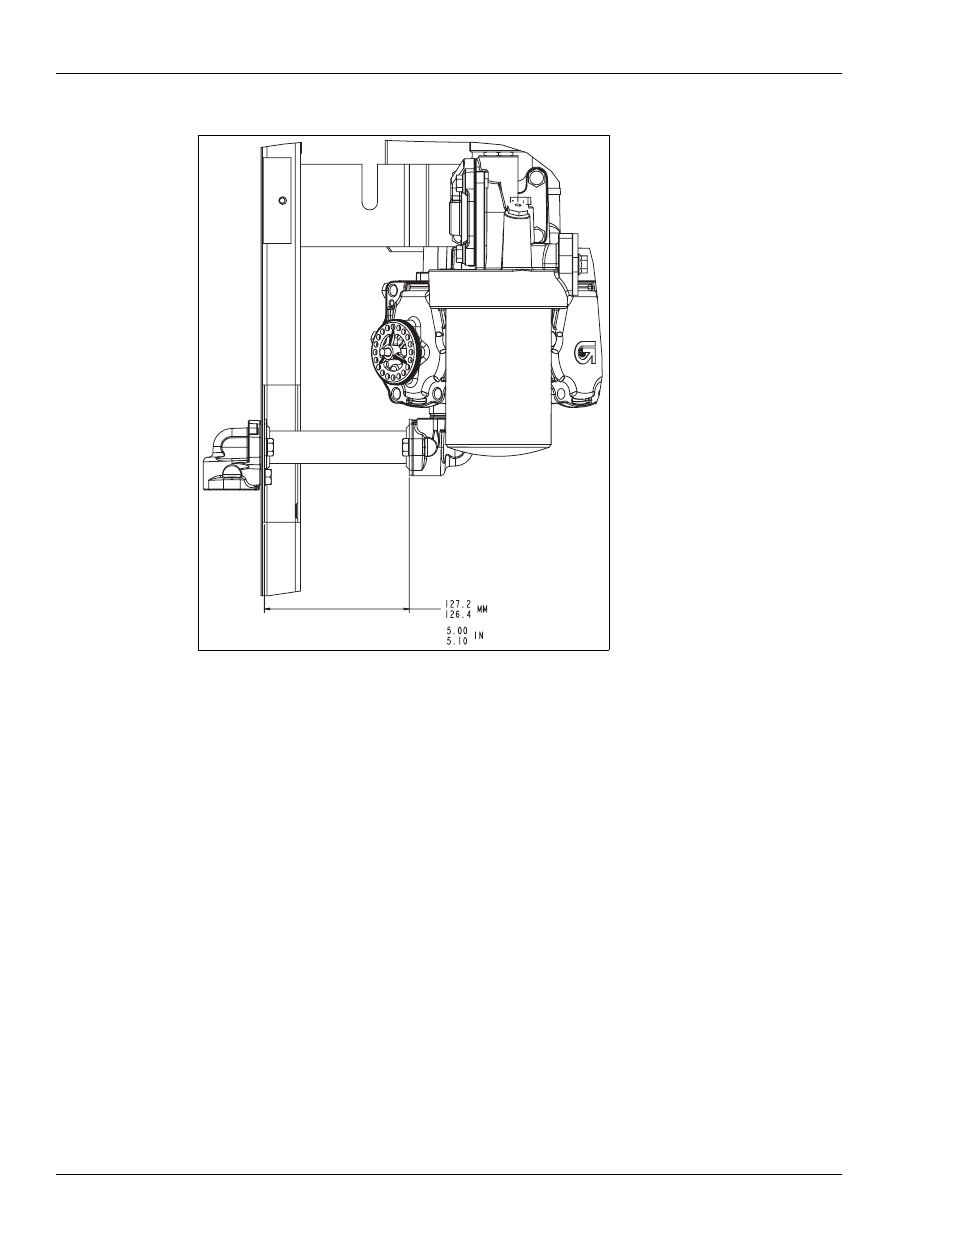
Figure 7: Flange to Frame Dimension
39
If there is a second meter, repeat steps 31 to 38.
40
If the meter shaft to computer/pulser joint was taped at the beginning of the process, remove
the tape and check the connection.
Reconnecting the Conduit:
41
While referencing
, thread the valve wires through the union half attached to the
junction box and into the box.
42
Tighten the conduit fittings.
43
Reconnect the wiring same as originally wired.
44
Replace the junction box cover and tighten the bolts.
45
Check all bolts and connections. Use start-up procedures as noted in MDE-2531.
See also other documents in the category Gasboy Hardware:
- 216S (18 pages)
- Atlas Fuel Systems Site Prep Manual (42 pages)
- Atlas Technician Programming Quick Ref (2 pages)
- ATC M05819K00X Kits (28 pages)
- Atlas Fuel Systems Owner Manual (80 pages)
- Gilbarco Global Pumping Unit Operation Manual (42 pages)
- 26 (7 pages)
- Atlas Valve Replacement Kits (10 pages)
- Atlas Fuel Systems Installation Manual (100 pages)
- 9120K (8 pages)
- 9820K (6 pages)
- Atlas Single Std. Inlet Centering Kit (8 pages)
- 8800 Atlas (1 page)
- 9120K Series Service Manual (40 pages)
- 9800A Atlas (6 pages)
- 9800 Atlas (14 pages)
- 9800 Atlas (20 pages)
- M08400 (6 pages)
- 9100 Series (8 pages)
- 9820K Series Installation (62 pages)
- 9853K (8 pages)
- 9216KTW (36 pages)
- Recommended Spare Atlas (14 pages)
- DEF Atlas (28 pages)
- 9820K Series (12 pages)
- 9800Q (1 page)
- Q Series (3 pages)
- 8753E (2 pages)
- 9152AXTW2 (1 page)
- 8800E (2 pages)
- 8800E (1 page)
- 9820Q Series (1 page)
- Atlas Start-up (230 pages)
- 2600A (12 pages)
- 2600A (2 pages)
- 9800Q Front Load Vapor (2 pages)
- 215A (1 page)
- 9800A (4 pages)
- 9820A (1 page)
- 2600A (3 pages)
- 216A (31 pages)
- 215A (2 pages)
- 9800Q Vapor (2 pages)
- Lamp Kit (2 pages)
- 9120Q Pulser (1 page)