Formax 6900 Series User Manual
Page 18
17/40
17/40
17/40
17/40
Fig. 24
5.7
5.7
5.7
5.7
Envelope hopper adjustment
Envelope hopper adjustment
Envelope hopper adjustment
Envelope hopper adjustment
The IN-3 can be equipped with a second hopper, the EF-3
(see section 10.2 page 32). This hopper is then called
“hopper B”. The IN-3 standard hopper is called “hopper
A”. Although an operator manual is delivered with the EF-3,
on this page you will also find a description of the hopper
adjustments.
Fig. 25
5.7.1
5.7.1
5.7.1
5.7.1 Side guides adjustment hopper A
Side guides adjustment hopper A
Side guides adjustment hopper A
Side guides adjustment hopper A
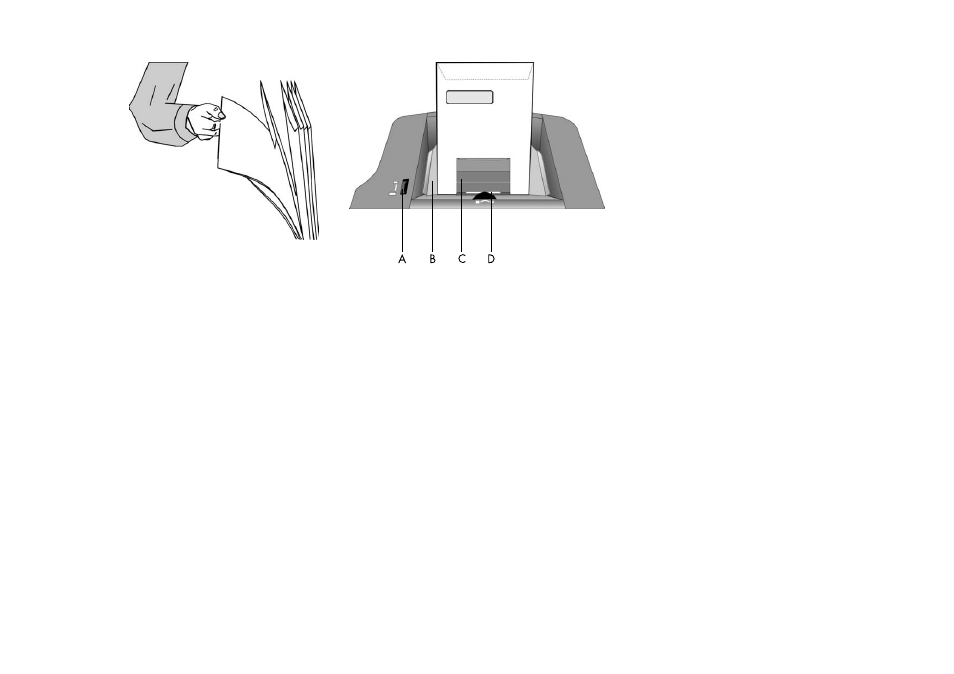
Take a stack of about 20 envelopes. Fan the envelopes a bit
(see Fig. 24) and place the envelopes upright in the system
with the flap to the back. Place the press bracket C on the
envelopes.
Adjust the envelope hopper side guides B by turning the
thumbwheel A, to provide just enough space for the
envelopes to move freely. Too much play causes skewing.
When using C4 envelopes check if the blade spring on the
sealing table is up. The spring is visible after lifting the loc.
The purpose of the spring blade is to obtain better support
when using thin A4 sized documents.
5.7.2
5.7.2
5.7.2
5.7.2 Envelope separation hopper A
Envelope separation hopper A
Envelope separation hopper A
Envelope separation hopper A
Adjust the envelope separation by turning thumbwheel D
(see Fig. 25) until one envelope is just about to be pulled in.
After starting the system it may occur that more than one
envelope at a time is pulled in. If this happens, rotate the
thumbwheel slightly until only one envelope at a time is
pulled in. Adjustments can be made with the system
operating.