Daktronics Venus DataStreamer User Manual
Page 52
46
Creating Messages for a DAKTicker
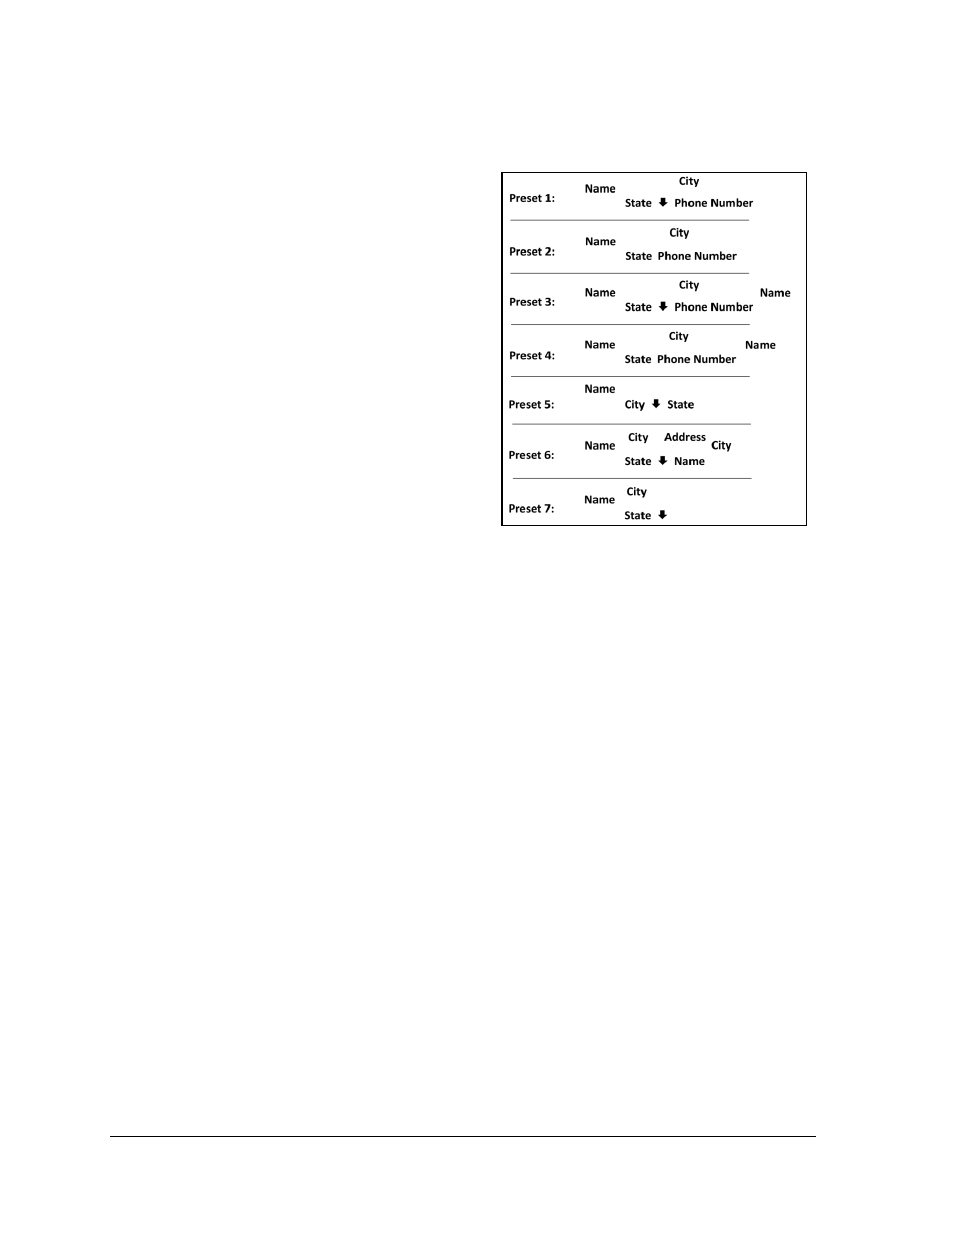
8. Click the down arrow next to the Layout field to select a format for the information to
appear on the display. When using a custom preset, it will be necessary for the user
to click the plus sign + next to the
layout field to add rows to be
formatted. See preset examples
available for database frames in
9. Click the arrow next to Background to
set the DAKTicker’s background
color.
Note: This feature is available only
for RGB displays.
10. Under the Item column, click into a
field to make the field active. Use the
down arrow to choose the database
information that will show up in that
field. Repeat this step for the fields
under Color, Font, Format, and
Conditional (if applicable). Refer to
Section 8 for information on setting
conditionals.
Note: The Justification field is set by the layout that is chosen and cannot be
changed unless the layout is set to a custom preset.
11. Under Image, click the cell containing NO and click the … button that appears. Check
the Replace Text with Image box to replace text with an image. Venus DataStreamer
will look for an image that has a tag matching the text for that field. Please refer to
Section 5 for further information regarding configuring images with the Image
Explorer. The size of the image displayed on the ticker can be specified under Image
Size. Click OK to confirm changes. Yes will appear in the Image column.
Note: When an image is used, the color, font, and format attributes are not used.
12. From the File pull-down menu, click Save As to save the message and information.
The message is now saved and ready to be sent to the display.
Figure 80: Database Preset Layouts