Section 5: image explorer, Section 5, Image explorer – Daktronics Venus DataStreamer User Manual
Page 37
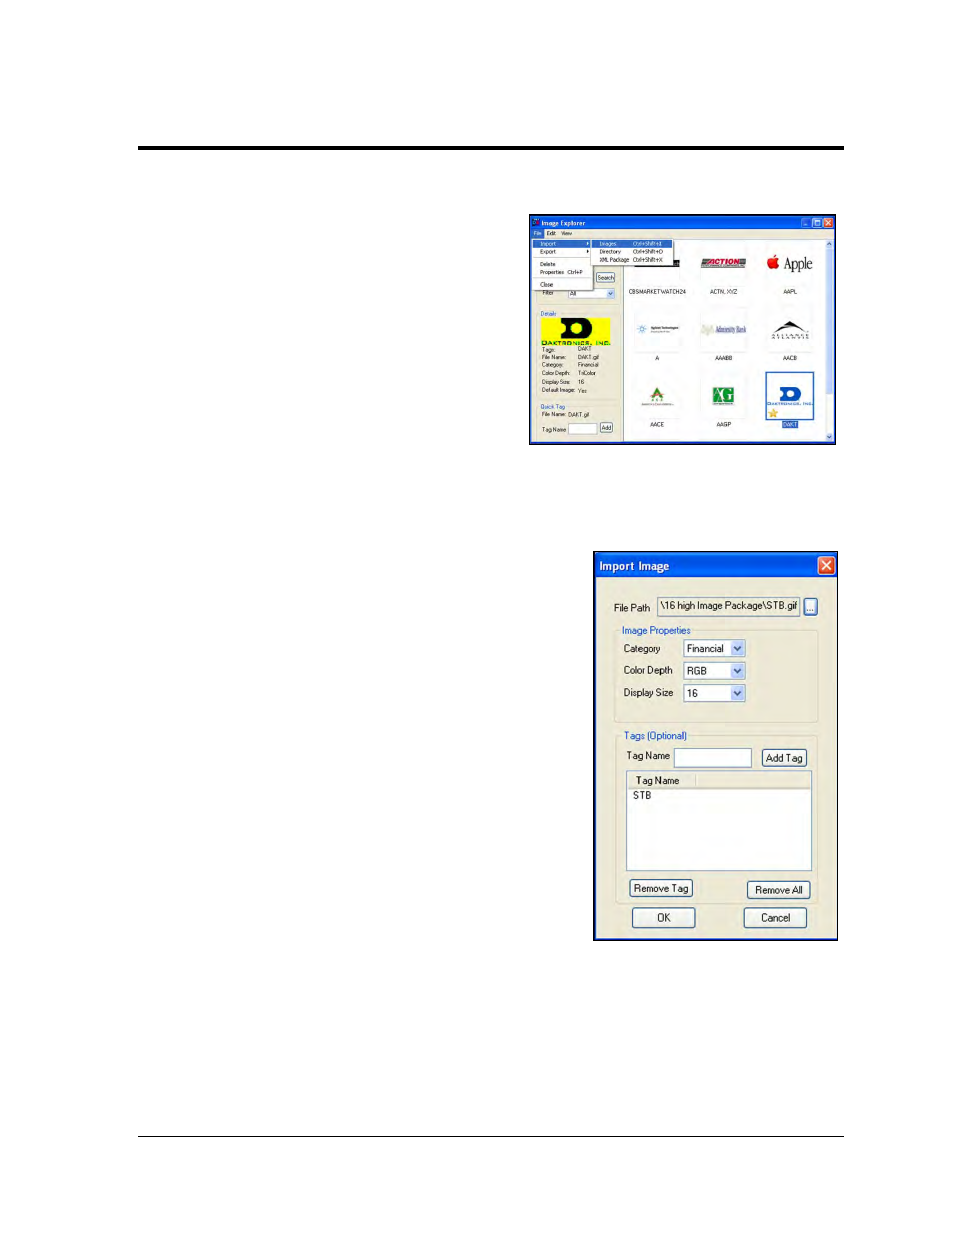
Image Explorer
31
Section 5:
Image Explorer
To use images as part of a frame, they must first be located on the Internet or other sources and saved
to a folder on the computer or network.
Daktronics does not provide an image library for
customer use.
Once images are saved go to File>Image Explorer to
open the Image Explorer. Go to File>Import>Images
to add images to the Image Explorer as shown in
Figure 49. Select folder name to search. Left-click an
individual image to import it or press and hold the
control [Ctrl] key while left-clicking multiple images
to import several at one time. Click open. To filter
images shown in the Image Explorer window, select
the drop down list next to Filter and then the
category of images to view.
Note: For best results, the image should be the same color depth and height as the ticker being used.
Import Image window opens as shown in Figure 50. Select a
Category, Color Depth and Display Size. Type a tag name in
the tag name box and click Add Tag. A tag name or names can
be assigned to each image. Click OK as shown in Figure 50.
Note: When using the financial, news, sports, or weather
frames, text can be replaced by an image. Under the Appearance
tab, when creating a message, there is an Image column where
replacing an image with text can be specified. For example, in
a financial frame where the Daktronics stock symbol is
presented, the stock symbol, DAKT can be replaced by an
image from the Image Explorer that has a tag of DAKT.
When a tag is not found that matches the data to be displayed
and the Image Options Configuration is set up to use an image,
the filter category’s default image will be displayed. To set an
image as the default image, right click on the image and click
select as default. A star designates the default image as shown
in Figure 49. To remove the default image attribute from an
image, right click on the image and click select as default.
To edit an image, select the desired image and click Edit>Image>Edit Image.
Figure 49: Image Explorer Import Dialog
Figure 50: Import Image Dialog