Daktronics Venus DataStreamer User Manual
Page 19
Configuration
13
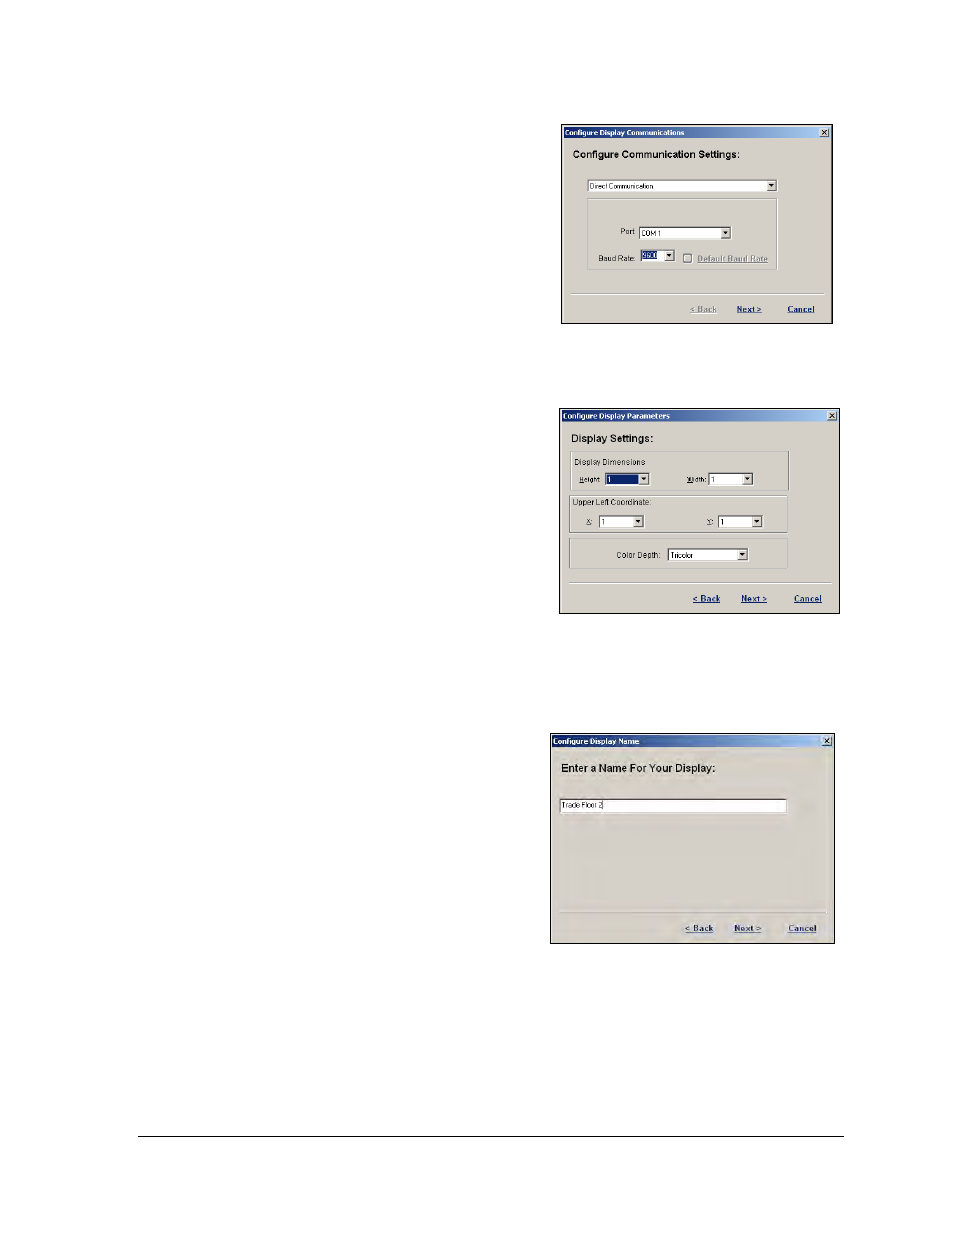
5. Select the type of communication that will
be used, either "Direct Communication" or
"Remote Communication". Direct consists
of a direct serial connection from the PC.
Remote uses a TCP/IP connection to the
display as shown in Figure 13.
6. Once the communication type is selected,
fill in any other necessary information,
(i.e. Com Port or IP Address). Click Next
to accept the entered information and
move on to the next step or click Cancel to
void the Configuration process entirely. Note: For this example, Direct
Communication is chosen.
7. To set Display Dimensions, click the down
arrow next to each field or click in the
field to set the overall height and width of
the Panelized DataTrac as shown in
Figure 14. The Upper Left Coordinate
values are typically set to 1 for X and 1 for
Y.
8. Click the down arrow next to Color Depth
to set the type of color technology for this
display. Default setting is Tricolor.
9. Once these parameters are set, click Next to move to the next screen. Click Cancel to
close the Configure window.
10. Move the slider bar to set the Display
Brightness level of the information on the
Panelized DataTrac. Daktronics
recommends a brightness of 48.
However, this may need to be adjusted
depending on different lighting
conditions. Click Next.
Note: Clicking and holding the mouse
button down on the slider bar will cause
a pop-up window to appear showing
the brightness level that the current
display is running. This number will
change as the slider is moved.
11. Enter a name for the display as shown in Figure 15. Click Next.
Figure 13: Configuring Communication
Figure 14: Configure Display Settings
Figure 15: Naming a Display