Comtest Networks MTAS-192 METALLIC TEST ACCESS SYSTEM User Manual
Page 25
CT-IG-MTAS192-2008-v1_8.doc
Comtest Networks
MTAS-192
June 2006
Installation Guide
19
Step 4. When the card will go no further, pull the card ejector tab upwards and push it
towards the shelf in one motion to completely seat the card.
Step 5. When the card is completely seated, lock it in place by pushing and hand-
tightening the slotted card locking screws until they are tight – DO NOT OVER-
TORQUE.
Step 6. Repeat for all the cards to be installed on the shelf.
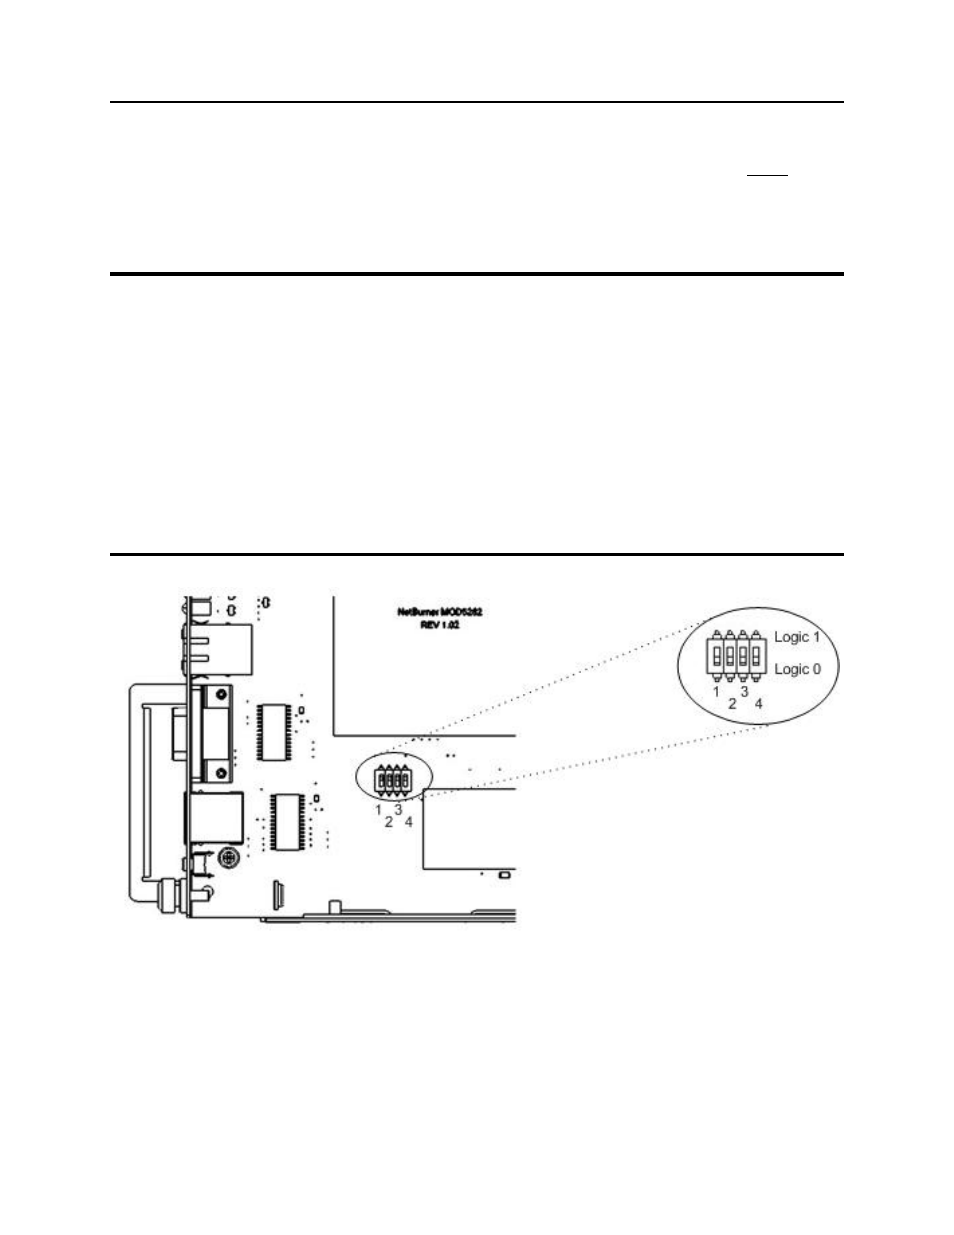
NOTE: The MTAS-CM (Master) control card has a block of DIP switches that are set to
a default setting of 0 (0-0-0-0) and factory-sealed with a plastic film. These DIP switches
must remain at 0-0-0-0 (see Figure 18: ). MTAS-CS (Slave) control card DIP switch
settings, however, must be set to identify the shelf's unique address in a daisy-chain of
up to 12 MTAS shelves
Slave shelves require their MTAS-CS cards to be set to a unique number between 1
and 11 in binary, to identify the slave shelf's logical ID in the daisy-chain. See Figure 18:
to locate DIP switches and consult Appendix A for the MTAS Control Card DIP switch
settings table.
In addition to physically inspecting the DIP switch settings, they can also be verified by
viewing the Binary ID LEDs (8, 4, 2, 1) on the slave card faceplate (see Figure 22).
Figure 18: MTAS-CM (Control Master) DIP Switch Location