Baby Lock Destiny (BLDY) Instruction & Reference Guide-Part1 User Manual
Page 167
SEWING THE STITCHES
U
tili
ty
S
tit
ch
es
165
3
l
Press the “Start/Stop” button to start edge
sewing.
→ Sewing starts with the set distance to the edge of the
fabric maintained.
*
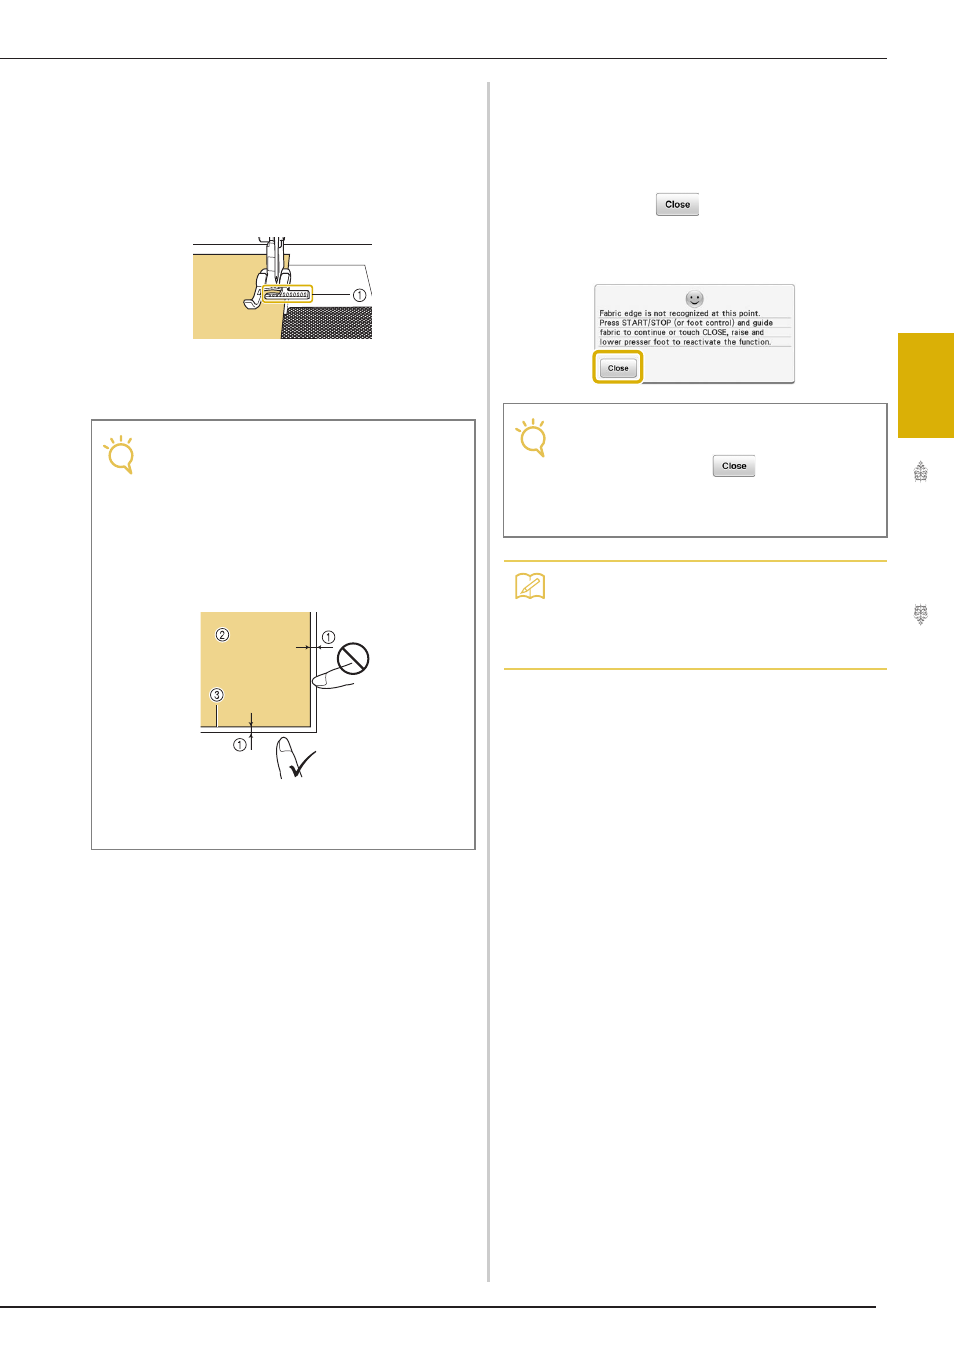
While sewing, use the red scale marks on the
vertical stitch alignment foot “V” as a guide to keep
a fixed distance from the edge of the fabric.
a Red scale marks
*
When sewing starts, a still image from the built-in
camera is displayed.
m
When sewing is between 10 and 20 mm
(about 3/8 and 3/4 inch) from the edge of
the fabric, sewing stops automatically and
the following message appears. To stop
sewing, press
.
*
When this message appears, edge sewing (with the
seam wizard function) is canceled.
Note
• While sewing, do not place anything,
including your hands, within 2 mm (about 1/
16 inch) from the edge of the fabric,
otherwise the edge of the fabric cannot be
detected correctly. When guiding the fabric
with your hands, place them outside of the
object-free area and more than 2 mm (about
1/16 inch) from the edge of the fabric.
a Approximately 2 mm (about 1/16 inch)
b Fabric
c Edge of fabric
Note
• To continue sewing to the edge of the
fabric, do not press
when the
message shown above appears. With the
above message displayed, press the “Start/
Stop” button to sew.
Memo
• When edge sewing is finished, store the
edge sewing sheet affixed to the
transparent sheet in order to prevent it from
collecting dust.