Baby Lock Destiny (BLDY) Instruction & Reference Guide-Part1 User Manual
Page 107
USING SENSOR FUNCTIONS WITH SEWING STITCH
Se
wi
n
g Ba
sics
105
2
e
Press
, and then continue sewing.
*
The setting can also be applied by extending the
touching with the sensor pen in the adjustment area
with the sensor pen.
→ When a sewing end point setting is specified,
appears in the upper-left corner of the screen.
→ The machine automatically stops with the needle in
the fabric, at about half the distance to the specified
sewing end point, and the sewing end point setting
screen appears.
f
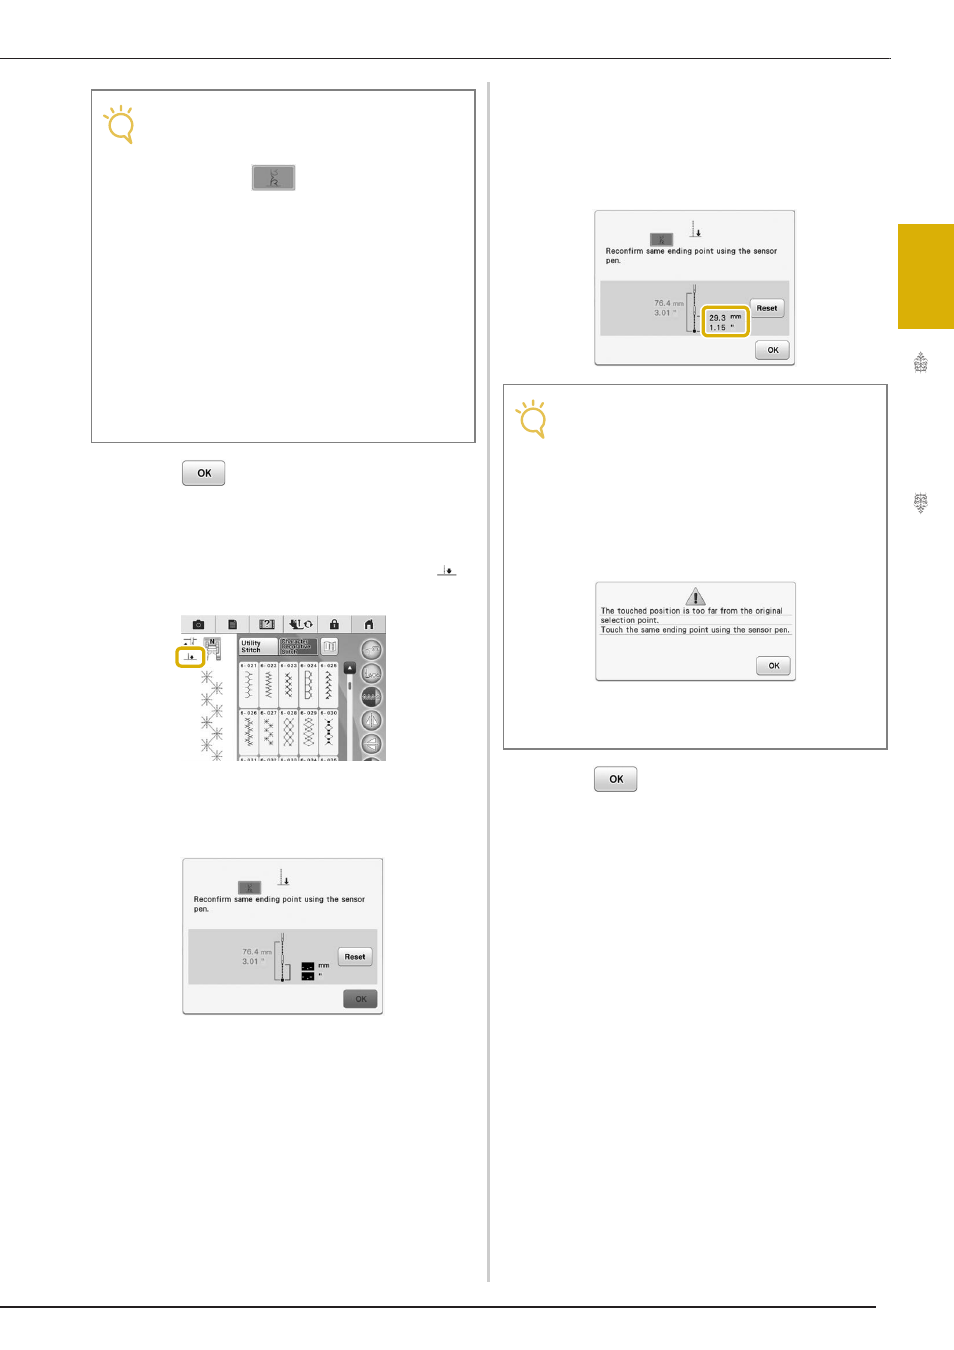
With the sensor pen, touch again the
location to be specified as the sewing end
point.
→ The distance from the current needle position to the
touched location appears.
g
Press
to apply the sewing end point
setting.
*
The setting can also be applied by extending the
touching with the sensor pen in the adjustment area
with the sensor pen.
h
Start sewing again.
*
The machine stops at the specified end point
automatically.
Note
• The stitch end mode key is not available
with the following situations.
- When only
is shown. The
adjustment of the stitch end is not
available with the selected stitch, and only
one icon will be shown.
- When the stitch end mode key is grayed
out.
- When specifying the sewing end point at
the point that needs adjustment more
than 20% of the length of a pattern, to
finish a pattern completely.
• In order to end sewing with a complete
pattern, we recommend reducing the size of
the pattern. Sewing with a long pattern may
not end with a complete pattern.
Note
• By using the sensor pen to touch the
sewing end point twice, the distance will be
accurately specified. Be sure to touch the
same point.
• The following error message appears if the
location touched the second time is
different than the location touched the first
time. Touch the correct location.
• The stitch end mode key cannot be used
when specifying the sewing end point for
the second time.